Advanced Hopping Techniques: FWH, Whirlpool, and Dip Hopping.
I killed my 60-minute hop addition three years ago, and my beers got better.
It happened on a Tuesday. I was running late for a remote meeting, had wort boiling on the propane burner outside, and completely forgot to add the bittering charge at 60 minutes.
By the time I remembered, there were only 20 minutes left in the boil. I panicked, then shrugged and just added everything at flameout and whirlpool. The beer that came out of the fermenter two weeks later had this round, soft bitterness and an aroma that didn’t fade after a week in the keg.
No harsh bite. No astringent finish. Just clean citrus oil and a hint of pine that lasted.
That accident taught me what the New England IPA brewers and Japanese lager makers already knew. You don’t need to boil hops into oblivion to get what you want. In fact, boiling them too long destroys exactly what makes modern beer interesting.
The 60-minute addition was designed for a different era, when we wanted maximum isomerization and didn’t care about preserving volatile oils. But if you’re chasing aroma and smooth bitterness without the harshness, you need to rethink when and how you add your hops.
This guide covers the techniques I’ve tested in the garage lab over the past few years. First Wort Hopping, whirlpool additions, dip hopping, mash hopping, and the weird enzymatic chaos of hop creep. Some of these methods are backed by solid research.
Others are based on anecdotal evidence and tasting notes from brewers who refuse to follow the rulebook. I’ll tell you what I’ve tried, what worked, and what the science says (when we have it).
First Wort Hopping: The Smooth Bitterness Trick
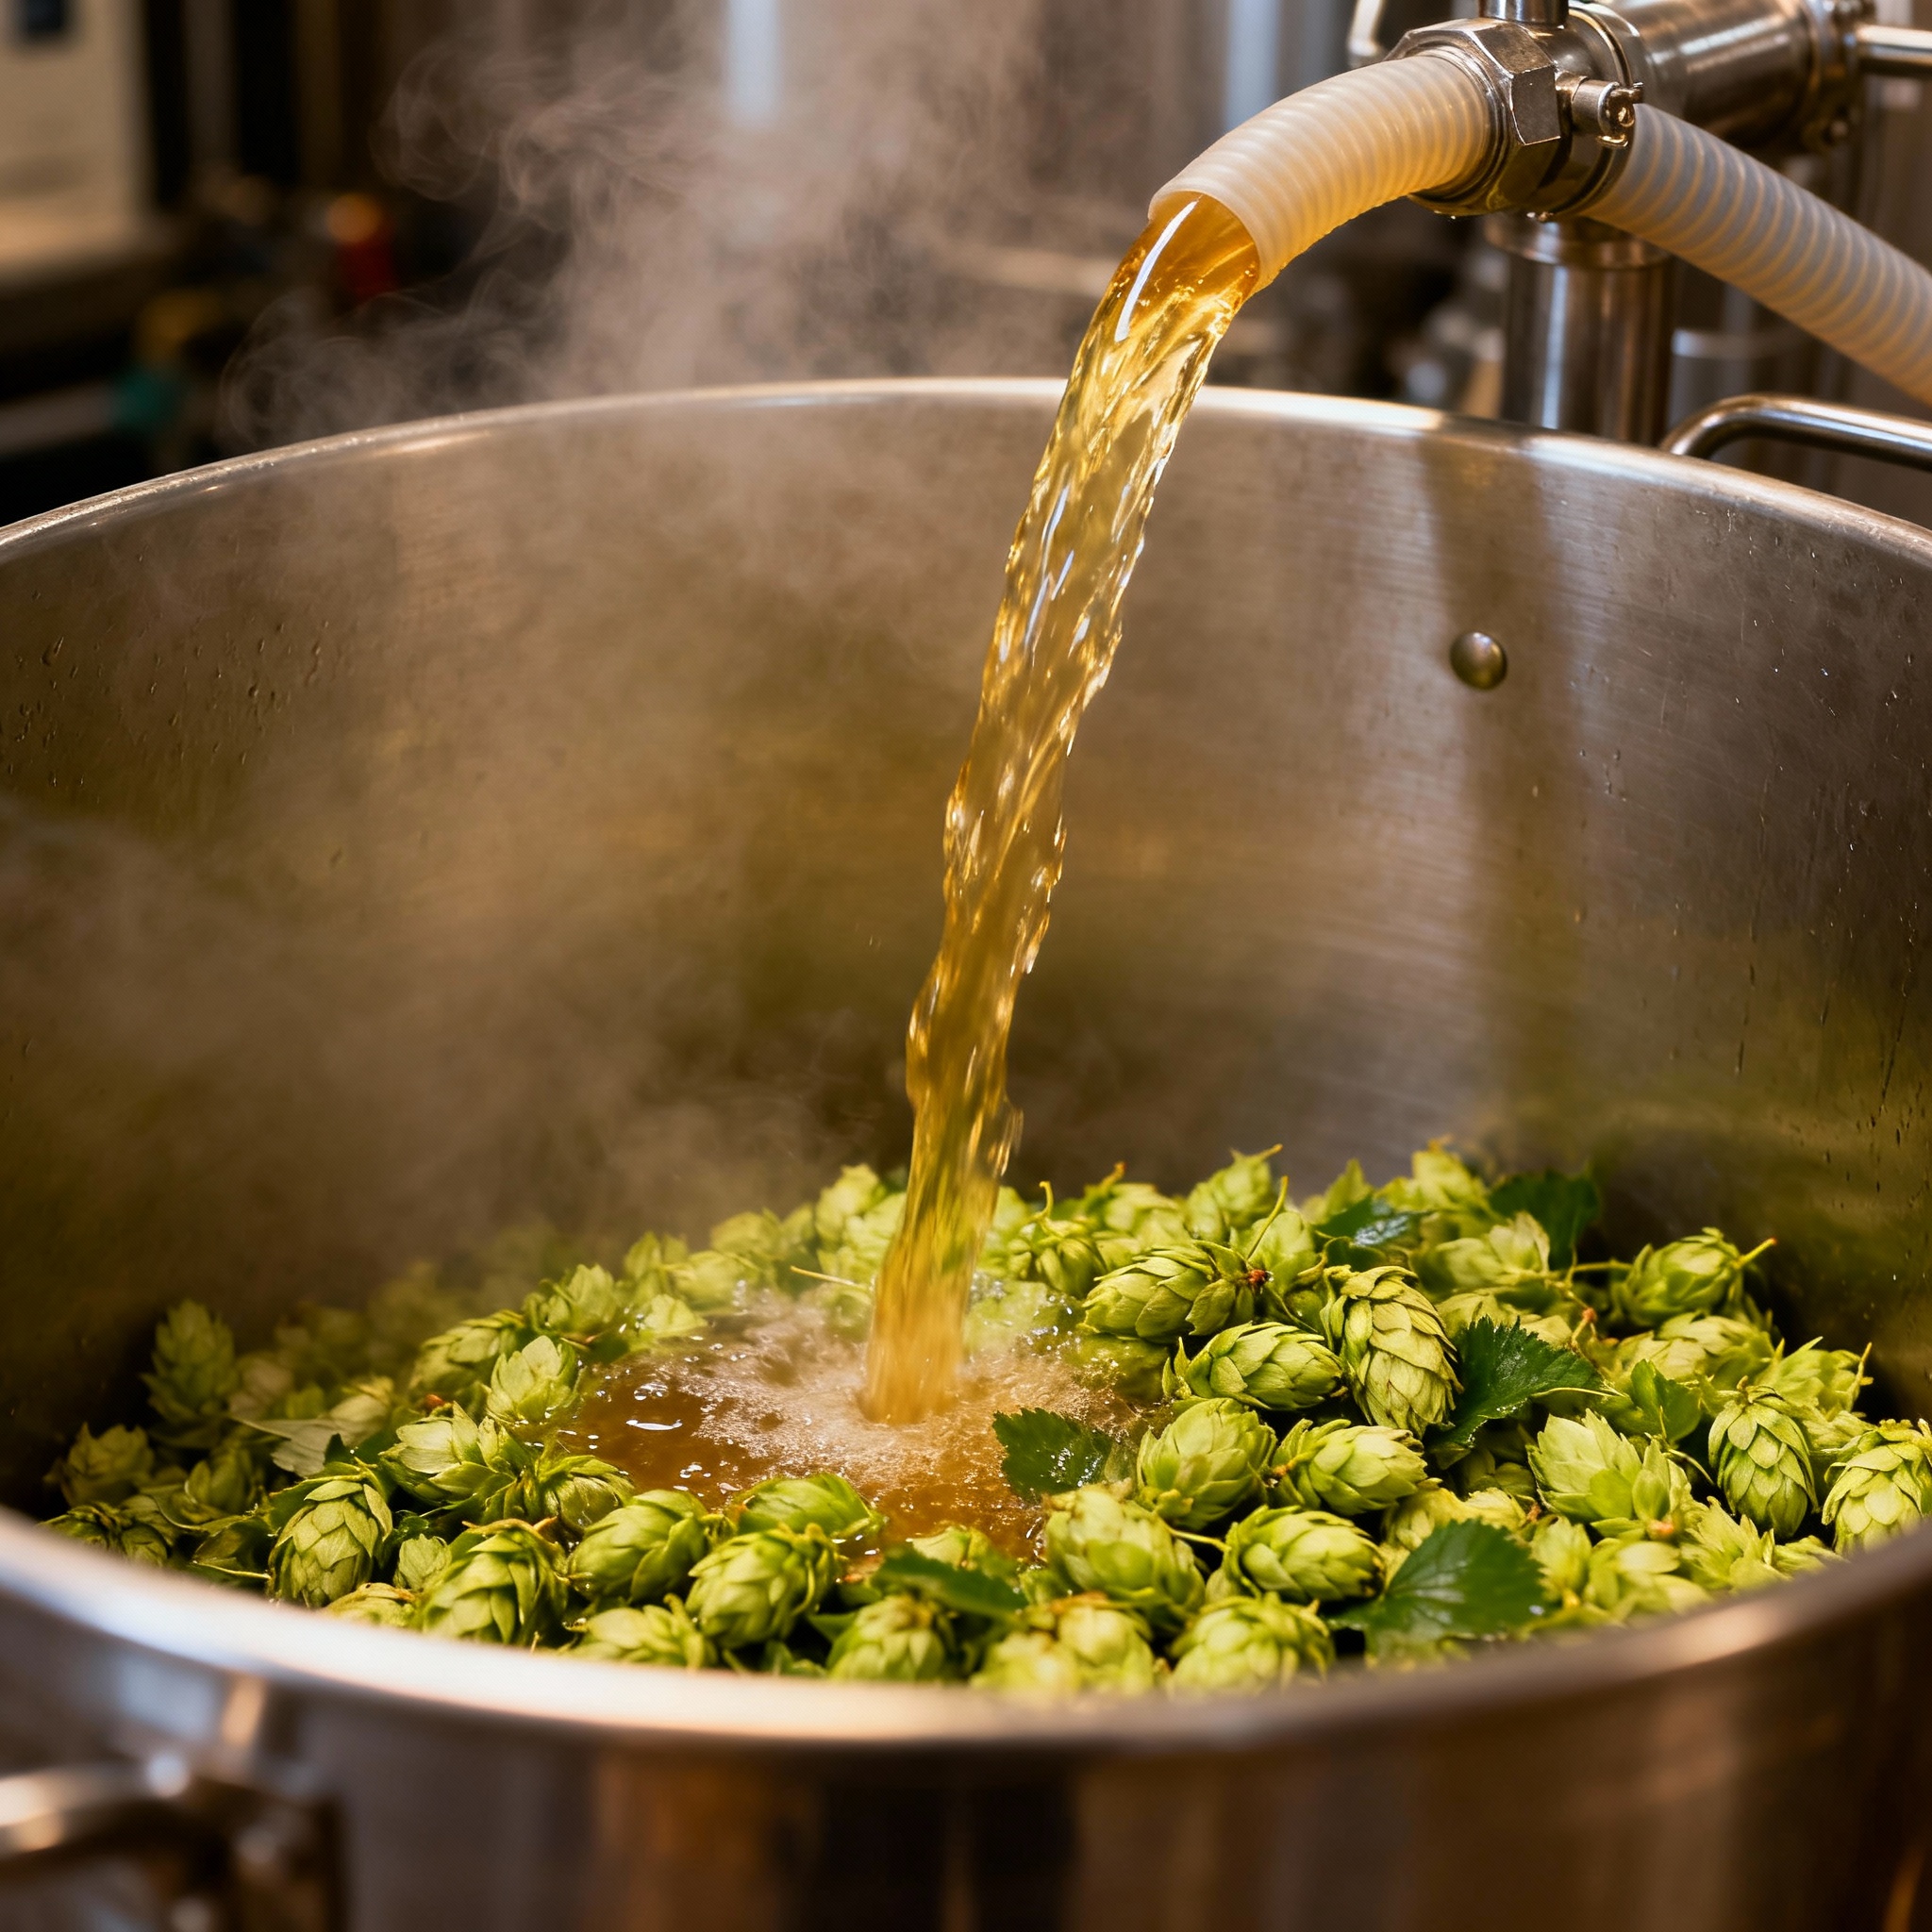
First Wort Hopping, or FWH, means adding hops to your kettle during the lautering process, before the boil even starts. You toss the hops into the thin layer of wort as it drains from the mash tun.
Hops steep in that hot, sugary liquid for 20 to 40 minutes (depending on how long your lauter takes), then they ride through the full boil. The theory is that it produces a smoother, less harsh bitterness compared to a standard 60-minute addition.
Some brewers describe it as “rounded” or “integrated.” The bitterness doesn’t punch. It sits in the background and lets the malt and aroma hops do the talking. German brewers have used this technique for decades, especially in Pilsners and Export lagers, where you want a firm but clean bitterness.
I first tried FWH on a Munich Helles. I used 28 grams of Hallertau Mittelfrüh in the kettle as the wort started flowing from the mash tun. The lauter took about 35 minutes, so the hops were steeping the whole time in wort that was around 168°F.
Then I brought everything to a boil and ran a 90-minute cycle. When I tasted the beer next to a batch where I added the same amount of hops at 60 minutes, the FWH version had a softer edge. The bitterness was there, but it didn’t cling to the back of my tongue. It felt more like part of the beer’s structure instead of an add-on.
The science here is not exact. Some research suggests that FWH allows certain alpha acids to isomerize more gently, producing fewer harsh or astringent compounds. A study from the Journal of the Institute of Brewing noted that FWH beers scored higher in perceived smoothness during blind tastings, though the IBU measurements were nearly identical to standard additions.
That makes me think the difference is qualitative, not quantitative. You’re not getting more bitterness. You’re getting better bitterness.
Now, this technique doesn’t preserve volatile oils. Those delicate myrcene and linalool compounds still get destroyed during the boil. So you’re not adding aroma here.
You’re adding bitterness with a different character. If you want both bitterness and aroma, you’ll need to combine FWH with late additions or dry hopping.
Use low-cohumulone hops like noble hops (Hallertau, Saaz, or Sterling) for FWH. These varieties are known for smoother bitterness profiles, and they shine when you give them the long, gentle extraction that FWH provides.
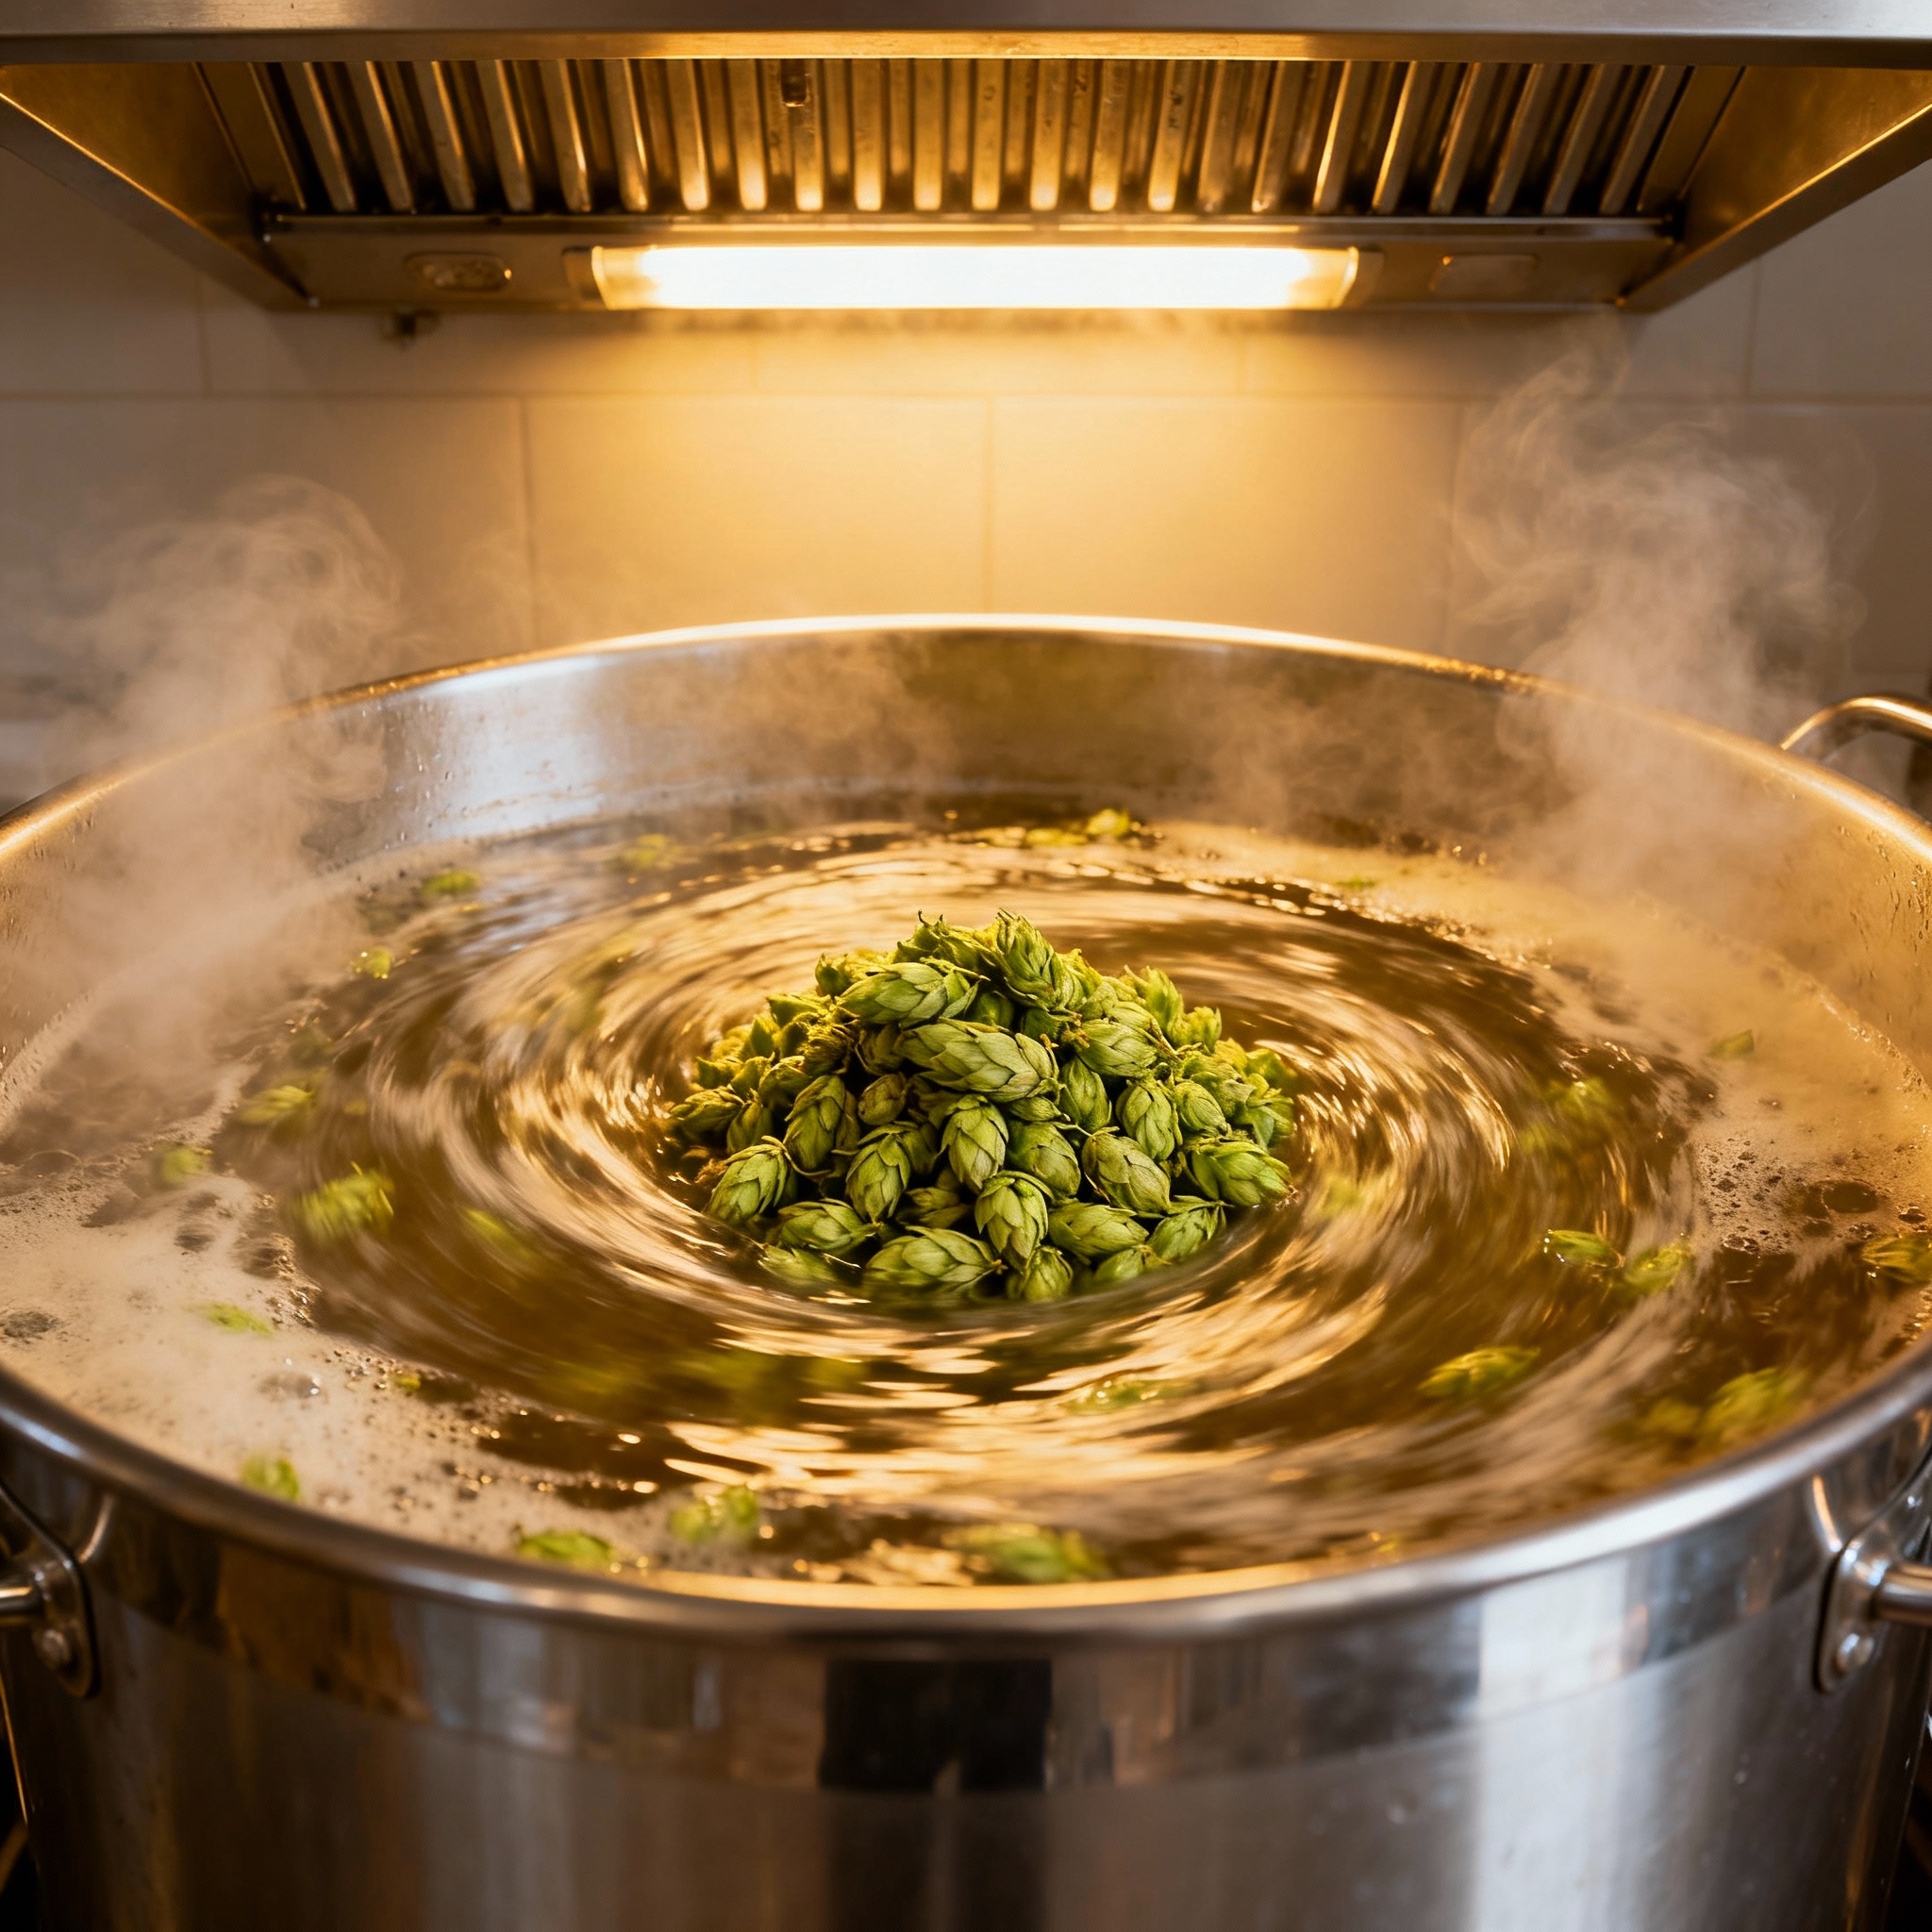
Whirlpool and Hop Stand: Extracting Oils Without the Burn
Whirlpool hopping (also called hop stand or steep hopping) is where the magic happens for aroma-forward beers. The idea is simple. After you finish the boil and turn off the heat, you let the wort cool to somewhere between 160°F and 180°F, then you add a big charge of hops and let them steep for 20 to 40 minutes.
This temperature range is low enough to preserve volatile oils like myrcene, linalool, and geraniol, but still hot enough to extract some bitterness through isomerization.
I started using whirlpool additions after reading a paper from Oregon State University’s fermentation science program. The researchers found that myrcene, the compound responsible for those bright, citrusy, piney notes, starts to vaporize and degrade rapidly above 180°F.
By the time you hit a full boil at 212°F, you’ve lost most of it. But if you keep the temperature under 180°F, you can hold onto a much higher percentage of those oils. The same goes for linalool, which gives floral and slightly spicy aromas, and geraniol, which adds rose-like or fruity character.
In the garage lab, I’ve settled on a whirlpool temperature of 170°F for most batches. I turn off the flame, use an immersion chiller to bring the wort down from 212°F to 170°F (takes about 10 minutes), then I add the hops and let them sit for 30 minutes with the lid on the kettle.
After the steep, I finish chilling to pitching temperature. The aroma I get from this method is night-and-day different compared to a 15-minute boil addition. It’s fuller, rounder, and lasts longer in the finished beer.
One challenge with whirlpool hopping is that you do pick up some bitterness, even at lower temperatures. Alpha acids still isomerize, just more slowly.
If you’re making a hazy IPA or a juicy pale ale and you want to keep the IBUs low, you need to account for this. I use advanced brewing software like Brewfather or BeerSmith, and I log my whirlpool additions as “20-minute additions” at around 50 percent efficiency.
It’s not perfect, but it gets me close. I’ve had batches come out more bitter than expected when I didn’t adjust for this.
The other thing to watch is astringency. If you’re whirlpooling at temperatures above 185°F, you risk extracting harsh tannins and off-flavors from the hops, especially if you’re using a lot of them.
I learned this the hard way on a double IPA where I dumped 170 grams of Citra into wort at 190°F. The beer had this dry, mouth-puckering quality that reminded me of over-steeped tea. Dropping the temperature to 170°F fixed that.
If you don’t have a way to control your whirlpool temperature precisely, just turn off the flame and wait 10 minutes. The wort will naturally drop into the safe zone (160°F to 180°F) on its own. Add your hops then. No fancy equipment needed.
Dip Hopping: The Japanese Lager Secret
Dip hopping is the least-known technique on this list, and it is one of the weirdest. The method comes from Japanese lager brewing, where brewers wanted to get hop aroma into clean, delicate beers without any bitterness or grassy flavors.
The process is simple but counterintuitive. You add hops to the fermenter right before you transfer the hot wort from the kettle. The hops sit in the fermenter for a short time (usually 30 to 60 minutes), soaking in wort that’s around 185°F to 195°F. You remove them before fermentation starts.
The idea is that this high-temperature soak extracts certain compounds while leaving others behind. Specifically, it pulls out some of the heavier, resinous oils and pigments but it drives off the highly volatile compounds like myrcene.
The result is a cleaner, more subtle hop character. Some brewers describe it as “polished” or “refined.” You get a hint of hops, but it’s not loud or aggressive.
I tested dip hopping on a rice lager, loosely based on the Asahi style. I added 40 grams of Saaz to a mesh bag and dropped it into my fermenter, then I transferred wort at 190°F from the kettle.
The hops sat in the fermenter for 45 minutes, then I pulled the bag and let the wort cool to pitching temperature overnight. The finished beer had this faint floral note, almost tea-like, but with no bitterness and no grassy edge. It was subtle, but it worked.
I haven’t found much scientific literature on dip hopping, probably because it’s so niche. Most of what I know comes from Japanese brewing forums and a few old threads on HomeBrewTalk.
The consensus seems to be that the high temperature and short contact time allow for selective extraction. You’re not getting the full spectrum of hop oils. You’re getting a narrow band, and that band leans toward the less volatile, more stable compounds.
One thing to watch out for is sanitation. You’re adding hops to the fermenter before fermentation starts, which means you’re introducing potential contamination vectors.
I always use a sanitized mesh bag and I make sure the hops have been stored properly. If you’re worried about it, you can pasteurize the hops by soaking them in 180°F water for 10 minutes before adding them to the fermenter. Some purists say this defeats the purpose, but I’ve done it and the beer turned out fine.
Dip hopping works best with noble hops or other low-alpha varieties. High-alpha hops like Simcoe or Columbus will still give you bitterness at these temperatures, and that’s not the goal here. Stick with Saaz, Tettnang, or Hallertau.
Mash Hopping: The Thiol Gamble
Mash hopping is exactly what it sounds like. You add hops directly to the grain bed during the mash, and they sit for 60 to 90 minutes while the enzymes break down starches into sugars.
The hops are removed (or left in) when you lauter. On paper, it seems like a waste. The mash temperature is too low to isomerize alpha acids, so you’re not getting bitterness. And the acidic, watery environment of the mash isn’t ideal for extracting oils.
So why people do it? The theory, which is more folk wisdom than hard science, is that mash hopping releases thiols. Thiols are sulfur-containing compounds that give you tropical fruit aromas like passionfruit, guava, and grapefruit.
These compounds are bound up in the hop material, and certain enzymes (specifically beta-lyase enzymes from yeast or malt) can release them during fermentation. Some brewers believe that mash hopping “primes” the hops, making it easier for the yeast to unlock those thiols later.
I’ve mash hopped twice, both times with Galaxy hops, which are known for high thiol precursor content. The first time, I added 30 grams to the mash at 152°F and left them in for the full 60-minute rest.
The second time, I skipped the mash hops and just dry-hopped in the fermenter. I couldn’t tell the difference. Both beers had strong passionfruit and citrus notes, and both finished at the same gravity. If the mash hopping did anything, it was too subtle for me to detect.
Research from the University of California, Davis backs up my experience. A 2019 study on thiol release found that while mash hopping did increase certain thiol precursors in the wort, the effect on the finished beer was minimal unless you also used a yeast strain with high beta-lyase activity (like certain Saison or Belgian strains).
For most American ale yeasts, the difference was negligible.
That said, some commercial breweries swear by mash hopping, especially in Germany and the Czech Republic. Weihenstephaner has experimented with it for their hop-forward lagers, and they claim it adds a “background complexity” that’s hard to describe.
I think the jury is still out. If you want to experiment, go ahead, but don’t expect a miracle. And don’t use expensive hops for this. Save the Citra and Mosaic for the whirlpool and dry hop.
If you’re going to mash hop, use a grain bag or a mesh basket so you can remove the hops easily before lautering. Spent hops in the grain bed can slow down your runoff and create channeling, which leads to poor extraction and longer brew days.
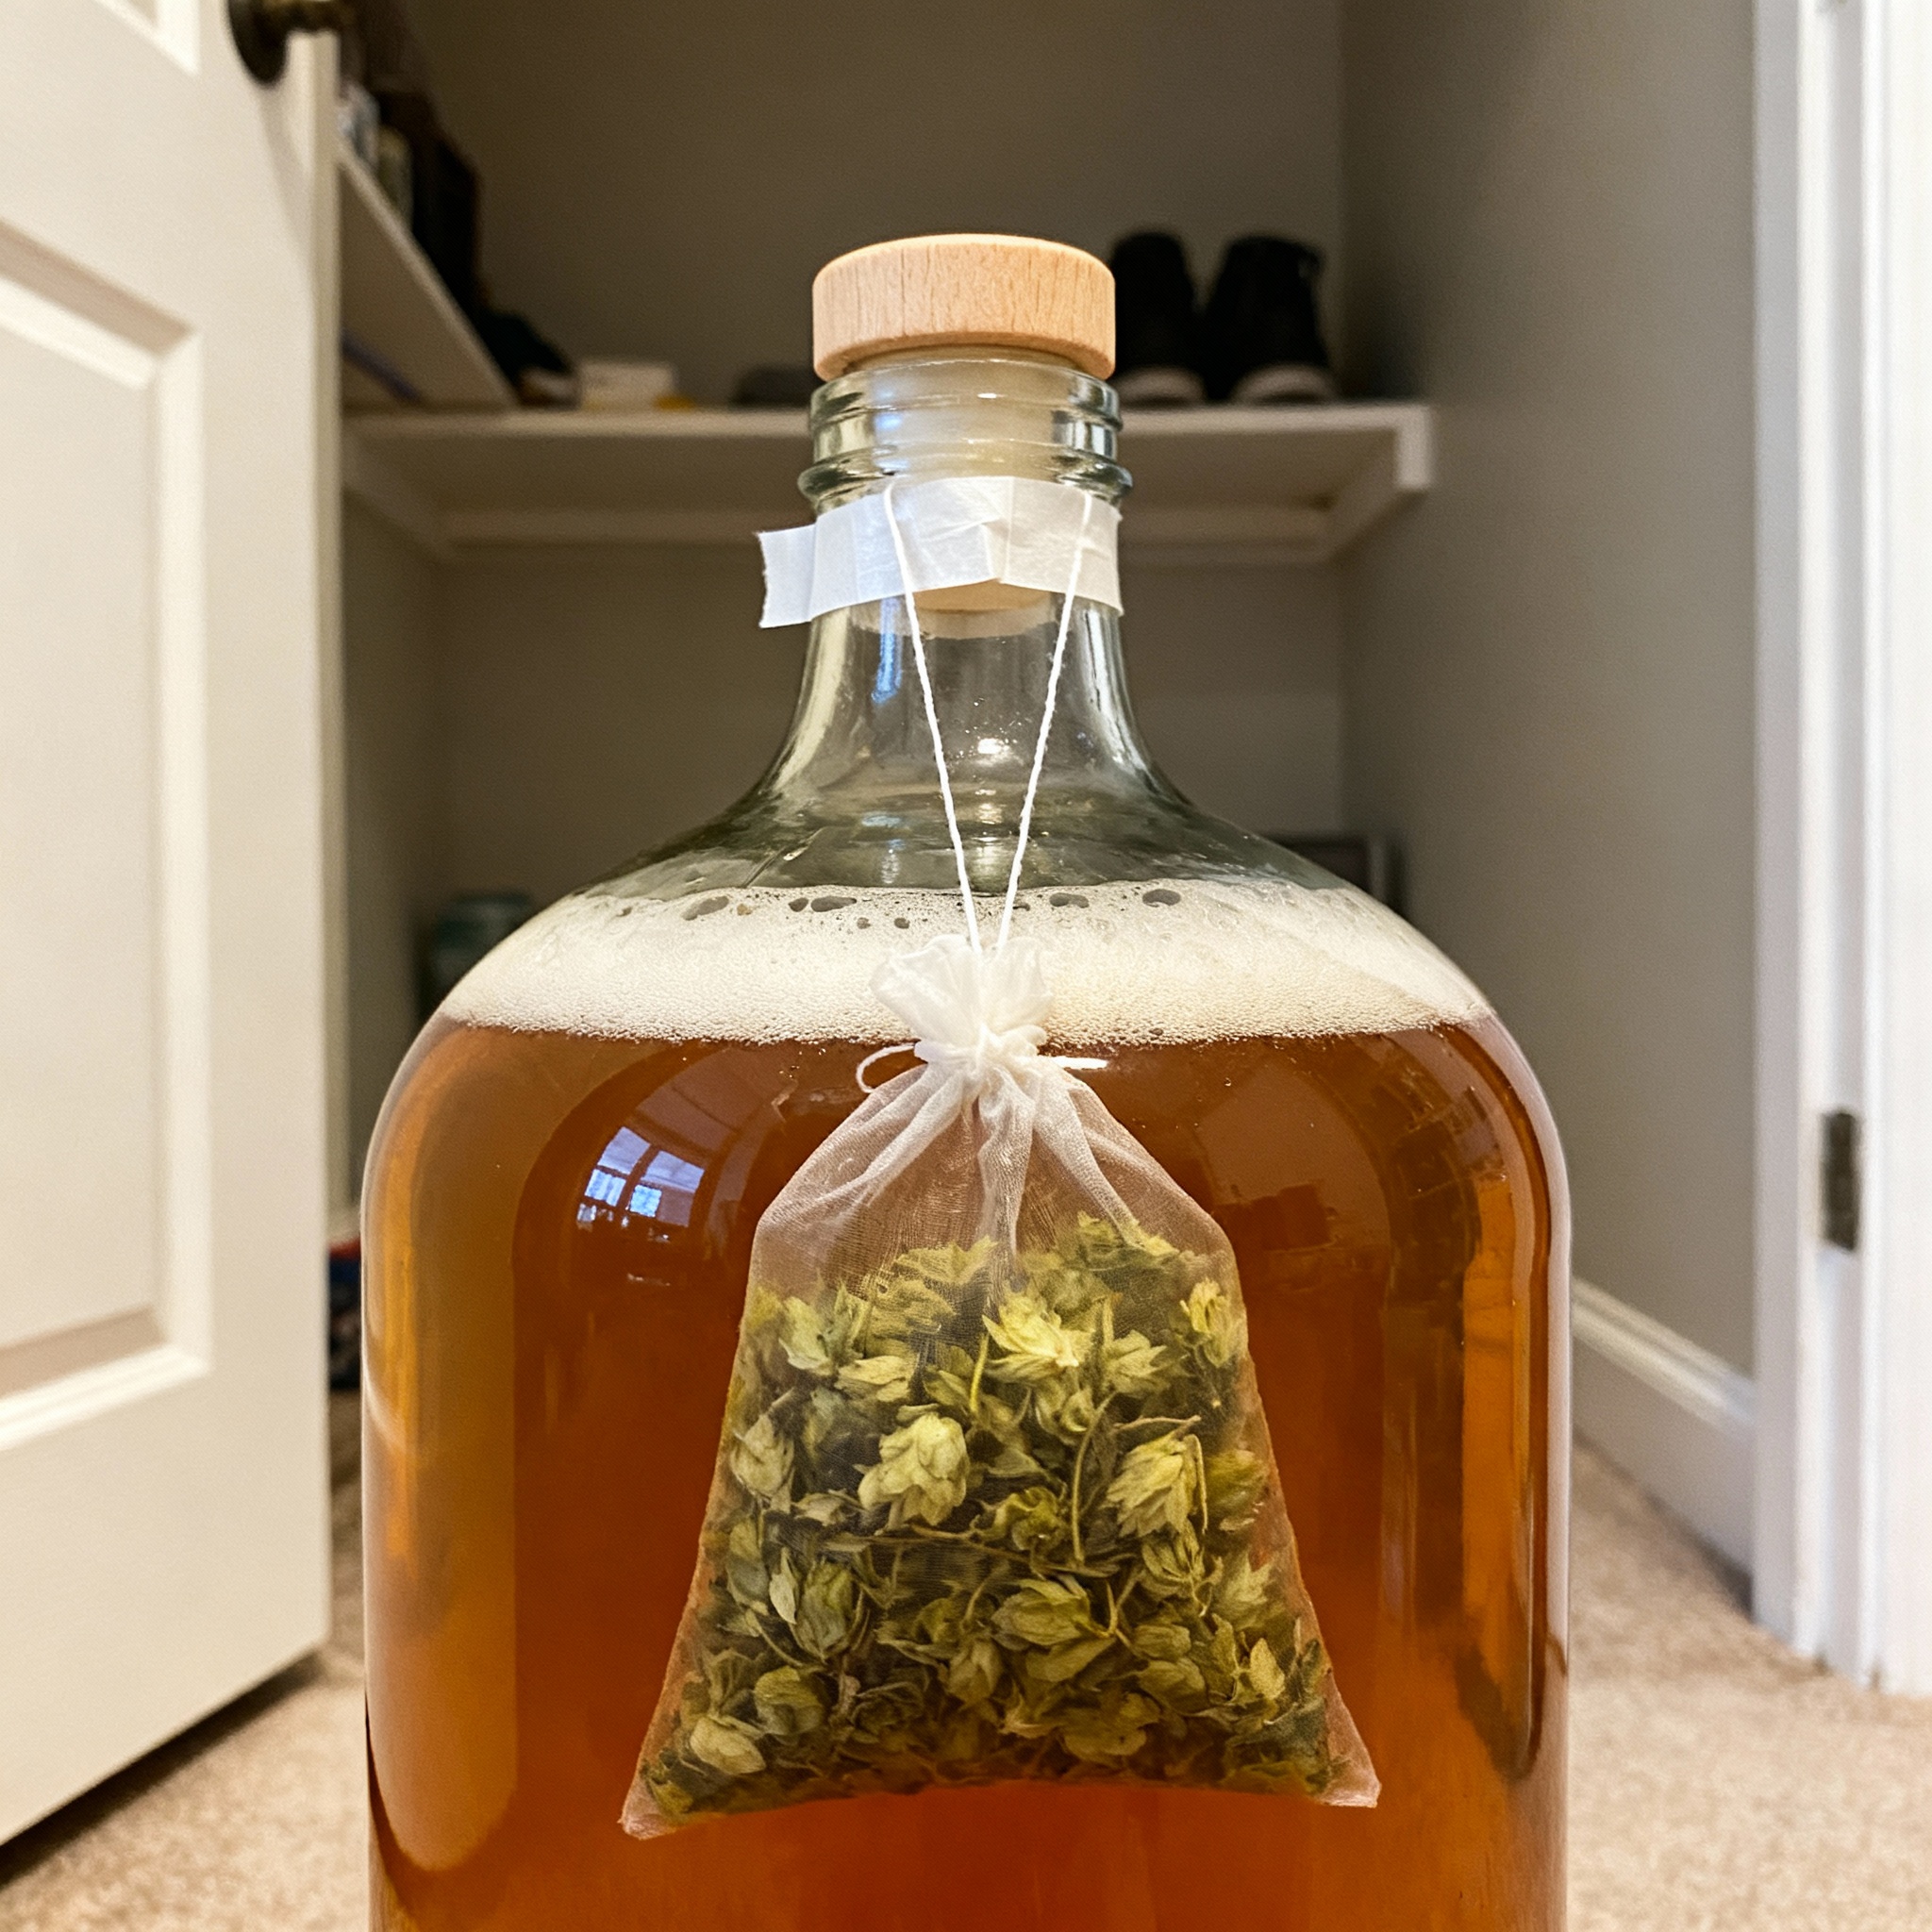
Hop Creep: When Your Dry Hops Restart Fermentation
Hop creep is not a hopping technique. It’s a side effect of dry hopping, and it can ruin a batch if you’re not ready for it. The term refers to the enzymatic activity of hops when they’re added to the fermenter.
Hops contain diastatic enzymes, similar to the ones in malted barley, that can break down complex sugars (dextrins) into simpler, fermentable sugars. When you dry hop, especially with large amounts of hops, these enzymes go to work. The yeast, which had mostly finished fermenting, suddenly has new food.
Fermentation restarts, gravity drops further, and you end up with a drier, more attenuated beer than you planned.
This happened to me on a New England IPA. I dry-hopped with 140 grams of Citra and Mosaic on day four of fermentation, right after the krausen dropped. The beer had been sitting at 1.012 for two days, so I figured it was done.
Three days later, I saw fresh bubbles in the airlock. Pulled a sample and the gravity had dropped to 1.008. The beer finished bone dry, almost 90 percent apparent attenuation, and it had a thin, hollow mouthfeel. The aroma was great, but the body was gone.
Research from Oregon State and Lallemand (the dry yeast specialists) has confirmed that hop creep is real and measurable. In trials, heavily dry-hopped beers saw gravity drops of 2 to 4 points after the hops were added, even when fermentation appeared to be complete.
The effect is stronger with certain hop varieties (Cascade, Centennial, and Simcoe seem to be the worst offenders) and at higher dry-hopping rates (above 100 grams per 19 liters).
There are a few ways to deal with hop creep. The first is to just accept it and plan for it. If you know your beer is going to drop another 3 points after dry hopping, adjust your mash temperature to leave more unfermentable sugars.
Mash at 156°F instead of 150°F, and you’ll end up with a higher finishing gravity even after the hops do their thing. The second option is to pasteurize your hops before adding them.
Soak them in 160°F water for 15 minutes to denature the enzymes, then add them to the fermenter. You’ll lose some of the volatile oils this way, but you’ll stop hop creep in its tracks.
The third option, which I use now, is to dry hop warm and fast. I add the hops when the beer is still at fermentation temperature (around 68°F for most ales), and I leave them in for only 48 hours before cold crashing.
This gives the hops enough time to release their oils, but it doesn’t give the enzymes enough time to do serious damage. I also make sure the yeast has fully flocculated before I dry hop, so there’s less risk of the fermentation restarting.
If you’re brewing a big, hazy IPA with 200-plus grams of dry hops, check the gravity every day after you add them. If you see it dropping, either cold crash immediately to stop the yeast, or ride it out and adjust your recipe next time.
Bringing It All Together
The best part about these advanced hopping techniques is that you can stack them. I’ve done batches where I use FWH for the base bitterness, a 170°F whirlpool for aroma, and a short dry hop for the final punch. You can too.
Just try your own version and you may discover something that’s sensational or bone-dry or like any of the dozen other things you ahve alrady tried. Keep trying. That’s where the fun is.