The Brewer's Pickle: Kimchi, Kraut, and Sours.
I spent six years analyzing fermentation tanks in sterile white rooms, swabbing surfaces for coliforms and watching pH meters like they held the secret to the universe.
Then one Saturday, I realized I was dumping good money into craft beer while my cabbage sat in the fridge, rotting. That’s when it clicked.
If I could maintain a clean fermentation for five gallons of wort, I could absolutely handle five pounds of shredded cabbage.
Turns out, brewers make phenomenal pickle makers. You already own the gear and understand the science; you just haven’t pointed it at vegetables yet.
This guide is for anyone who has racked a carboy, sanitized a fermenter, or stared at an airlock bubbling away at 2 a.m. because you couldn’t sleep.
If you can brew beer, you can ferment cabbage, cucumbers, radishes, or anything else that grows in dirt. The principles are nearly identical, the cleanup is easier, and you don’t have to wait six weeks to taste the results.
Why Brewers Are Already the Best Pickle Makers
Sanitation is the wall most new fermenters hit hard. They read a blog that says “just shove cucumbers in a jar,” and three days later, they’ve got a fuzzy white carpet of mold.
They give up because they assume fermentation is witchcraft. But as a brewer, you’ve already internalized the difference between clean and sterile.
You know that fermentation isn’t about killing everything. It’s about creating an environment where the good guys win and the bad guys starve.
Lactobacillus bacteria, the bacteria behind sauerkraut and kimchi, thrives in salty, low-oxygen conditions while mold needs air and yeast needs sugar. If you control those variables, you control the outcome.
In vegetable fermentation, we leverage competitive exclusion. By establishing a 2% salinity and anaerobic environment, we select for L. plantarum and L. brevis, which produce lactic acid that drops the pH below the survival threshold of spoilage organisms.
Your brewery gear is already built for this. A fermenting bucket with a spigot at the bottom is perfect for draining brine off pickles without disturbing the batch.
A carboy with an airlock keeps oxygen out while letting CO2 escape, preventing surface mold. You can even use your refractometer to quickly check brine concentrations.
The biggest advantage you have is muscle memory. You already sanitize without thinking and check seals regularly.
These habits are the reason your first batch of sauerkraut will probably turn out better than someone who’s been making it “traditionally” for years without understanding why it works.
Use Star San on your fermentation vessel and utensils, but rinse with boiled (then cooled) water before adding vegetables. The phosphoric acid in Star San can slow down Lactobacillus if left in high concentrations.
Sauerkraut: The 2% Salt Rule
Sauerkraut is the gateway drug of the pickle world. It is simply cabbage, salt, and time.
The Lactobacillus is already on the cabbage leaves. Your job is to create the conditions where it dominates the environment.
The magic number is two percent salt by weight. Not by volume and not by “a handful,” but by total mass.
If you’re used to weighing hop additions or grain bills, this precision will feel natural.
I weigh the shredded cabbage first. If it is 1000 grams, I multiply by 0.02 and add exactly 20 grams of salt.
I use kosher salt because it dissolves fast and lacks anti-caking agents. I massage the salt into the cabbage until the cell walls break and liquid pools at the bottom.
No water goes in during this process. The brine comes entirely from the cabbage itself, which preserves the crunch and prevents a limp texture.
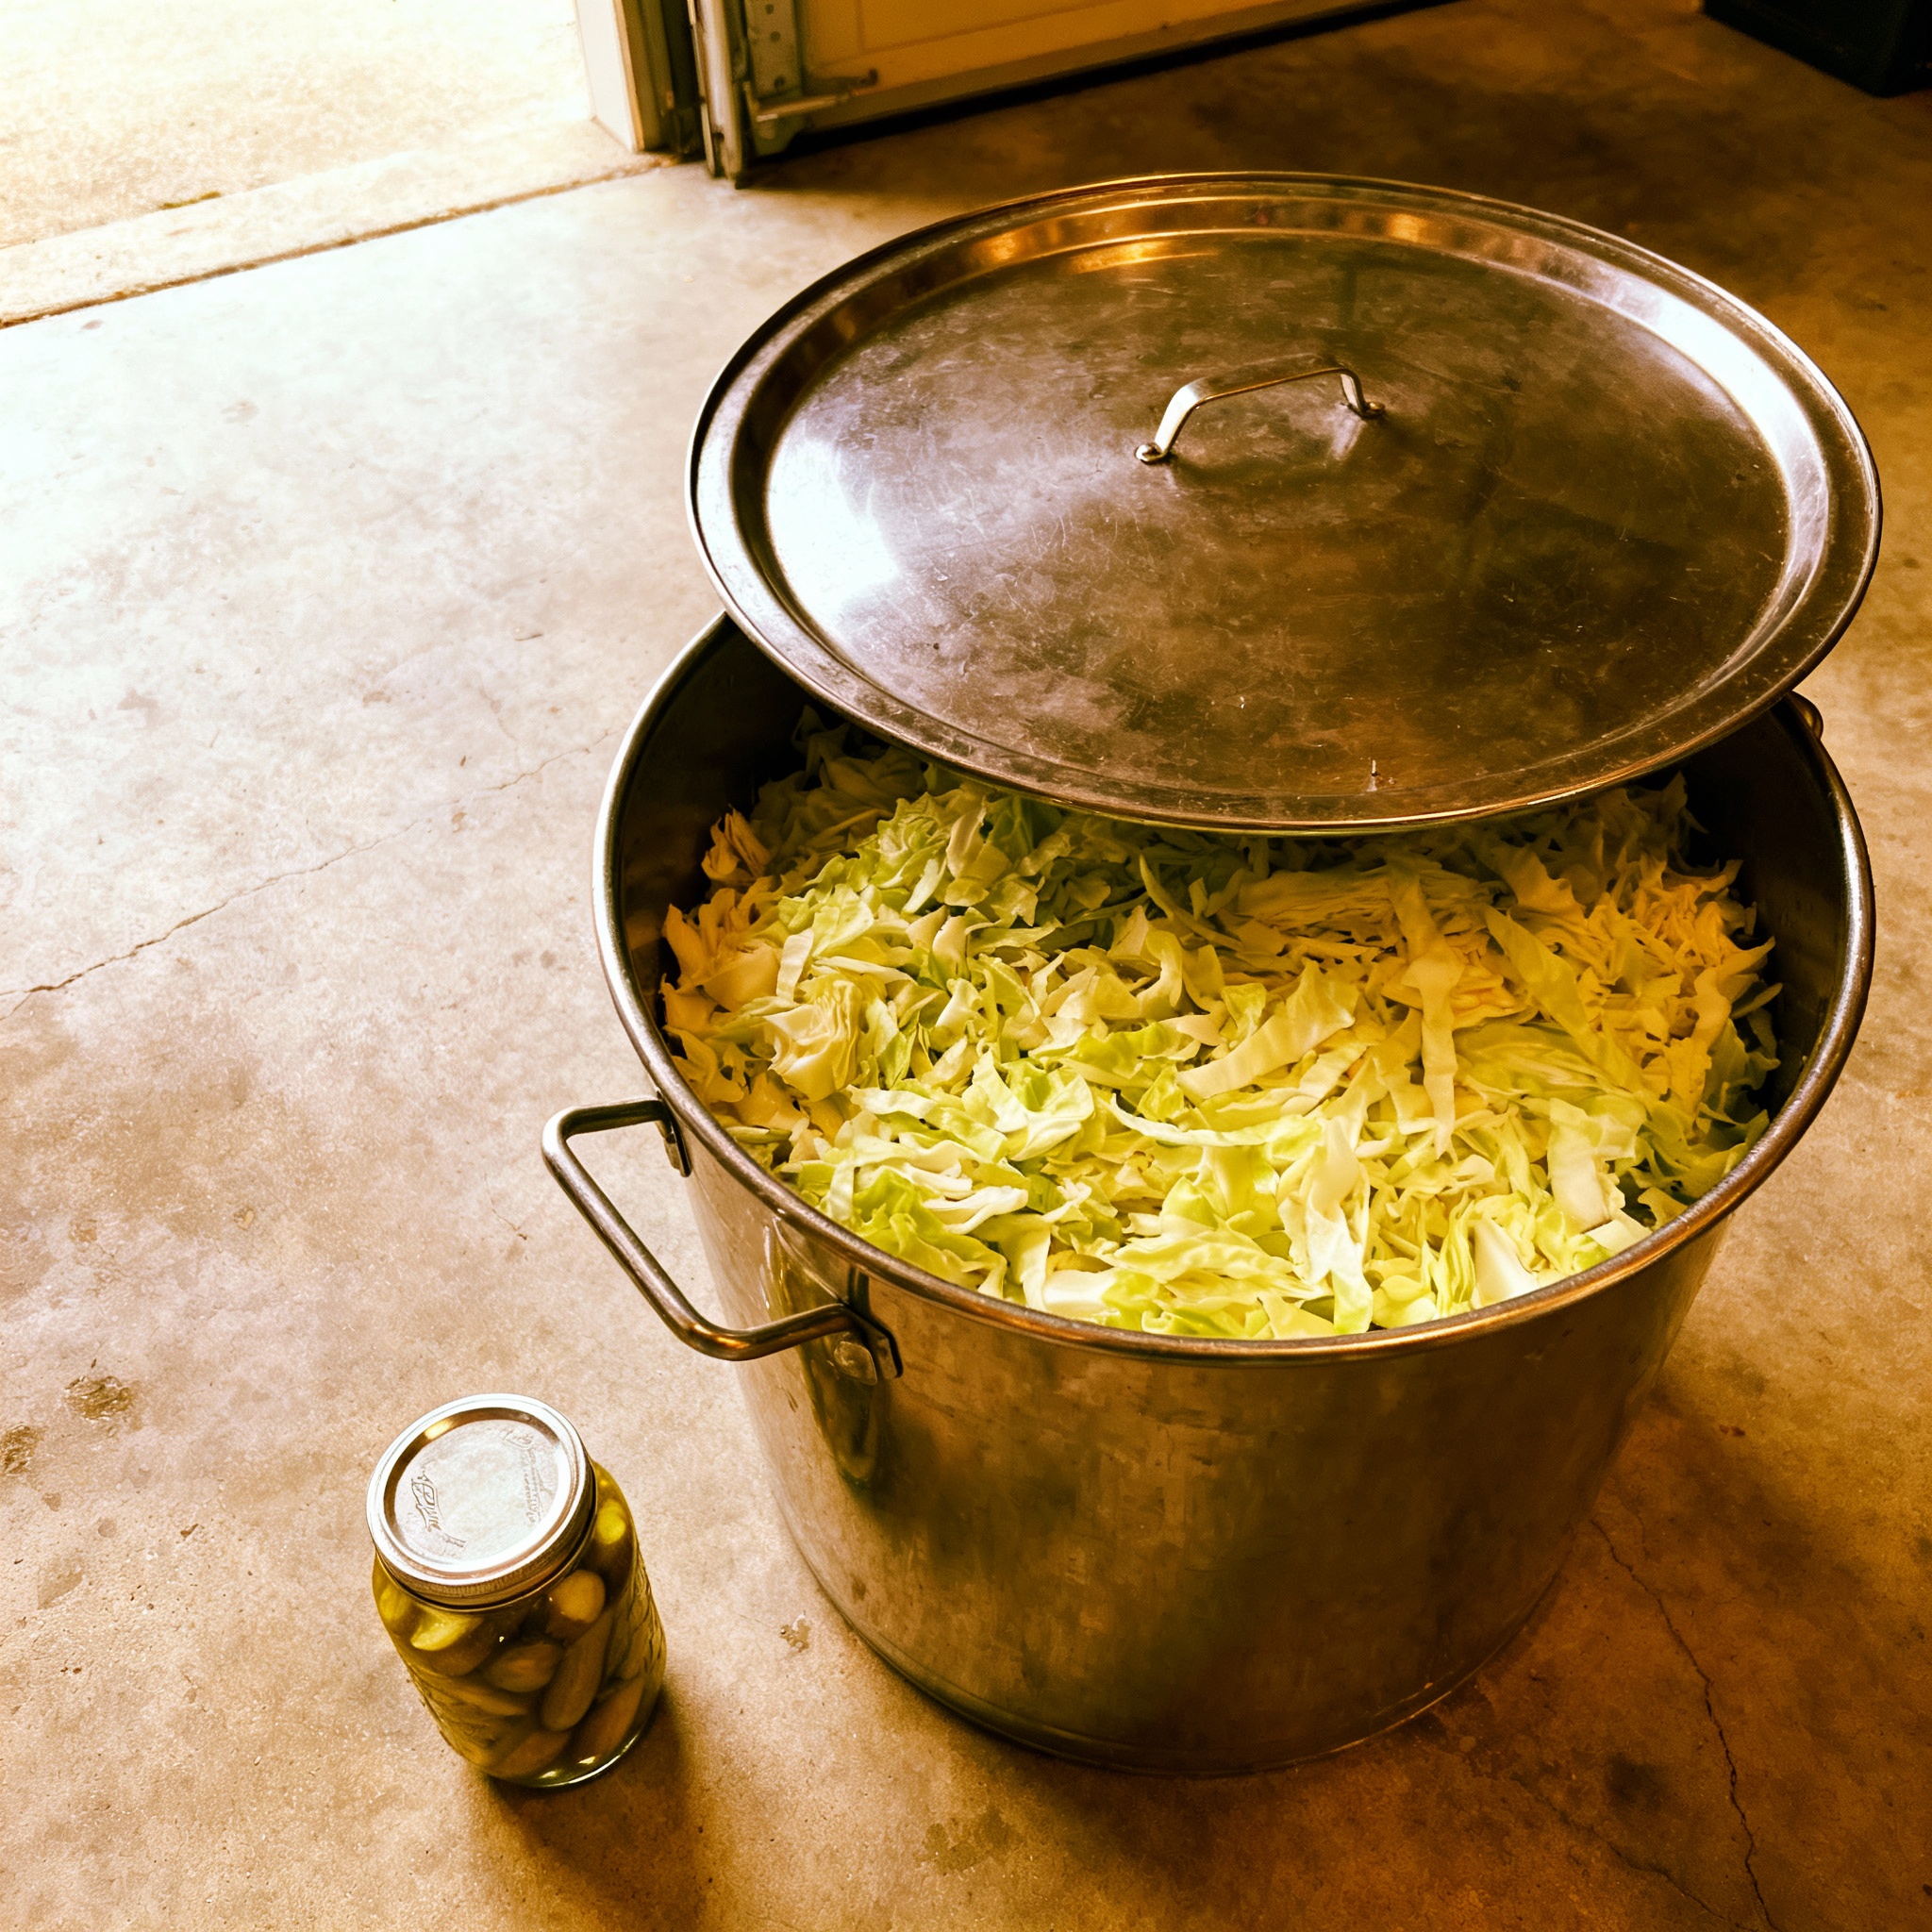
I pack the cabbage into a sanitized fermenting bucket and press it down until the brine rises above the solids.
I use a sanitized plate or fermentation weight to keep everything submerged. I then seal the lid and insert an airlock filled with vodka.
Within 24 hours, you will see active bubbling. The pH typically drops from 6.0 to 3.5 over the next week.
Taste it after three days. If it is tangy and crunchy, it is done; otherwise, wait a few more days depending on your local climate.
Save the outer leaves of the cabbage to use as a “sacrificial layer” on top of your fermentation weight. They protect the kraut underneath from any stray oxygen and can be easily discarded before jarring.
Kimchi: Bulk Fermentation in a Mash Tun
Kimchi is sauerkraut’s louder, spicier cousin. It follows the same principles of salt and anaerobic conditions but adds garlic, ginger, fish sauce, and gochugaru red pepper flakes.
The process is messier, but if you’ve ever cleaned a mash tun, you can handle it. The challenge with kimchi is often the sheer volume of ingredients.
Traditional recipes involve coating individual leaves, which is tedious for bulk batches. This is where brewery gear truly shines.
I use a 10-gallon Igloo cooler mash tun for bulk kimchi. It is food-safe and has a spigot for easy brine drainage.
First, I quarter the napa cabbage and soak it in a 6% salt brine for four to six hours. The leaves should bend easily without snapping.
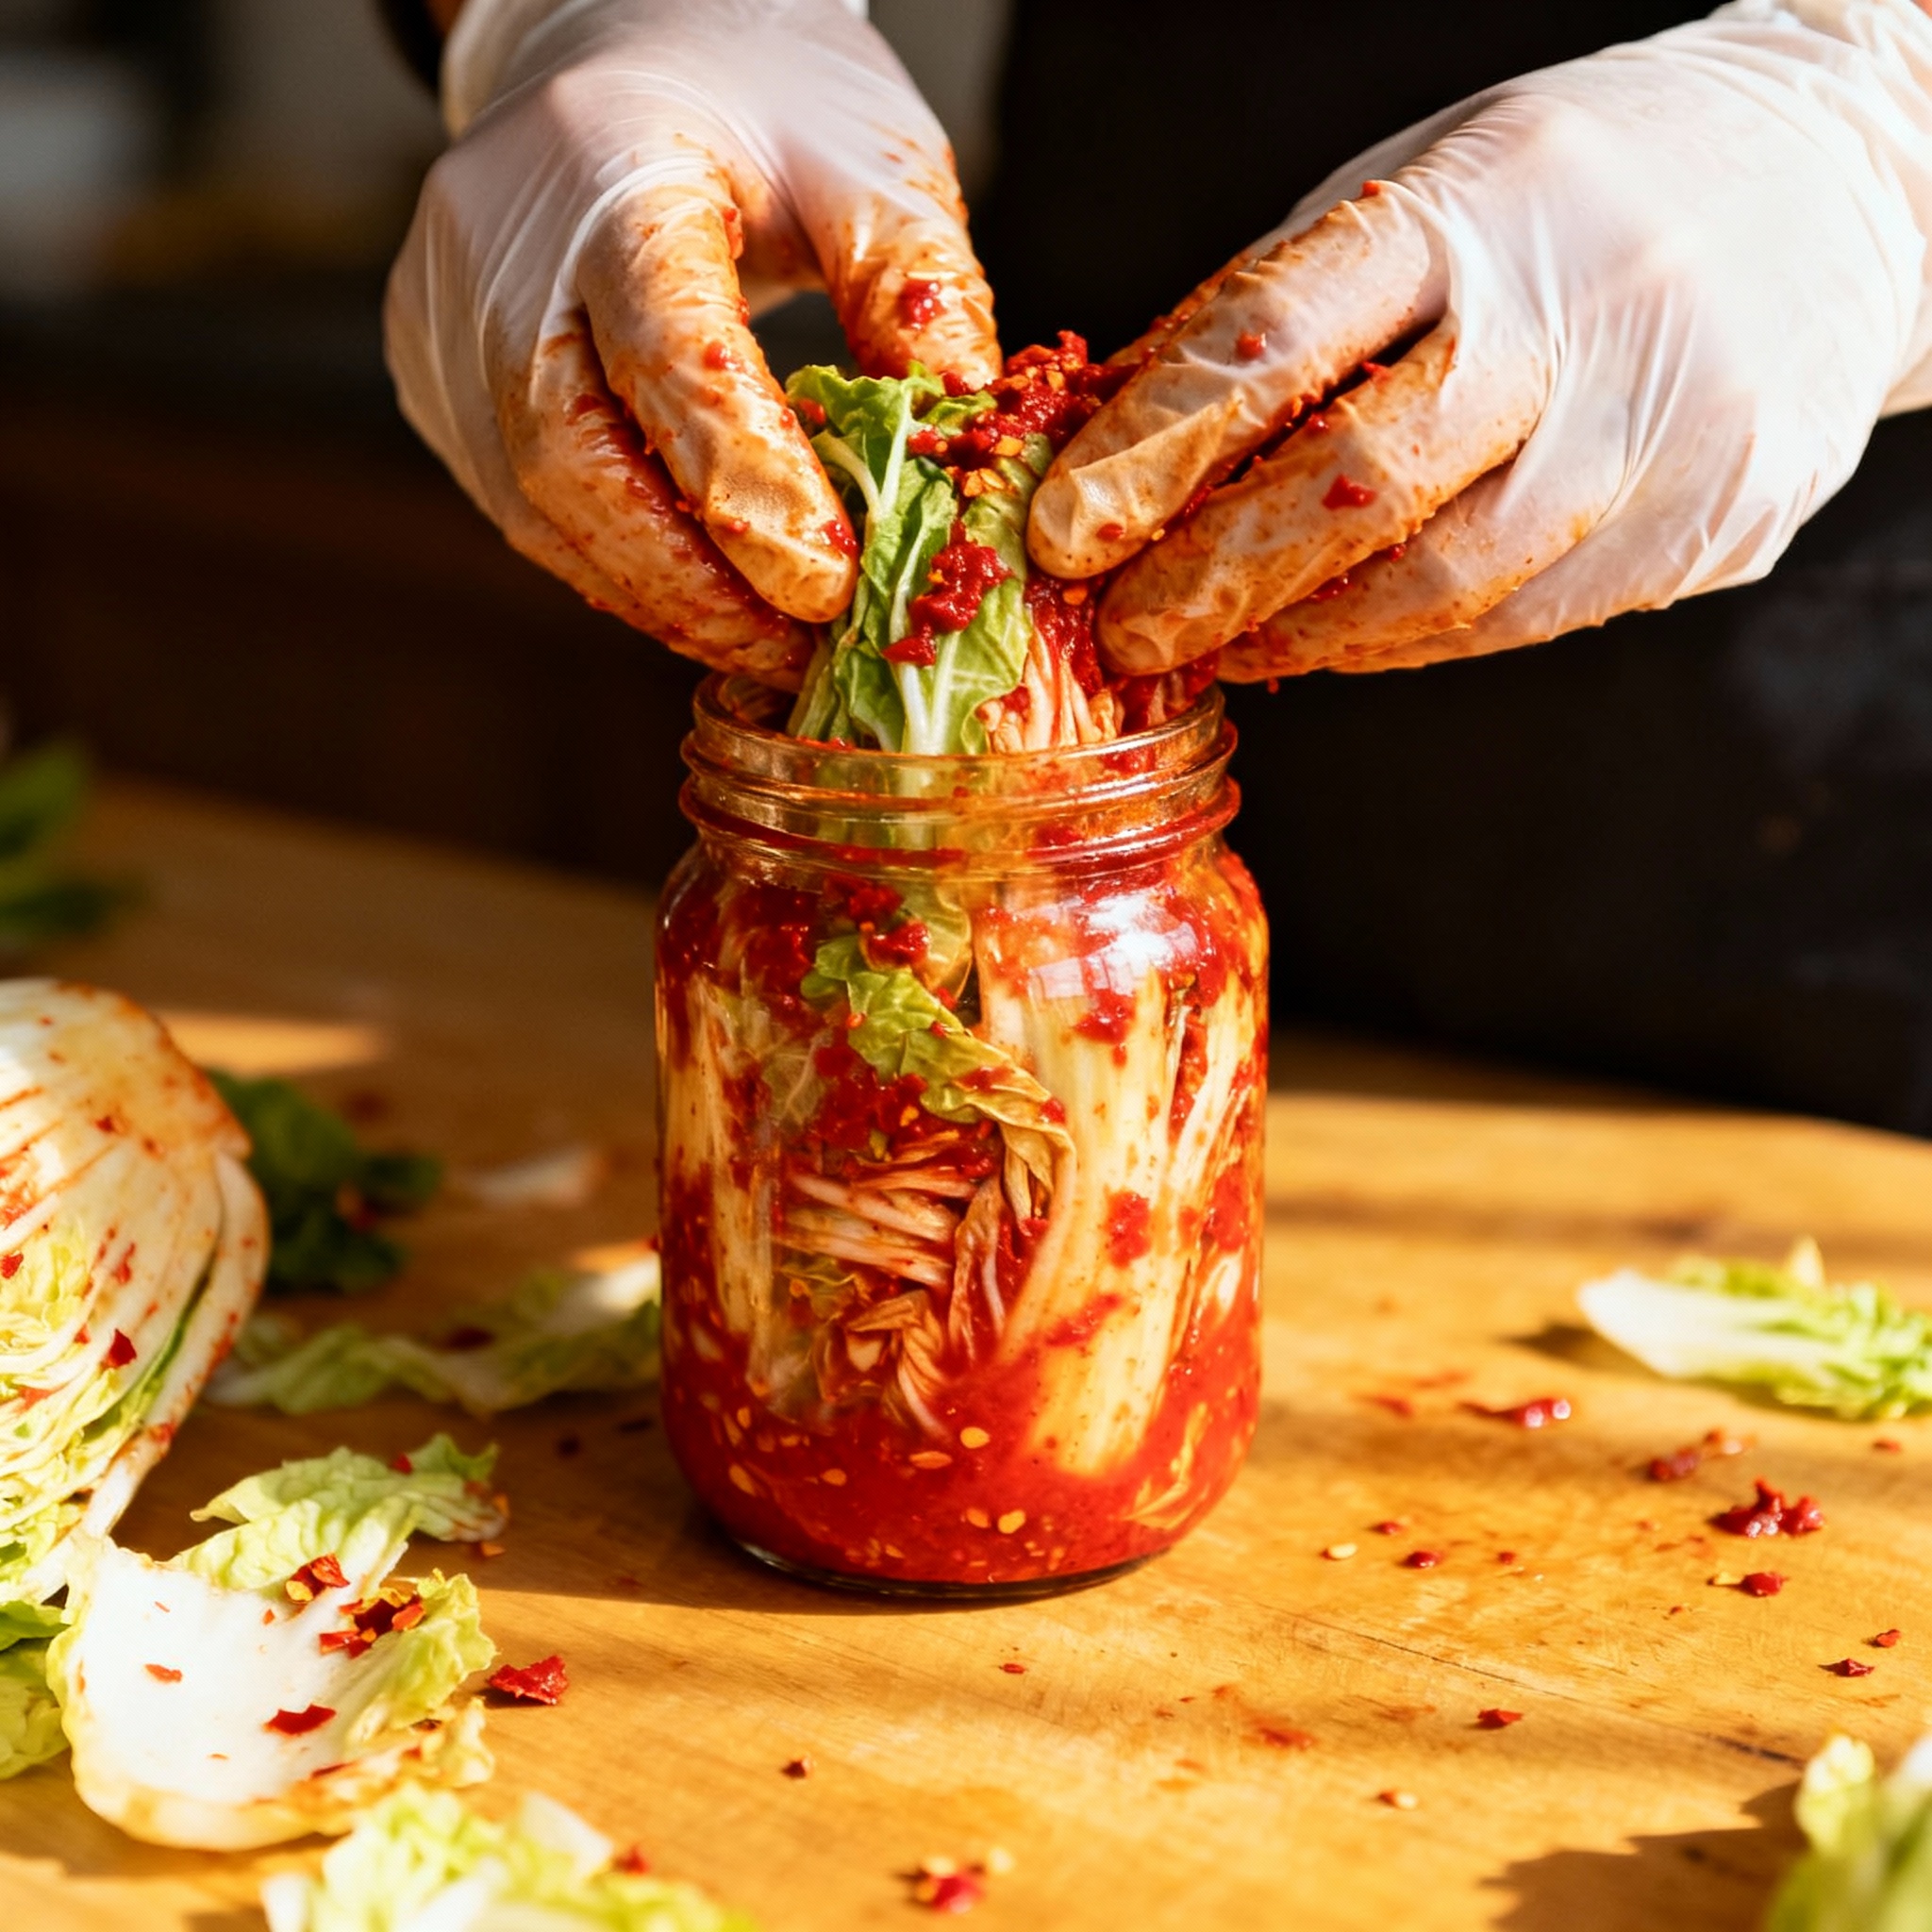
I drain the brine through the spigot and rinse the cabbage with cold water. Then I blend garlic, ginger, fish sauce, and gochugaru into a thick slurry.
I wear nitrile gloves-the same ones used for dry-hopping-and massage the paste into the cabbage. Your hands will burn without them.
I pack the coated cabbage into a sanitized fermenting bucket and add an airlock. Kimchi ferments faster than kraut due to higher sugar content and ambient yeast.
Taste it after two days. By day seven, it is usually ready for the refrigerator.
The ginger and garlic in kimchi contribute more than just flavor; they provide amylase enzymes that help break down complex starches into simple sugars for the bacteria to consume.
Ferment kimchi in a bucket with a gamma seal lid. These screw-top lids allow you to “burp” the massive CO2 buildup without breaking the anaerobic seal entirely.
Half-Sours vs Full Sours: The Three-Day Rule
Pickles are the easiest ferment but the hardest to get right. Too little salt and they turn mushy; too much salt and they’re inedible.
The cucumbers must be fresh to prevent the enzymes that cause softening from activating. The style you achieve depends entirely on time and acidity.
Half-sours ferment for three to five days. They are crunchy, mildly tangy, and still taste like fresh cucumbers.
Full sours ferment for three to six weeks. The pH drops below 3.5 and the cucumbers turn a deep olive-green with a sharp, mouth-puckering sourness.
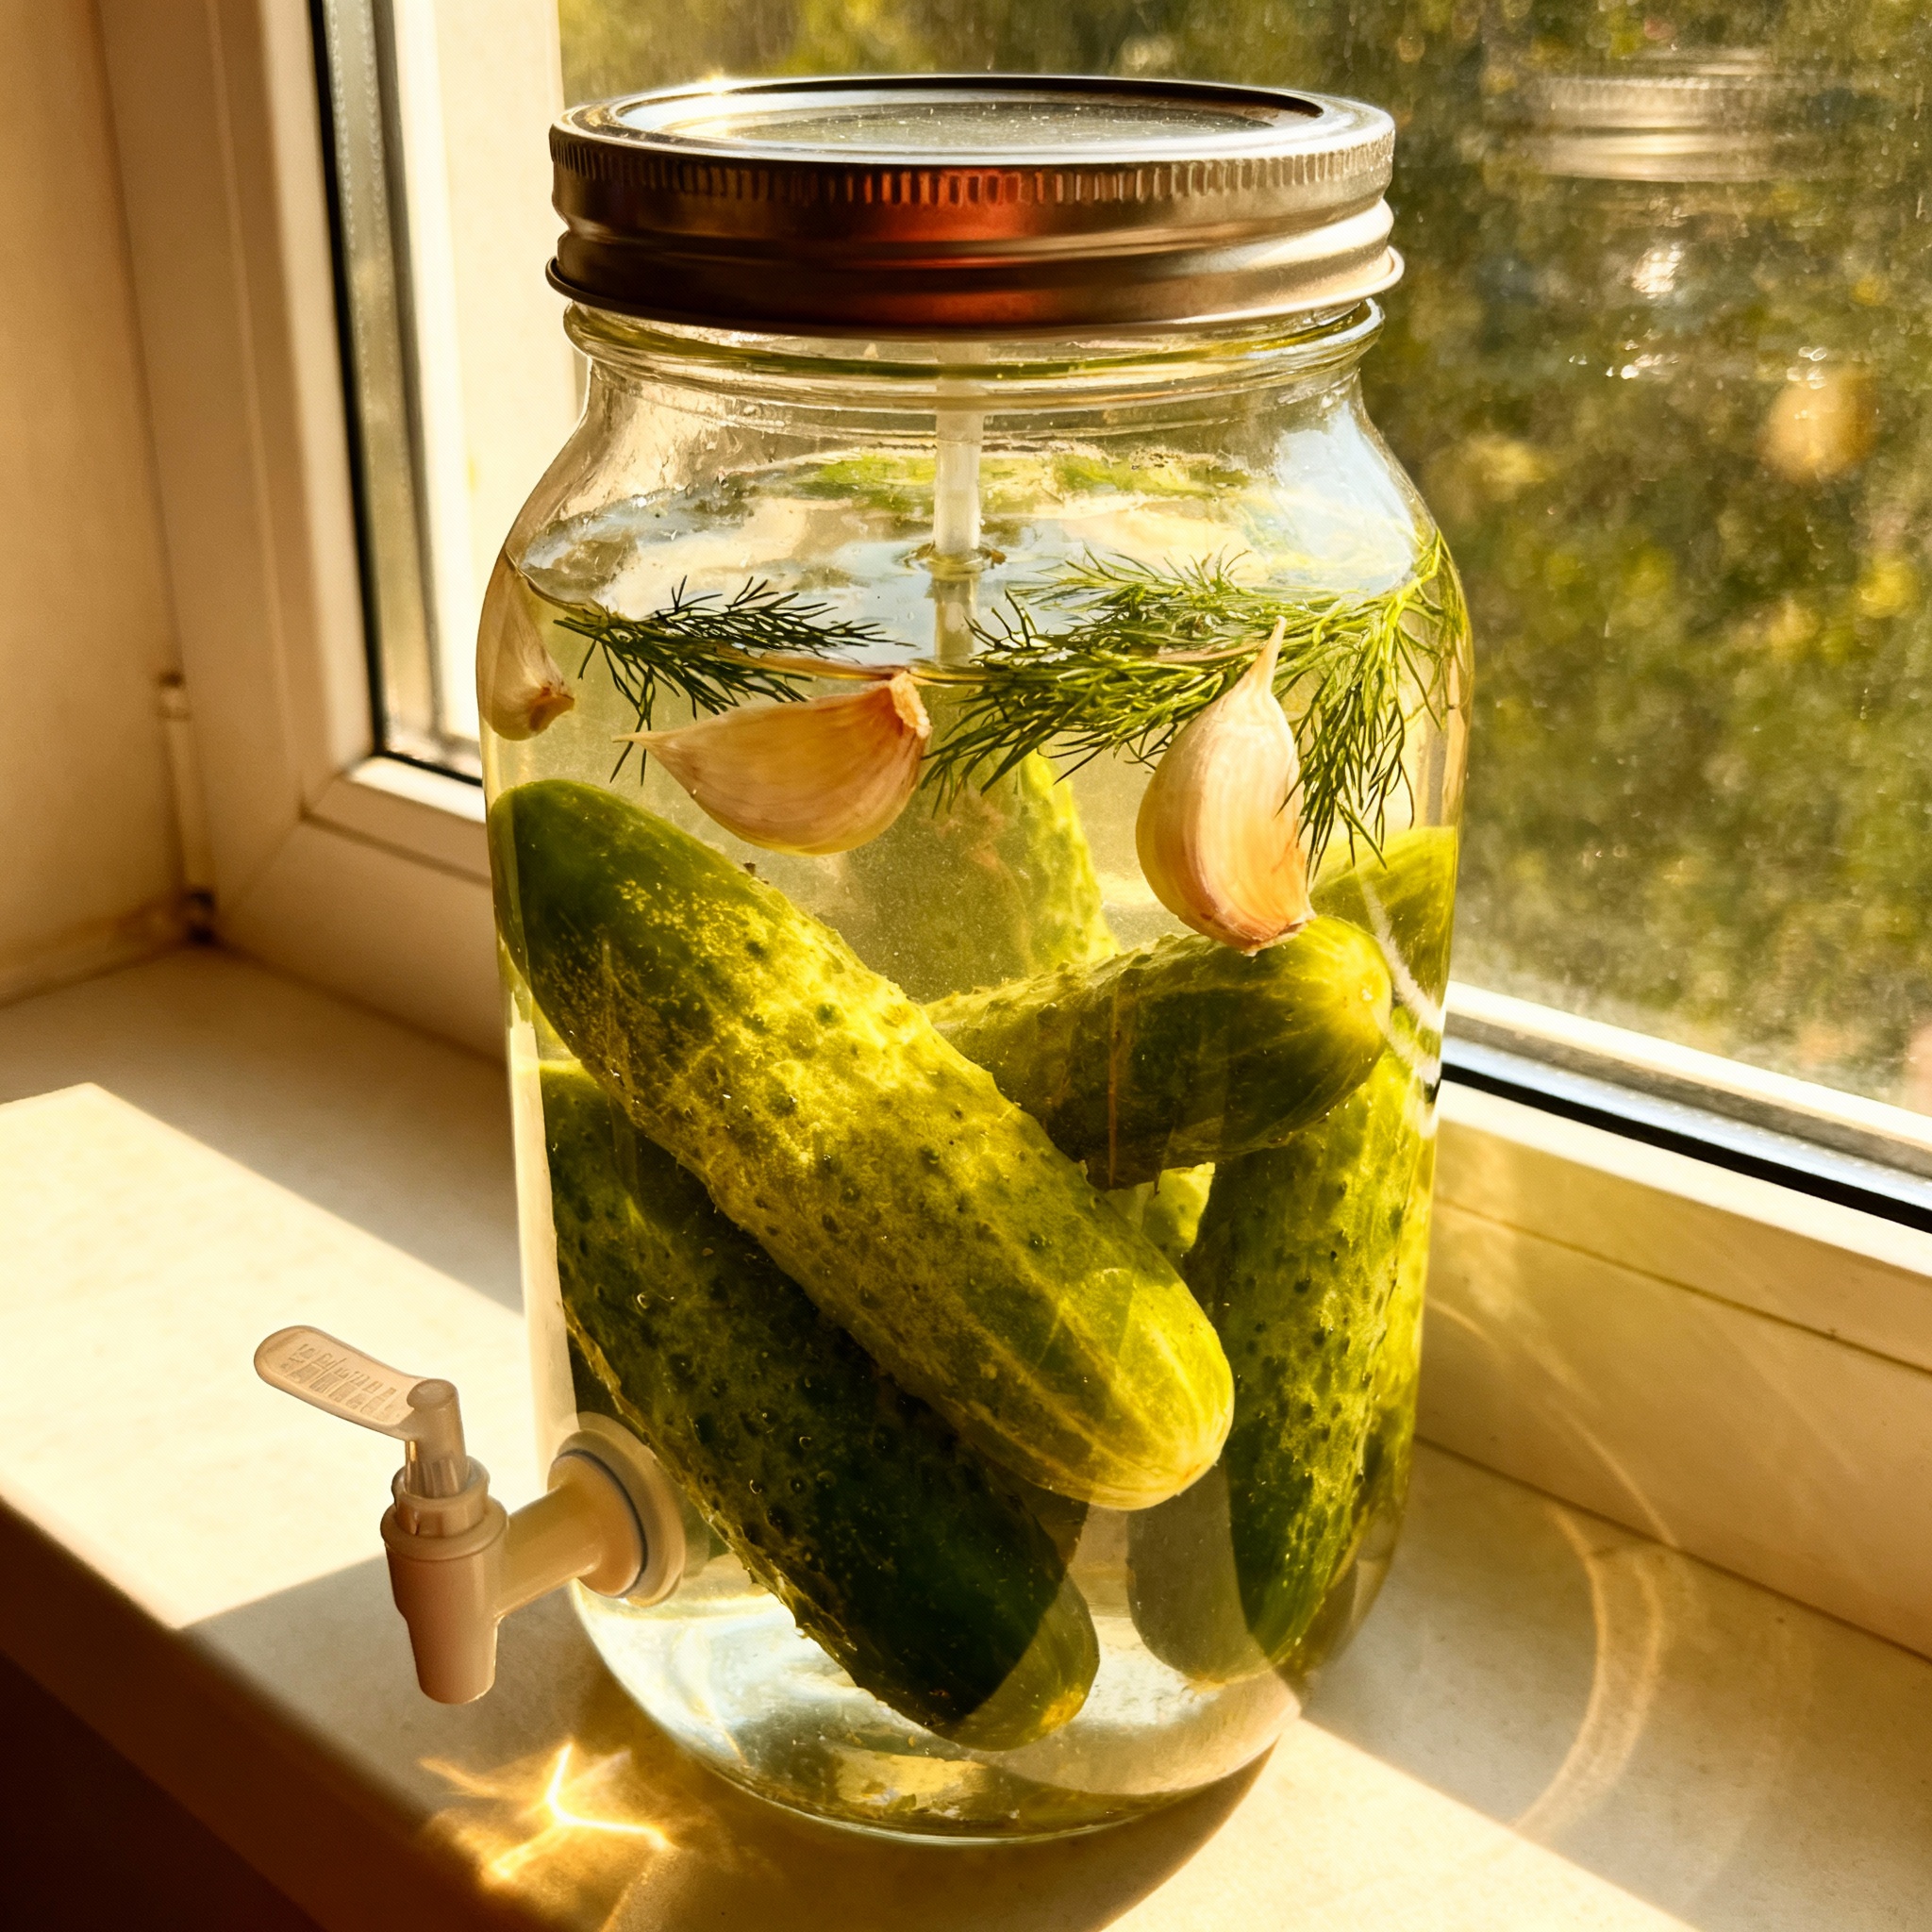
I use a brine of 40 grams of salt per liter of water. I boil the water first to remove chlorine, then cool it before adding salt.
I pack pickling cucumbers into a bucket with dill, garlic, peppercorns, and grape leaves for tannins. The tannins help the pickles stay crisp during the long fermentation.
Room temperature is vital for this process. Aim for 65°F to 70°F. If it’s too hot, the pickles will go soft quickly.
If you can’t find grape leaves, add a pinch of black tea leaves to the brine. The tannins in the tea fulfill the same role in maintaining structural integrity in the cucumber skin.
Why Mason Jars Fail and Airlocks Win
The internet loves the aesthetic of mason jars for homesteading. However, they are terrible for fermentation unless modified.
The problem is oxygen. If you seal them tight, the CO2 pressure can crack the glass.
If you leave the lid loose, oxygen sneaks in and creates surface mold. Surface mold shifts the flavor profile from clean and tangy to musty and off.
Airlocks solve this by letting CO2 escape without letting oxygen in. It is the same reason you use an airlock on a beer carboy.
The water or alcohol barrier is the difference between a clean ferment and a ruined batch. I use standard three-piece airlocks on all my vegetable ferments.
I fill them with vodka because it doesn’t grow algae or mold. Visual feedback is another huge advantage.
If the airlock is bubbling, you know the bacteria are winning. With a loose-lidded mason jar, you are simply guessing.
Closing the Loop
I started fermenting vegetables because I hated wasting cabbage. Now I do it because it’s the cleanest expression of fermentation.
There is no recipe to hide behind and no hops to mask mistakes. It is just salt, time, and environmental control.
If you brew beer, you already have the skills needed for this hobby. You understand sanitation and respect the timeline of living organisms.
Use the gear you already own. Point your skills at vegetables and trust your data.
Your first batch may not be perfect, but by the third, you will recognize the patterns. You’ll know the smell of a healthy ferment versus a stalled one.
Stop worrying and start tweaking your salt percentages and spice blends. When someone asks how you made such incredible kimchi, tell them the truth: you followed the data.
Fermentation Data Table
| Ferment Type | Salt % (by weight) | Fermentation Time | Target pH | Storage Life (refrigerated) |
|---|---|---|---|---|
| Sauerkraut | 2.0% | 5-10 days | 3.4-3.6 | 6+ months |
| Kimchi | 6.0% (brine soak) | 4-7 days | 3.5-4.0 | 3-6 months |
| Half-Sour Pickles | 3.0-4.0% (brine) | 3-5 days | 3.8-4.2 | 2-4 weeks |
| Full-Sour Pickles | 4.0-5.0% (brine) | 21-42 days | 3.2-3.5 | 4-6 months |
References
- Katz, Sandor Ellix. The Art of Fermentation. Chelsea Green Publishing, 2012.
- McGee, Harold. On Food and Cooking. Scribner, 2004.
- University of California ANR. “Safe Methods to Store, Preserve, and Enjoy Summer Produce.” 2017.
- Nummer, Brian A. “Historical Origins of Food Preservation.” University of Georgia, 2002.