3 DIY Brewery Upgrades You Can Build This Weekend
Introduction: Sweat Equity
I spent on a commercial stir plate once. It worked fine, but the whole time I kept thinking about the salvaged computer fan sitting in my drawer and the neodymium magnets I’d pulled from an old hard drive.
The math didn’t sit right. That’s when I realized something: most brewing equipment is just repackaged hardware store parts with a markup and a craft beer label slapped on it.
Look, I get it. You work all week. Saturday morning, you want to brew, not turn your garage into a machine shop.
But here’s the thing: these projects aren’t complicated. You’re not welding titanium or writing firmware.
You’re assembling parts that already want to fit together. The longest part is usually the trip to Home Depot.
I’ve built every upgrade in this guide. Some worked perfectly on the first try.
Others (like my first hop spider, which unraveled mid-boil and dumped pellet sludge everywhere) taught me what not to do. I’m sharing the second-version instructions, the ones that actually work.
You don’t need a workshop. You need a weekend, about total, and a willingness to accept that sometimes the DIY version looks janky but performs just as well as the fancy catalog item.
The Stir Plate: Magnets and Fans
A stir plate spins a magnetic bar inside your yeast starter flask, keeping everything oxygenated and building up healthy cell counts before brew day. Commercial versions run to .
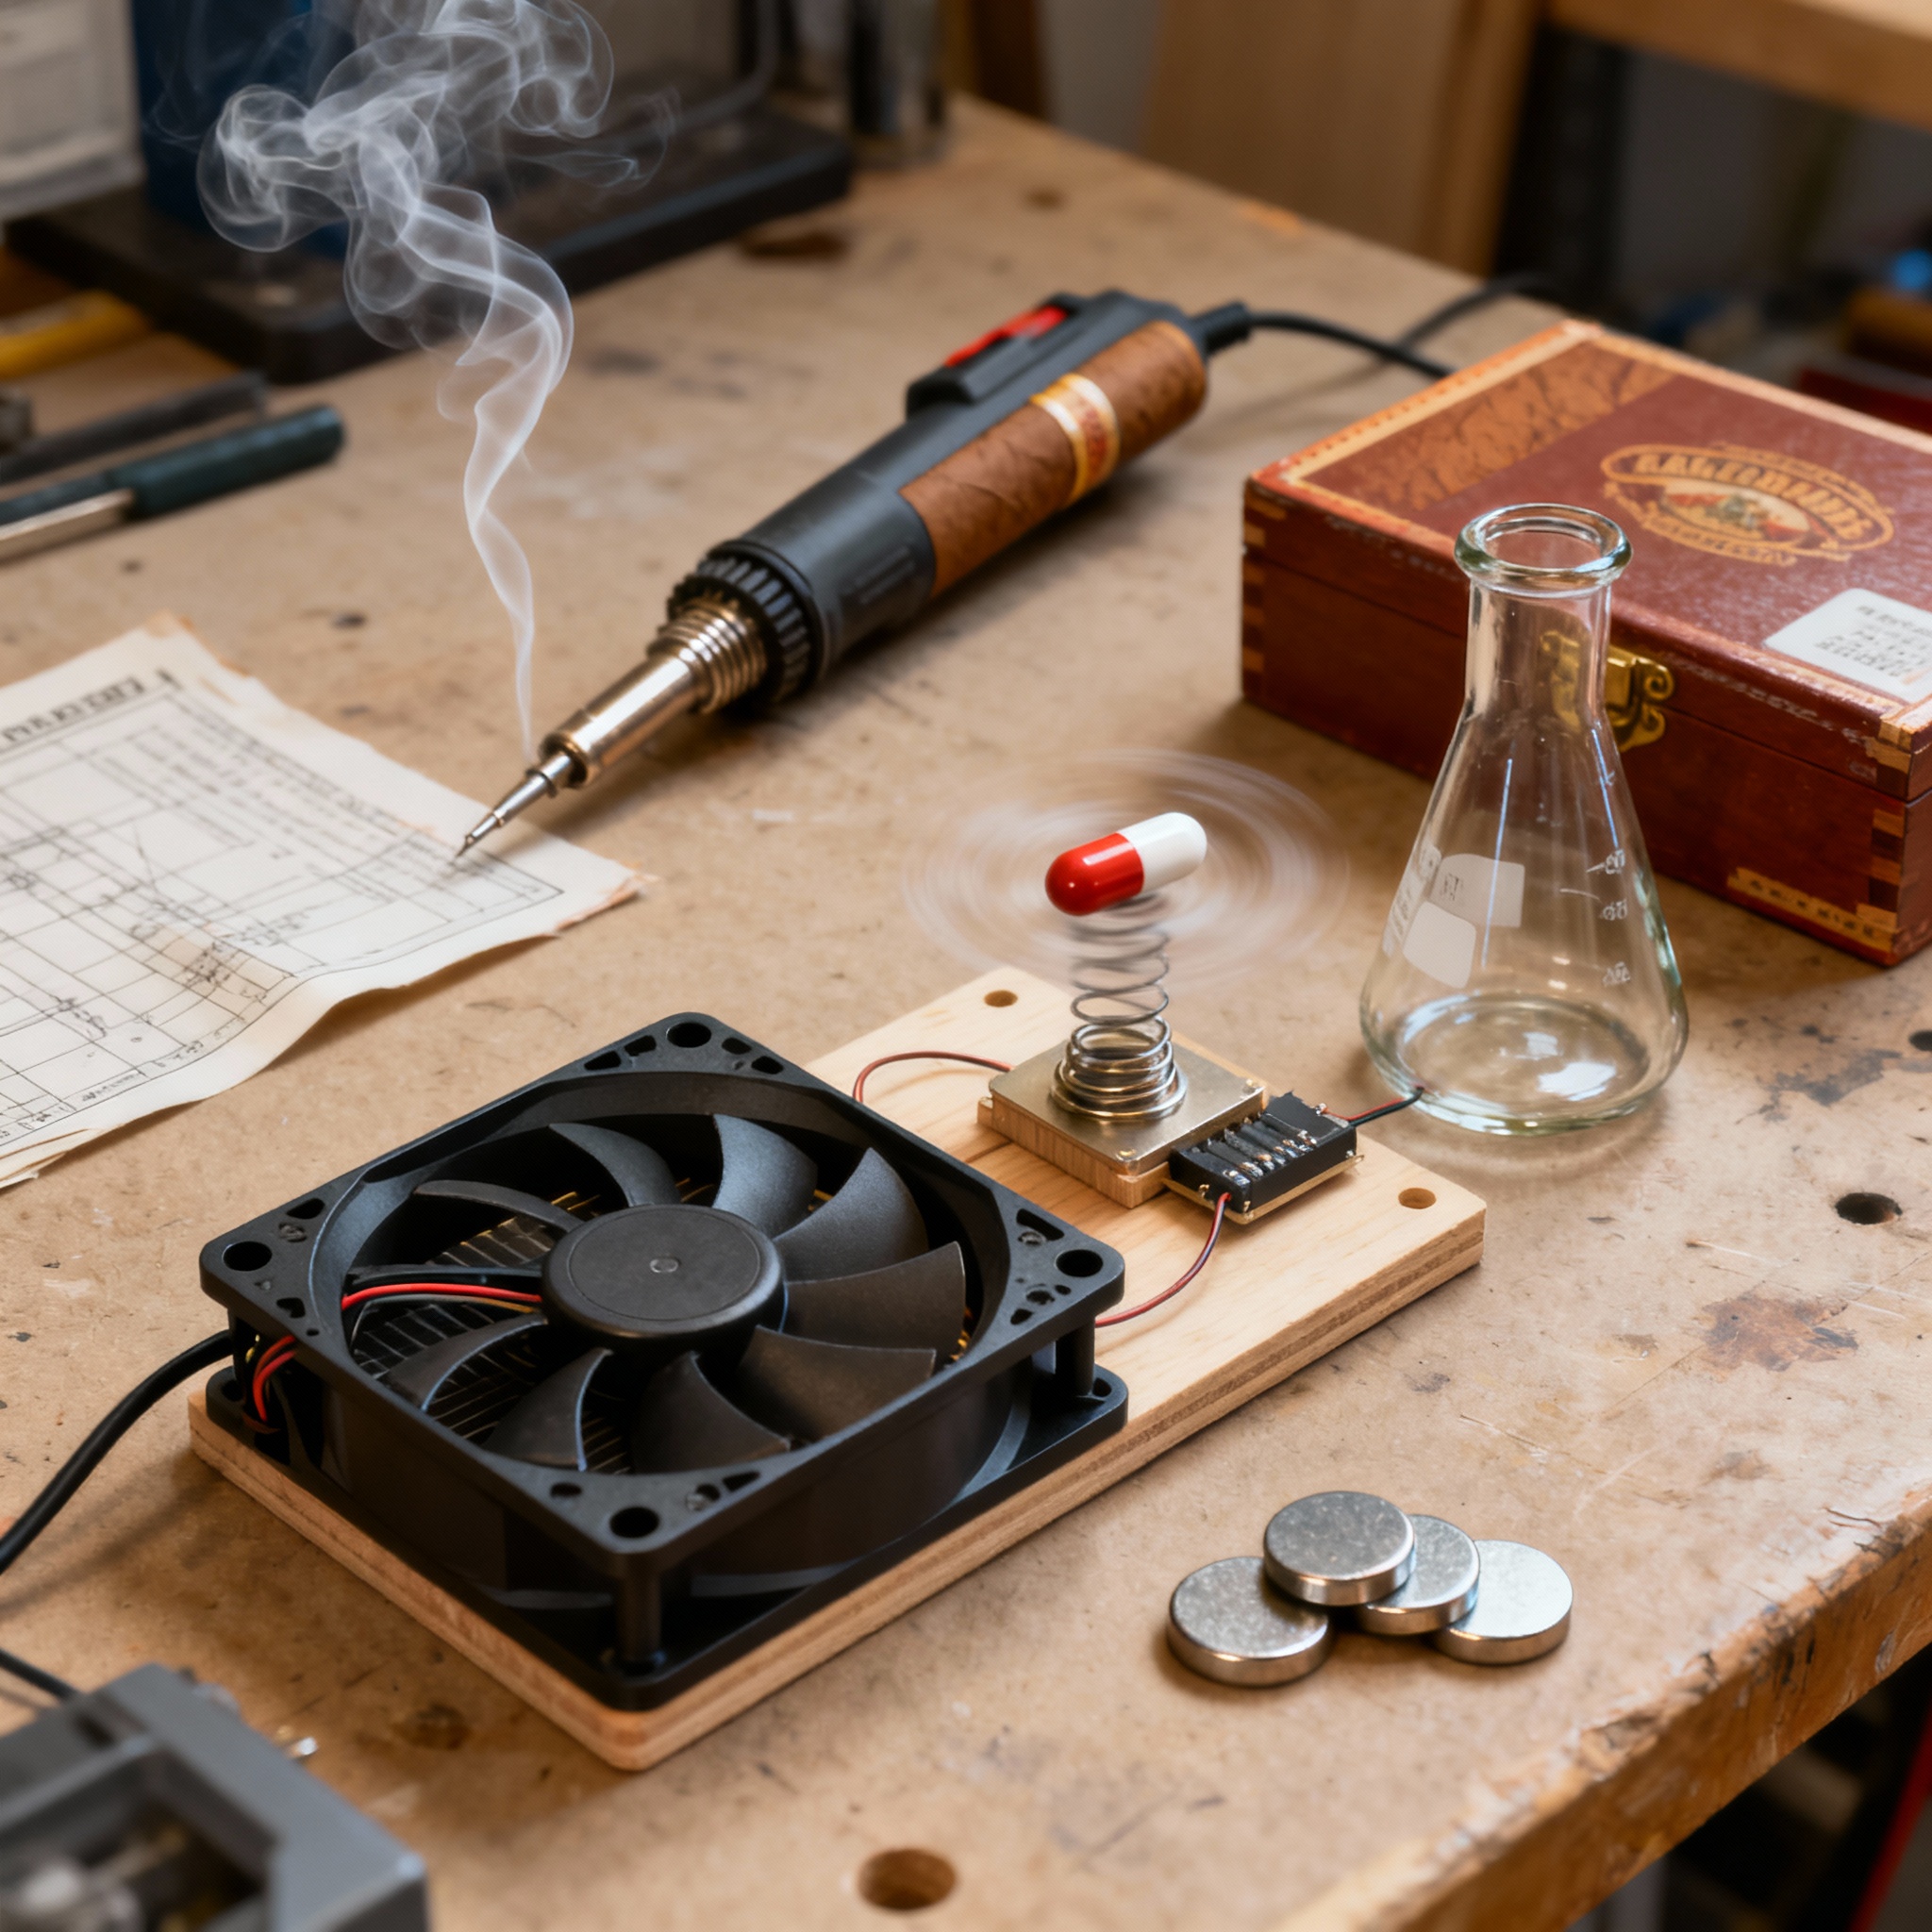
You can build one for the cost of lunch. Here’s what you need: a computer fan ( or ), a power adapter, two neodymium magnets, a plastic project box, and a magnetic stir bar.
The build is simple: mount the fan inside the project box with the intake side facing up to keep the motor cool. Glue or epoxy the two neodymium magnets to the center hub of the fan blade, ensuring opposite poles face outward.
Drill a small hole for the power cable and connect the fan leads to your adapter. Set your Erlenmeyer flask on top, drop the bar inside, and flip the switch.
The efficiency of a DIY stir plate depends on the magnetic flux density between the drive magnets and the stir bar. By using neodymium magnets (NdFeB), you create a high-coercivity field that maintains a stable “lock” on the bar even as the wort viscosity increases during the growth phase of the yeast culture.
If your stir bar keeps flying off the magnet, your flask is too far from the fan. Try a thinner project box, or stack a second set of magnets on top of the first to strengthen the field.
The Hop Spider: Hardware Cloth Construction
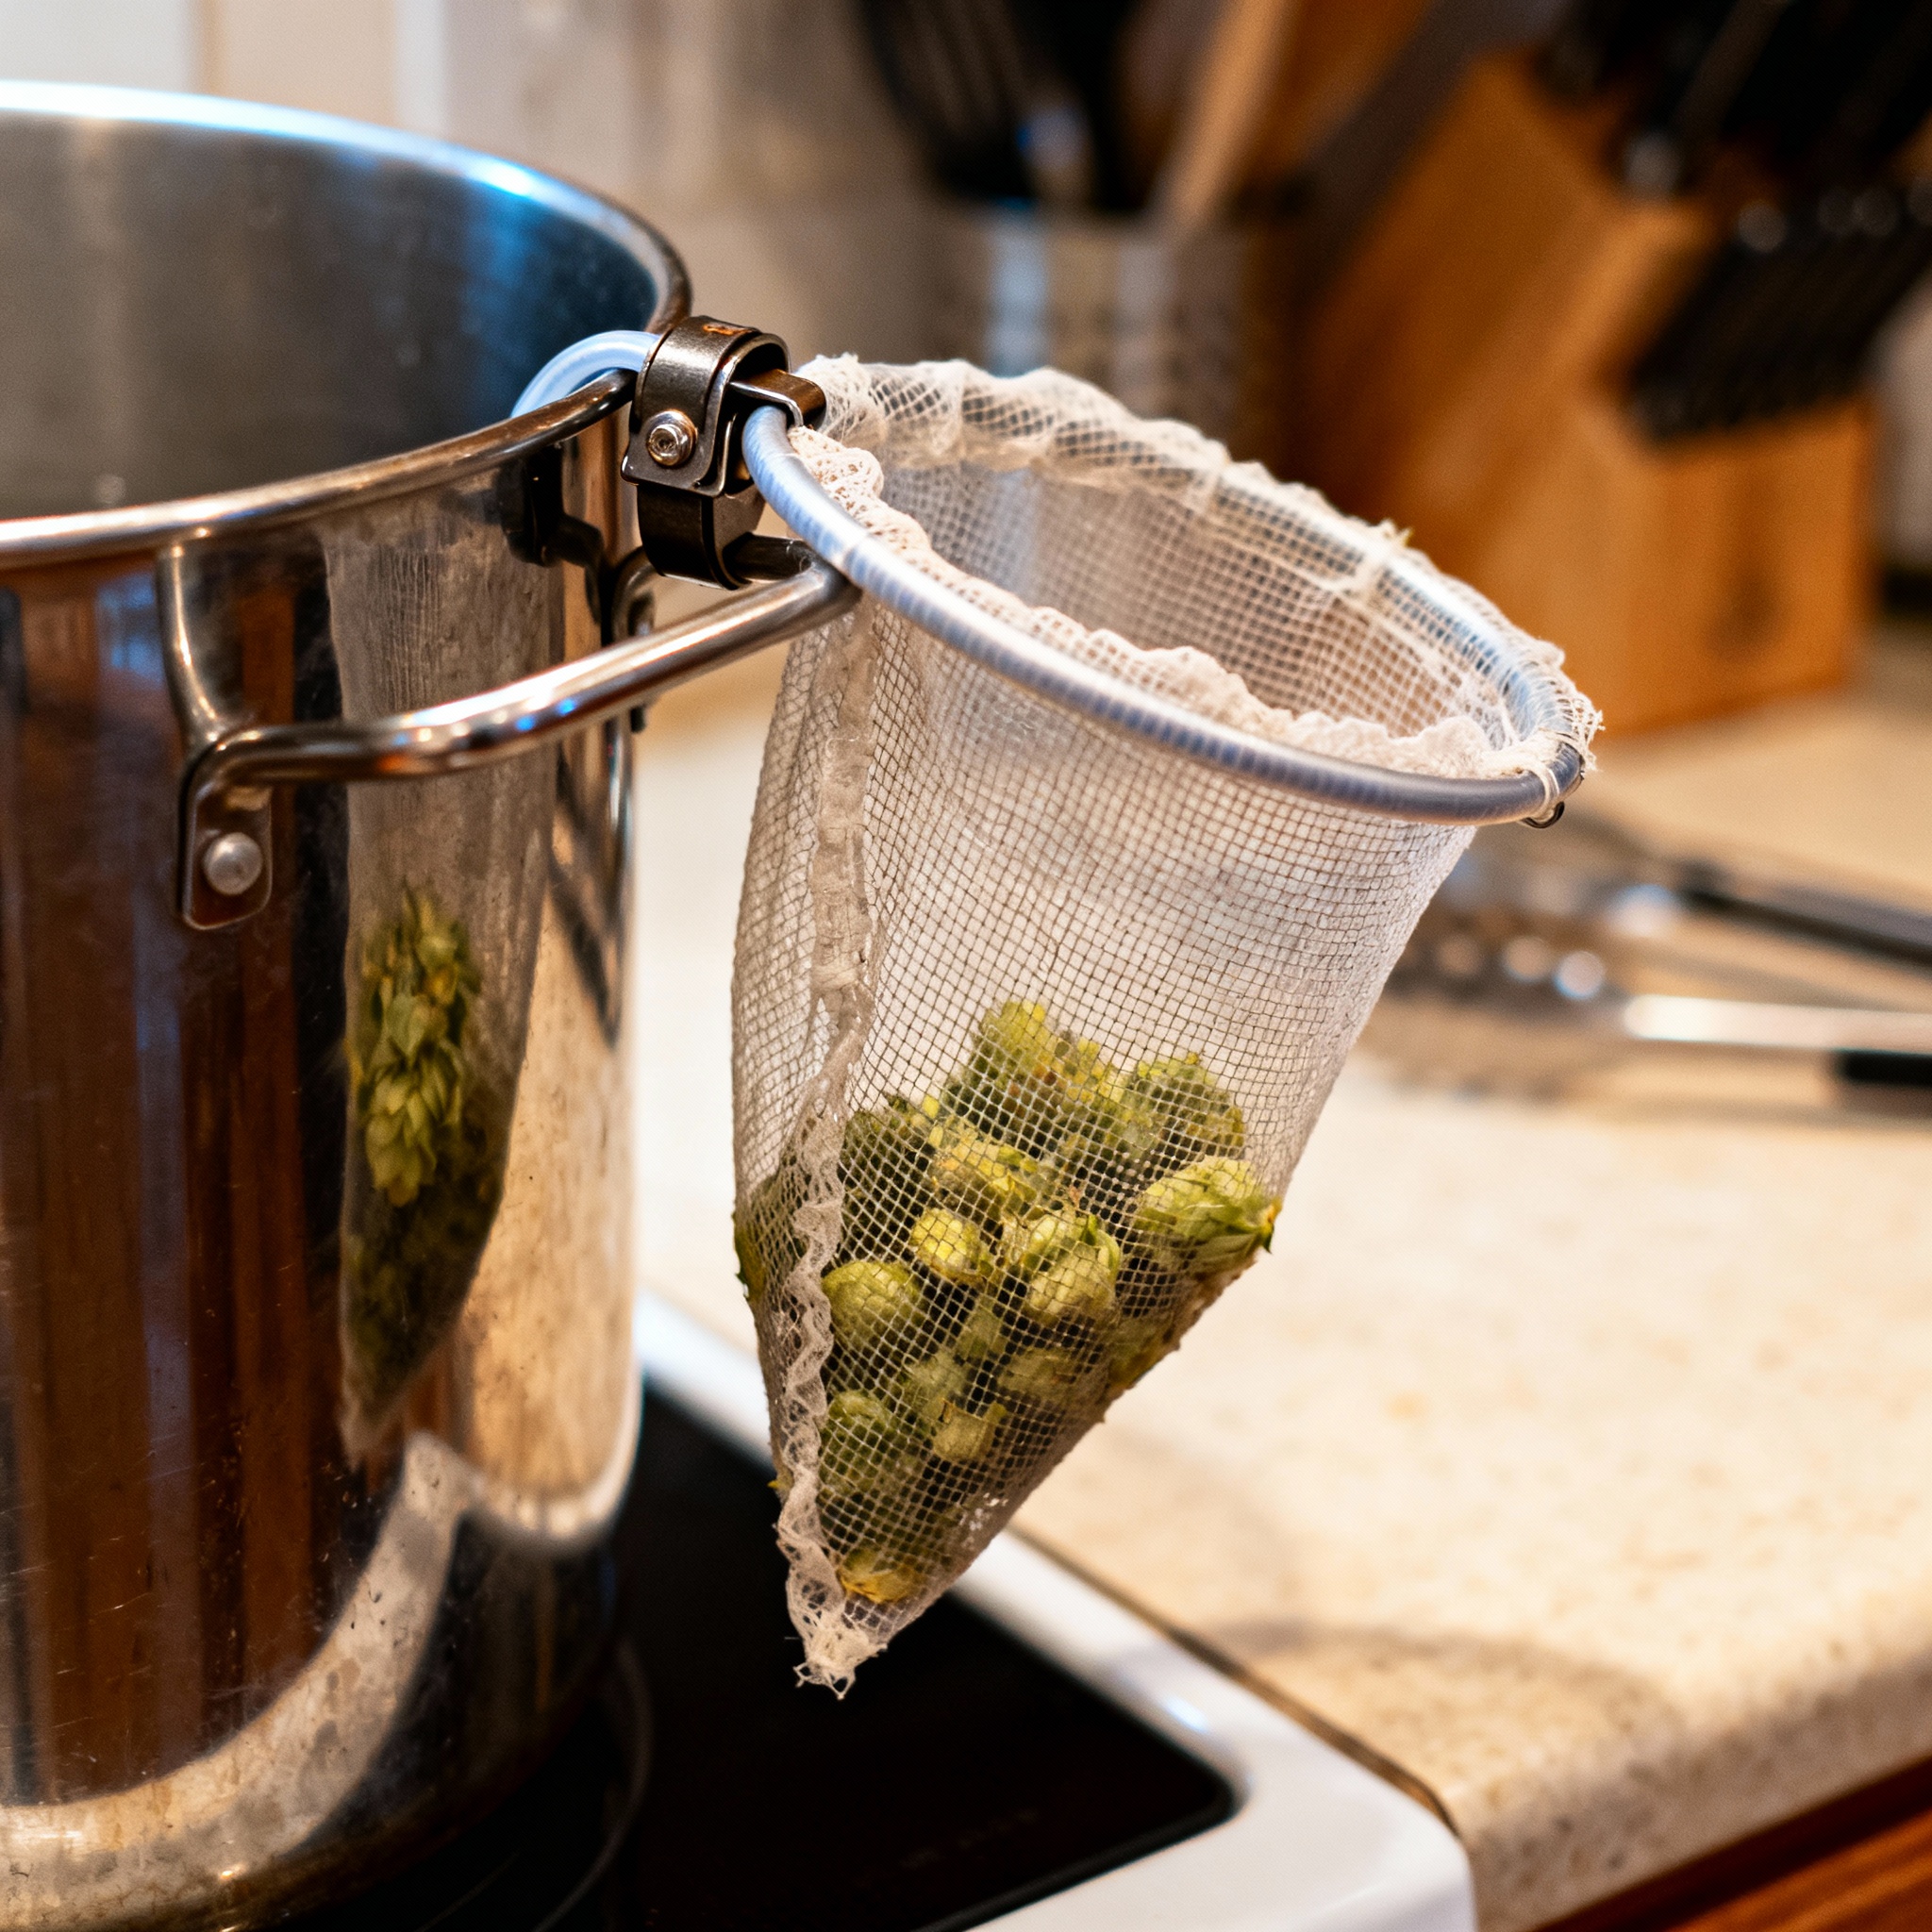
Hop spiders keep your kettle clean by containing all the hop matter in a hanging mesh basket. Commercial versions are to for what amounts to a stainless steel tube with holes.
You can build a better one for under . Get a by sheet of stainless steel hardware cloth ( mesh) and a large stainless hose clamp. See hop spider uses for more context.
Skip the galvanized mesh; you’re boiling wort and don’t want zinc leaching into your beer. (See boil basics). Roll the hardware cloth into a cylinder about in diameter and tall.
Overlap the edges and cinch the hose clamp around the seam near the bottom. For the top, you can either hook the mesh over the kettle edge or form a rim by bending the top inch outward at a angle.
During the boil, dump your hops directly into the spider instead of free-floating them. At the end, lift the whole thing out to pull out a contained puck of hop sludge.
After you drain the spider, hit it with the hose immediately. Dried hop matter turns into cement if you leave it overnight, requiring an hour of scrubbing with a wire brush.
The Spunding Valve: Pressure Control
Spunding valves let you ferment under pressure, which reduces ester production, speeds up lager conditioning, and naturally carbonates your beer. Commercial versions run to .
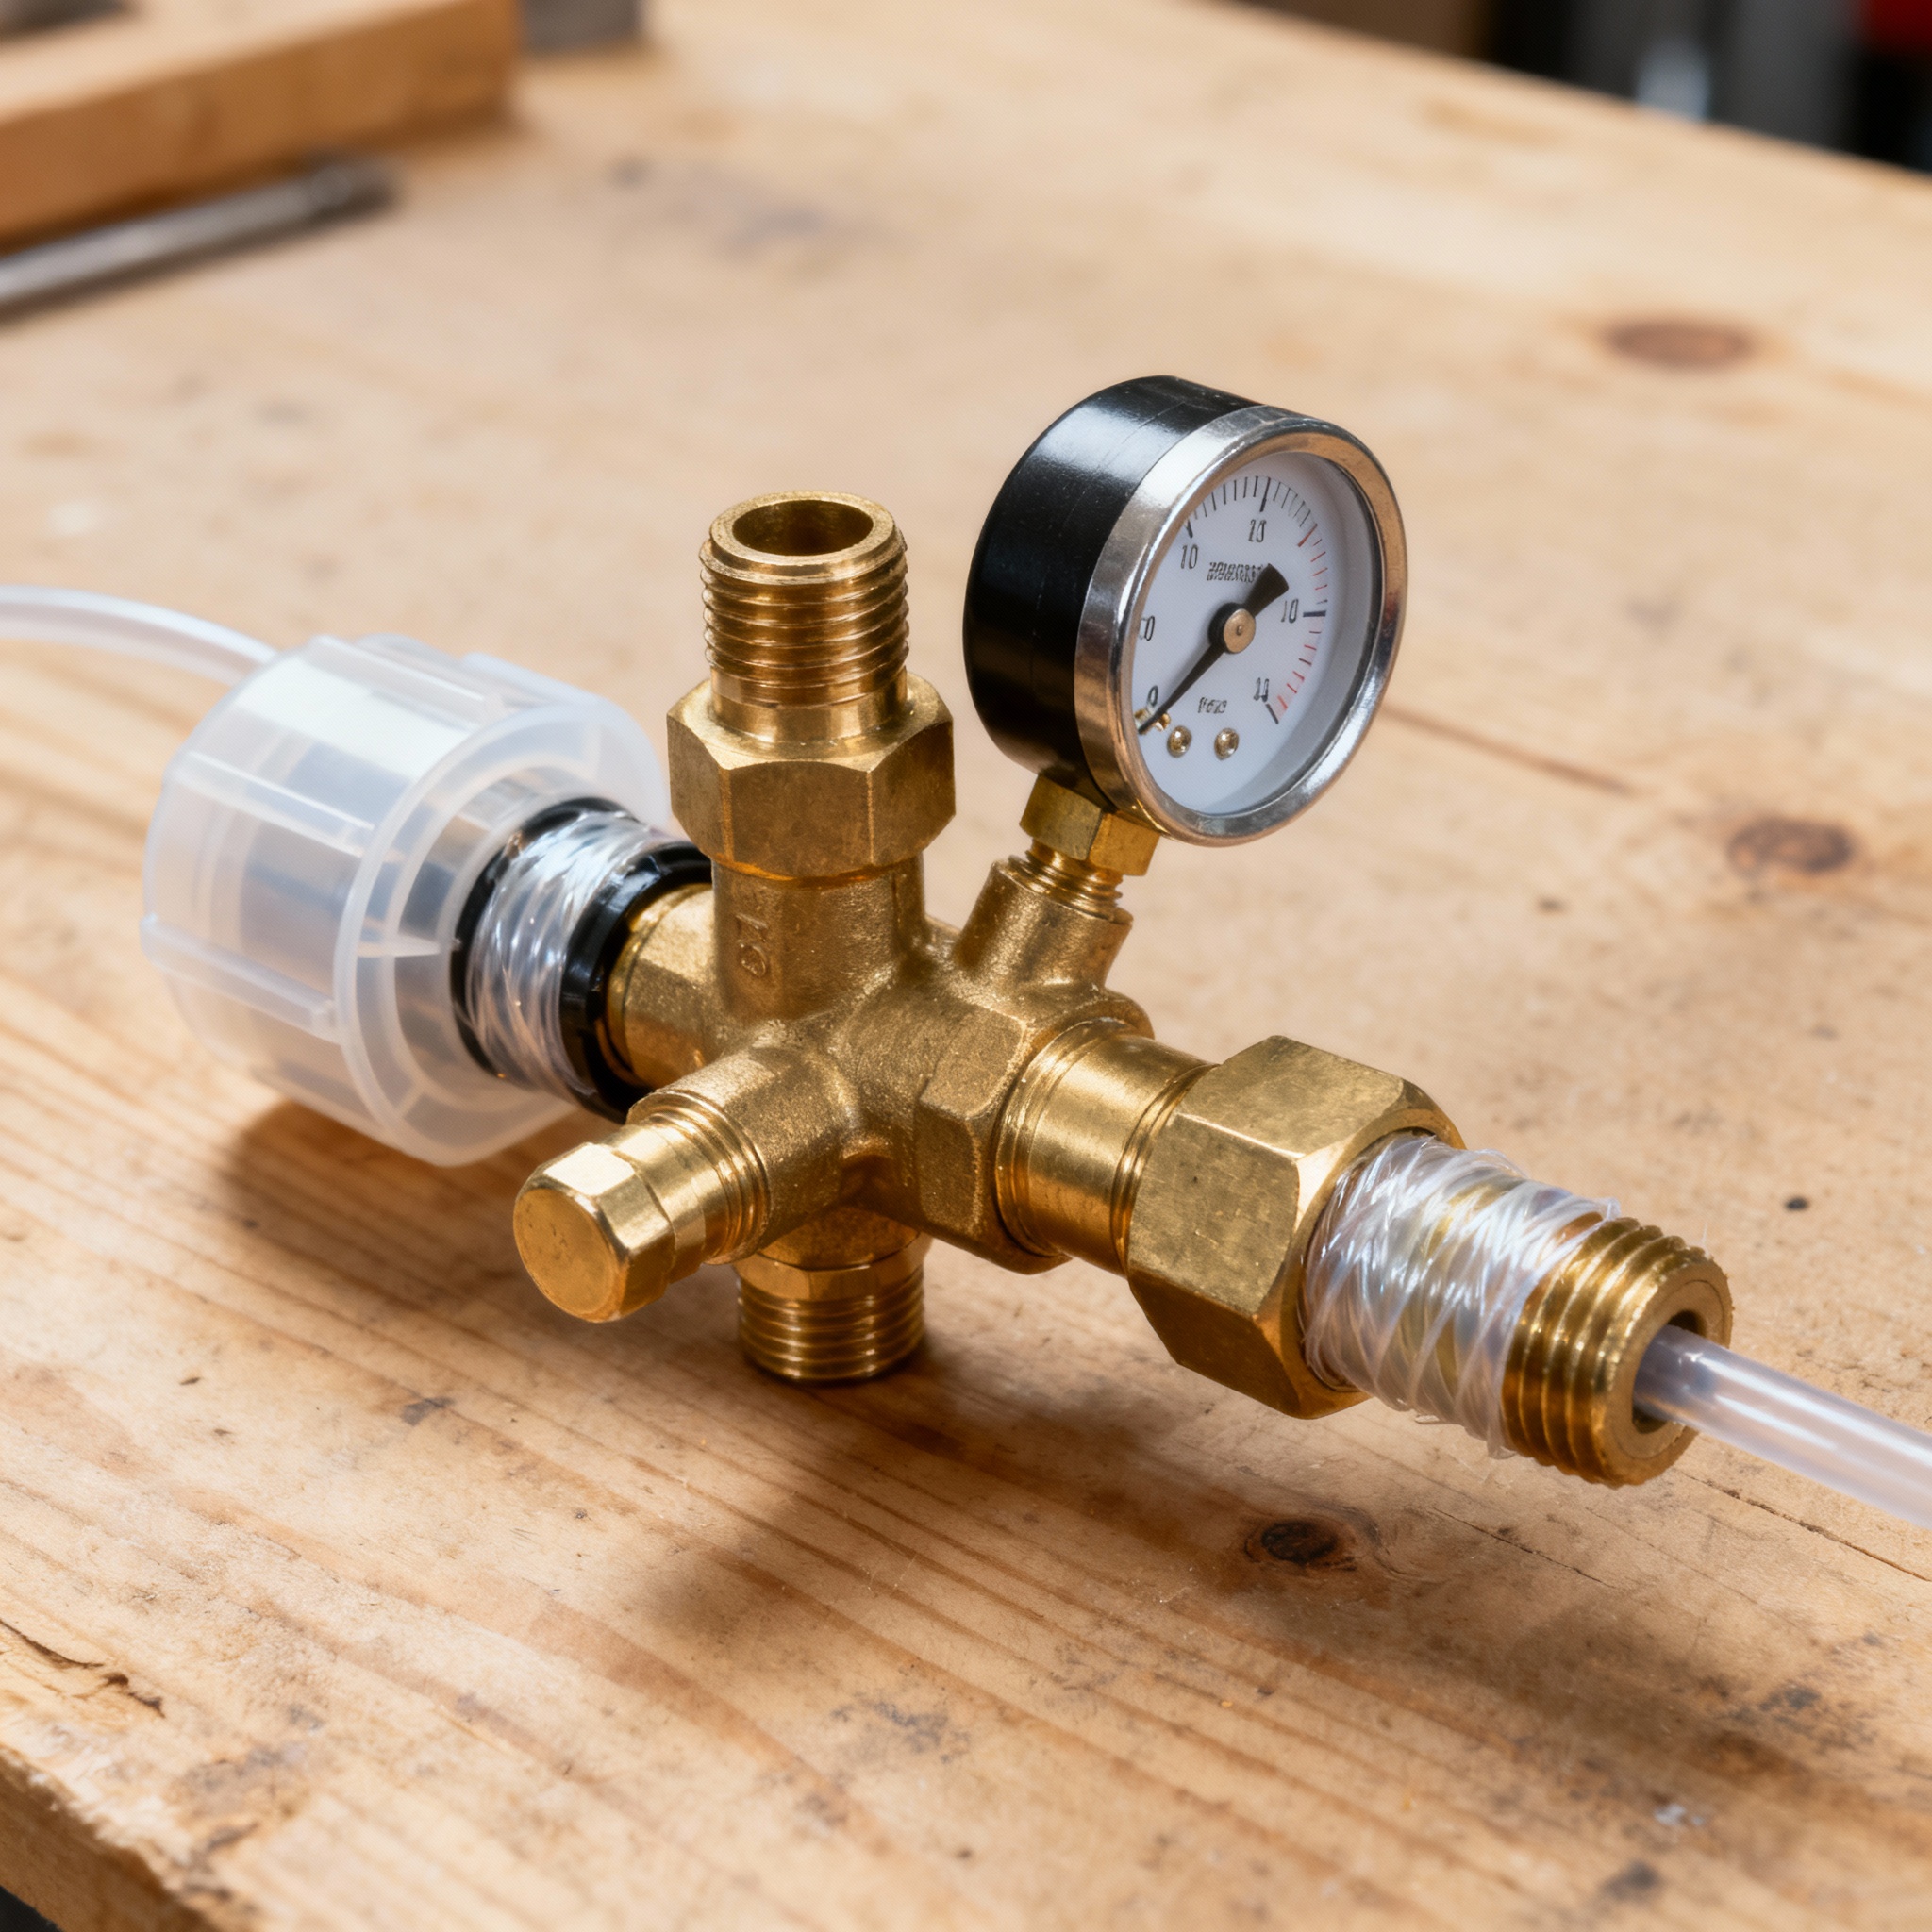
You can assemble a functional one from plumbing parts for about . You need a adjustable pressure relief valve, a barb fitting, and a ball-lock gas disconnect.
Screw the barb fitting into the outlet side of the pressure relief valve using thread seal tape. Attach the gas line to the barb and connect the other end to your ball-lock disconnect.
To use it, set your target (usually for ales), attach it to the gas post, and let the yeast produce . The valve vents any pressure above your setpoint, naturally carbonating the beer.
Pressure fermentation leverages Henry’s Law (), where the solubility of in the beer is directly proportional to the partial pressure of the gas in the headspace. By regulating this pressure with a spunding valve, you can achieve precise carbonation levels (volumes of ) before the beer ever reaches a keg.
Calibrate your valve before you trust it with a batch. Hook it up to a regulated source, set the valve to , and check it against a known-good gauge.
The Heat Stick: Supplemental Power
Heat sticks are immersion heaters that boost your kettle temperature when your stovetop can’t keep up. You can build one from water heater elements for about , but you must be extremely careful with power.
You need a water heater element ( or ), a metal electrical box, and a grounded power cord with an inline switch. You also absolutely need a GFCI outlet to prevent electrocution.
Mount the heating element through the electrical box and wire it: hot to hot, neutral to neutral, and ground to both the element housing and the box itself. Every metal part needs to be grounded.
Before use, test for continuity between the element housing and the ground pin; it should read . To use it, submerge the element completely in your kettle and flip the switch.
Label your heat stick with a bright tag that says “UNPLUG BEFORE REMOVING.” You do not want to yank a live heating element out of water.
Cost Analysis: Build vs. Buy
If you bought all four upgrades commercially, you’d spend about . Building them yourself runs about to .
That is a to savings, or roughly the cost of two batches worth of grain and hops. The stir plate takes , the hop spider , and the spunding valve .
The heat stick takes two hours because you must triple-check the electrical safety. So you’re looking at about of actual work for all four projects.
There’s also the repair factor: I’ve fixed my DIY stir plate twice in because I know exactly how it was built. Match your risk tolerance to the project, especially when dealing with electricity.
Conclusion
I’m writing this from the garage with my DIY stir plate running a starter for tomorrow’s brew. It’s been spinning yeast for two years without complaint, proving that DIY gear doesn’t have to be pretty to work.
These upgrades give you better control, cleaner processes, and more flexibility. They’ll also give you something commercial equipment never does: the exact understanding of how your tools work.
Start with the stir plate. It’s the easiest build and it’ll immediately improve your fermentation results.
If that goes well, try the hop spider next. Save the heat stick for last, or skip it entirely if you’re not confident with electrical work.
References
- Hieronymus, S. For the Love of Hops. Brewers Publications, 2012.
- Palmer, J., & Kaminski, C. Water: A Comprehensive Guide. Brewers Publications, 2013.
- White, C., & Zainasheff, J. Yeast: The Practical Guide. Brewers Publications, 2010.
- Brülosophy. “Hop Spider vs. No Hop Spider.” Efficiency and IBU Extraction Archives, 2015.
- AHA Safety Guidelines. “Electrical Protocols and Grounding.” American Homebrewers Association, 2021.