The 1-Gallon Laboratory: Stovetop Brewing Techniques.
I brewed my first batch of beer in a 5-gallon carboy that took up half my kitchen and cost $180 in gear. When it turned out infected, I poured 50 bottles worth of vinegar down the drain and didn’t brew again for months.
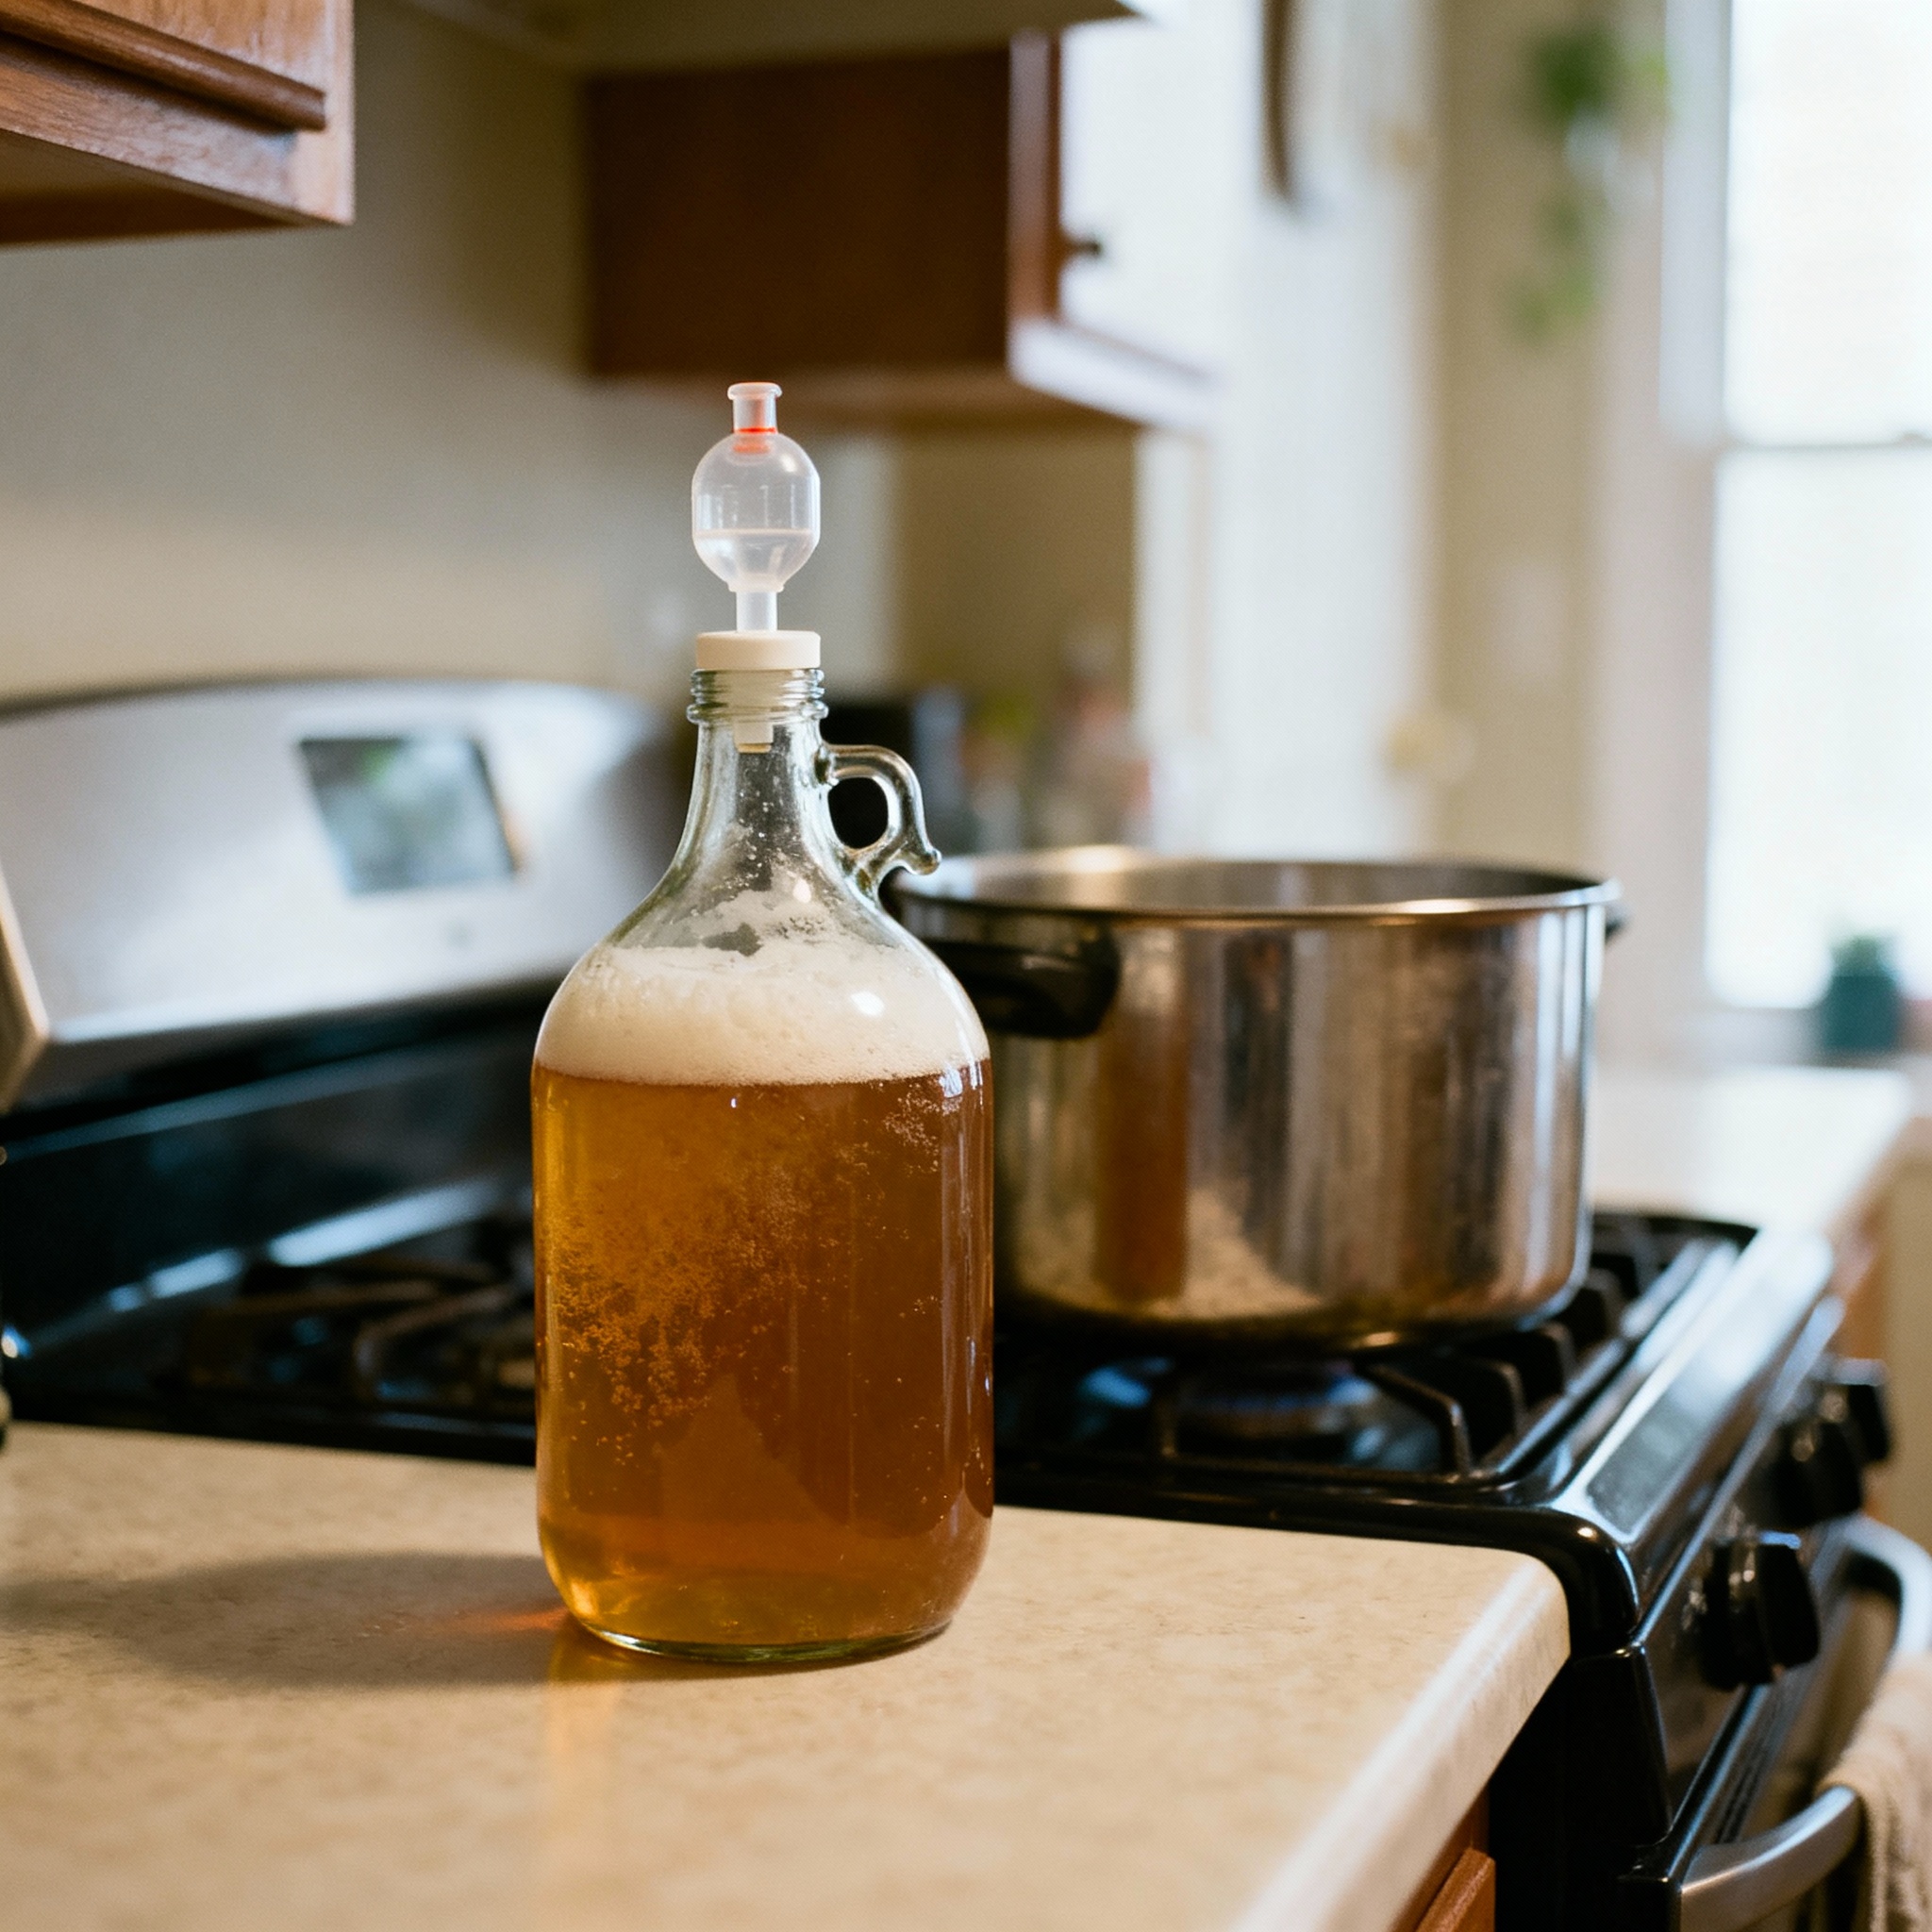
Then I found a 1-gallon glass jug for $3 and brewed a drinkable pale ale using a standard kitchen pot. This stovetop process took only three hours and proved that small-batch brewing is about variety and faster learning rather than compromising.
You can test four recipes in the time it takes to age one 5-gallon batch without committing to bulk grain orders. This is the ideal method for apartment dwellers or those who want to try fifteen styles on a budget.
Why Small Batches Lower Cost and Raise Variety
A 1-gallon all-grain recipe costs about 8 and yields roughly 10 bottles of beer. This volume is enough to evaluate your process and share with a friend without being stuck with a mediocre batch for months.
Small volumes heat to mash temperature in 15 minutes and cool much faster than bulk batches. This allows for more iterations in less time, which leads to a deeper understanding of brewing mechanics.
Small volumes of liquid possess lower thermal mass, allowing standard kitchen stovetops to reach strike and boil temperatures rapidly. This efficiency reduces the total brew day by several hours compared to 5-gallon setups.
I keep four 1-gallon jugs in rotation to ensure I am never waiting on equipment. I can brew a robust porter in January and a wheat beer in February without any scheduling conflicts.
Gear Scaling: The Spaghetti Pot and the Glass Jug
You do not need a dedicated brew kettle; a 2-gallon stainless steel stock pot used for pasta works perfectly. For fermentation, 1-gallon glass jugs are superior to plastic because they do not scratch and allow you to monitor active fermentation.
You will need an S-shaped airlock and a #6 or #6.5 drilled stopper to seal your fermenter. A basic digital candy thermometer and a kitchen scale that measures in grams are also essential for accuracy.
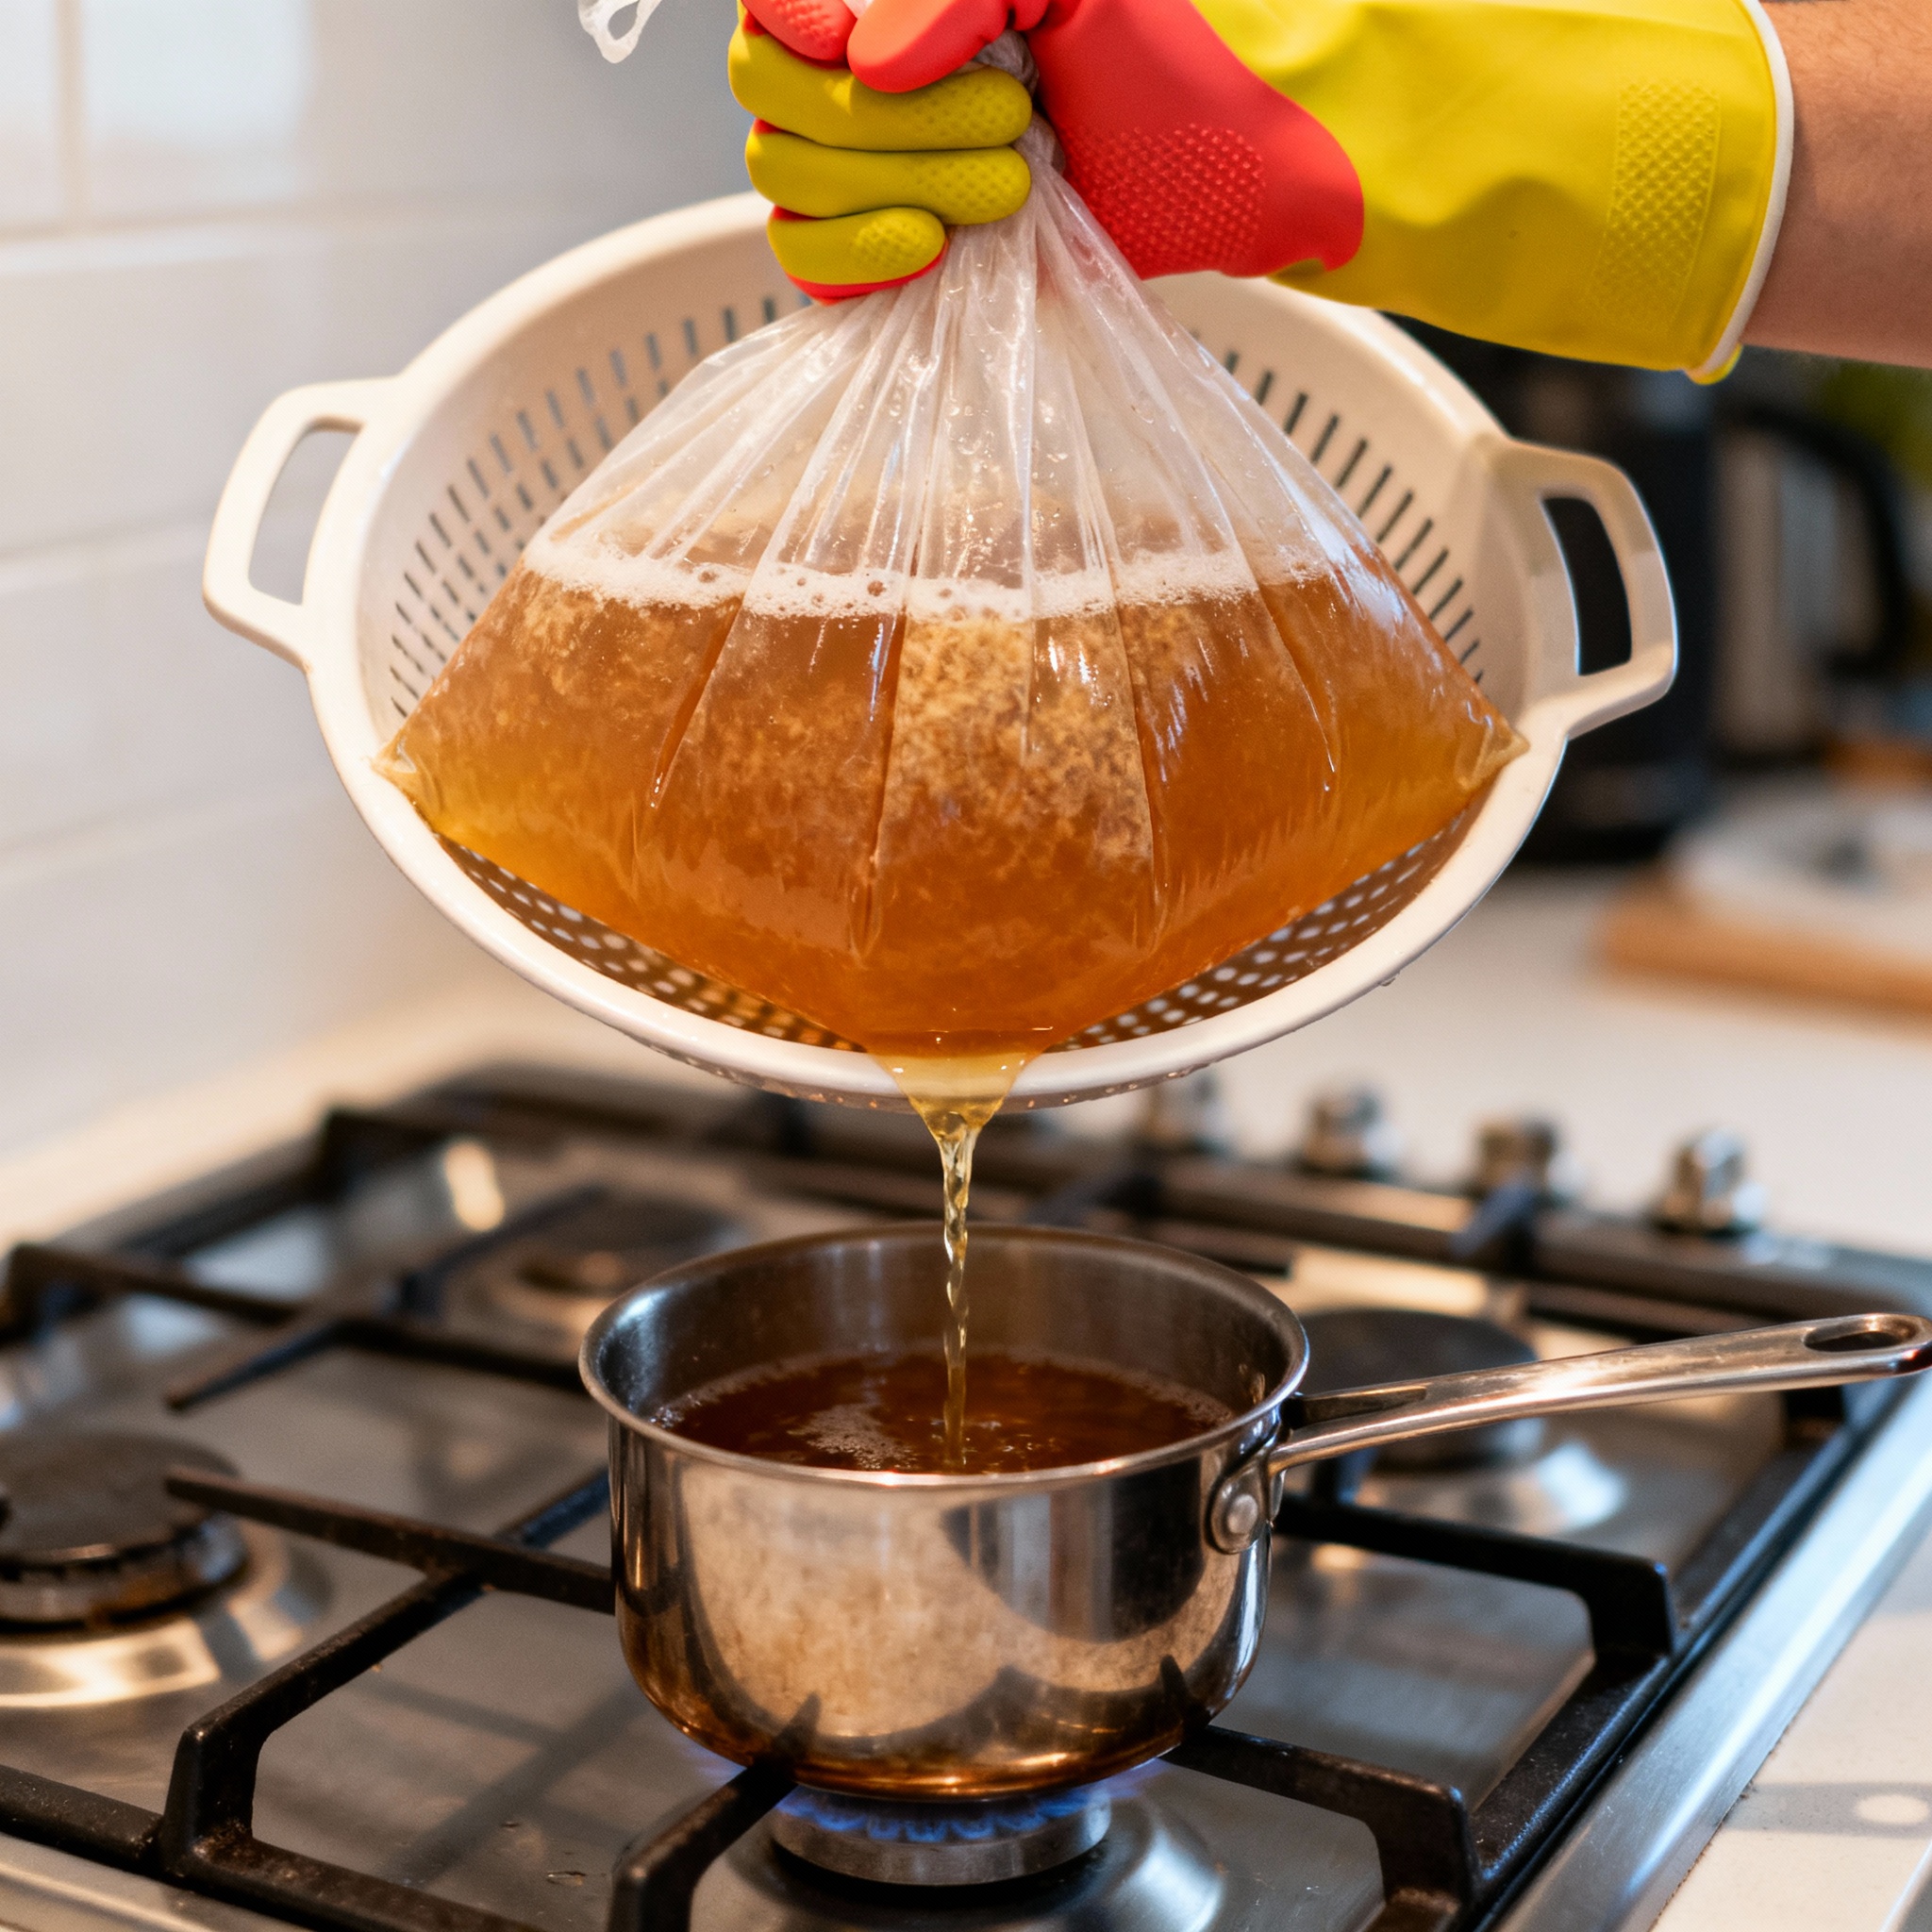
A small mesh bag is necessary for the Brew-in-a-Bag (BIAB) method. I recommend a 2-gallon fabric paint strainer bag from a hardware store because it handles heat better than standard nylon.
Avoid buying pre-assembled 1-gallon kits, though reputable suppliers like Northern Brewer, Brooklyn Brew Shop, and MoreBeer! offer good starting points if you prefer convenience. They are often overpriced and include unnecessary items like tiny hydrometers that are difficult to read. Buy your gear separately to save money and only get what you actually need.
BIAB for Small Batches: One-Pot Efficiency
Brew-in-a-bag (BIAB) simplifies the process by combining the mash tun and boil kettle into one vessel. At this scale, you typically work with about 2.5 pounds of grain, which fits comfortably in a large mesh bag.
Heat 1.5 gallons of water to 160°F so that the temperature drops to a target mash temp of 150°F once the grain is added. Wrap the pot in a blanket to hold the heat for 60 minutes, then pull the bag out and give it a gentle squeeze.
The mash converts complex starches into fermentable sugars over the hour-long steep. The saccharification process is key in BIAB to recover wort, as it does not extract significant tannins at these temperatures.
Once the bag is removed, bring the wort to a boil and start your hop additions. A standard 1-gallon pale ale only needs about 0.6 ounces of hops split between the boil and flameout.
Yeast Pitching: The Danger of Over-Pitching
A standard 11.5-gram packet of dry yeast is meant for 5 gallons; a 1-gallon batch only requires 2 to 2.5 grams. Dumping the whole packet leads to over-pitching, which strips away yeast character and thins the flavor.
I use a kitchen scale to measure exactly 2.3 grams of dry yeast and store the rest in a zip-top bag in the fridge. Properly pitched yeast creates better ester profiles, such as the citrus and peach notes found in healthy ale fermentations.
| Batch Size | Grain Weight | Water Vol | Yeast Pitch |
|---|---|---|---|
| 1 Gallon | ~2.5 lbs | 1.5 gal | 2.3 grams |
| 5 Gallons | ~12.5 lbs | 7.5 gal | 11.5 grams |
Always write the date and remaining weight on your yeast packet with a permanent marker after opening. Dry yeast remains viable for months in the fridge if it is kept cold and tightly sealed.
Cooling: The Ice Bath in the Sink
You do not need an expensive wort chiller for small batches. Move the pot to a sink filled with cold water and approximately 3 pounds of ice to reach pitching temperature in 20 minutes.
Stir the wort every five minutes with a sanitized spoon to move hot liquid toward the cold edges of the pot. This accelerates heat transfer and ensures you aren’t waiting an hour to pitch your yeast.
Once the wort is at 68°F or below, pour it through a sanitized funnel and mesh strainer into the jug. Top off with filtered water if you are short of the 1-gallon mark, pitch your yeast, and seal it with the airlock.
Bottling: Carbonation Drops and Star San
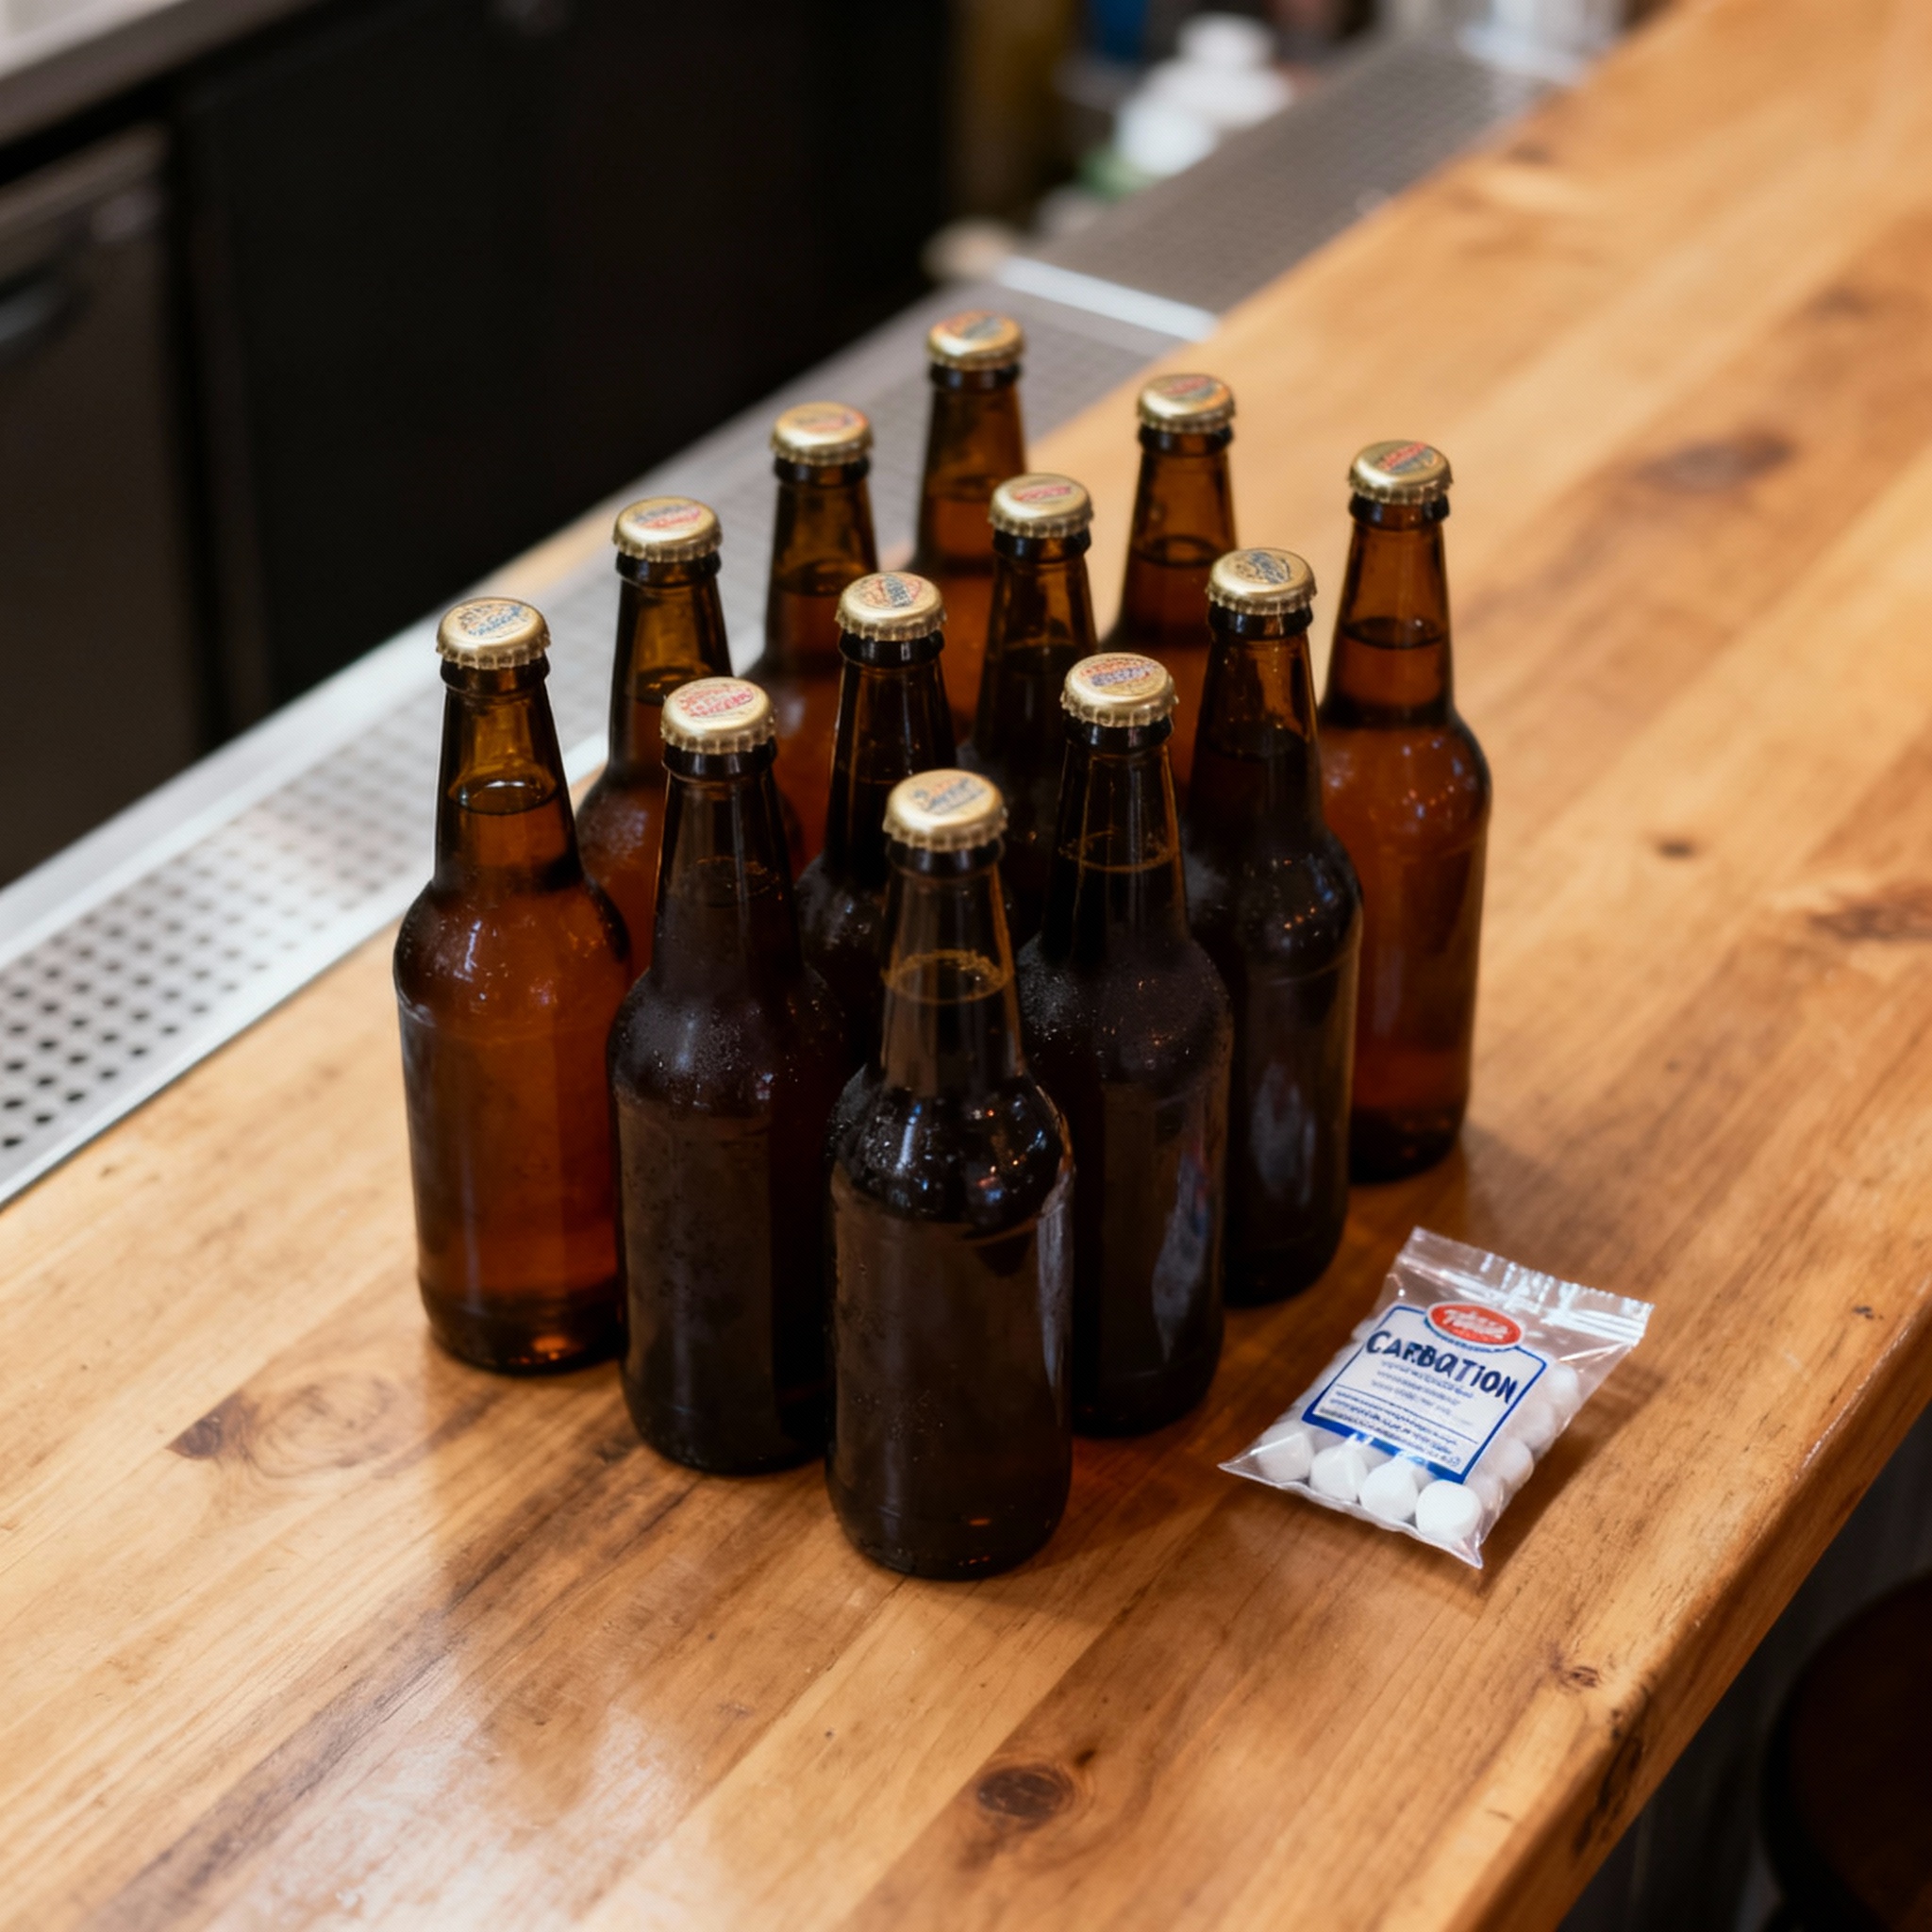
Bottling small batches can make measuring priming sugar difficult, as kitchen scales often struggle with fractions of an ounce. I switched to carbonation drops, which are pre-measured corn sugar tablets that ensure consistent carbonation.
Use one drop per 12-ounce bottle to eliminate math and the risk of over-priming. A 1-gallon batch usually fills eight or nine bottles depending on trub loss.
Label your bottles with masking tape indicating the style and bottling date. When running multiple small experiments, it is easy to confuse a porter with a stout without clear markings.
Store the capped bottles at room temperature for two weeks to allow the yeast to carbonate the beer. After two weeks, move them to the fridge to cold-condition for a few days before your first taste.
Conclusion
Small-batch brewing is a distinct approach that values rapid iteration and variety over sheer volume. It allows you to brew more styles and test more techniques without filling your home with heavy equipment or carboys.
Whether you live in a small apartment or want to explore twenty different styles on a budget, the 1-gallon lab is the best way to start. By keeping costs low and the process simple, you can focus on mastering the art of fermentation.
References
- Palmers, J. (2017). How to Brew: Everything You Need to Know to Brew Great Beer Every Time (4th ed.). Brewers Publications.
- White, C., & Zainasheff, J. (2010). Yeast: The Practical Guide to Beer Fermentation. Brewers Publications.