Mastering Fermentation Temperature: Inkbirds, Fridges, and Glycol.
I killed a batch of saison last summer because I got cocky. The forecast said 72°F, so I figured the basement would hold steady.
What I forgot was that my fermenter sits right under a heating duct. By day three, the yeast had climbed to 88°F and threw out enough phenols to make the beer taste like a band-aid soaked in diesel.
I dumped five gallons down the drain and spent the next weekend building a temperature chamber out of a chest freezer I found on Craigslist for sixty bucks. That was four years ago.
Since then, I have not lost a single batch to temperature swings. The difference is not magic; it is stability.
Yeast do not care if you ferment at 65°F or 75°F, as long as you stay there. What kills them is the daily roller coaster from cold mornings to hot afternoons.
Wild swings stress the cells, stall fermentation, and produce off-flavors that no amount of dry-hopping can cover up. This guide walks you through three tiers of temperature control, from the budget build to professional glycol chillers.
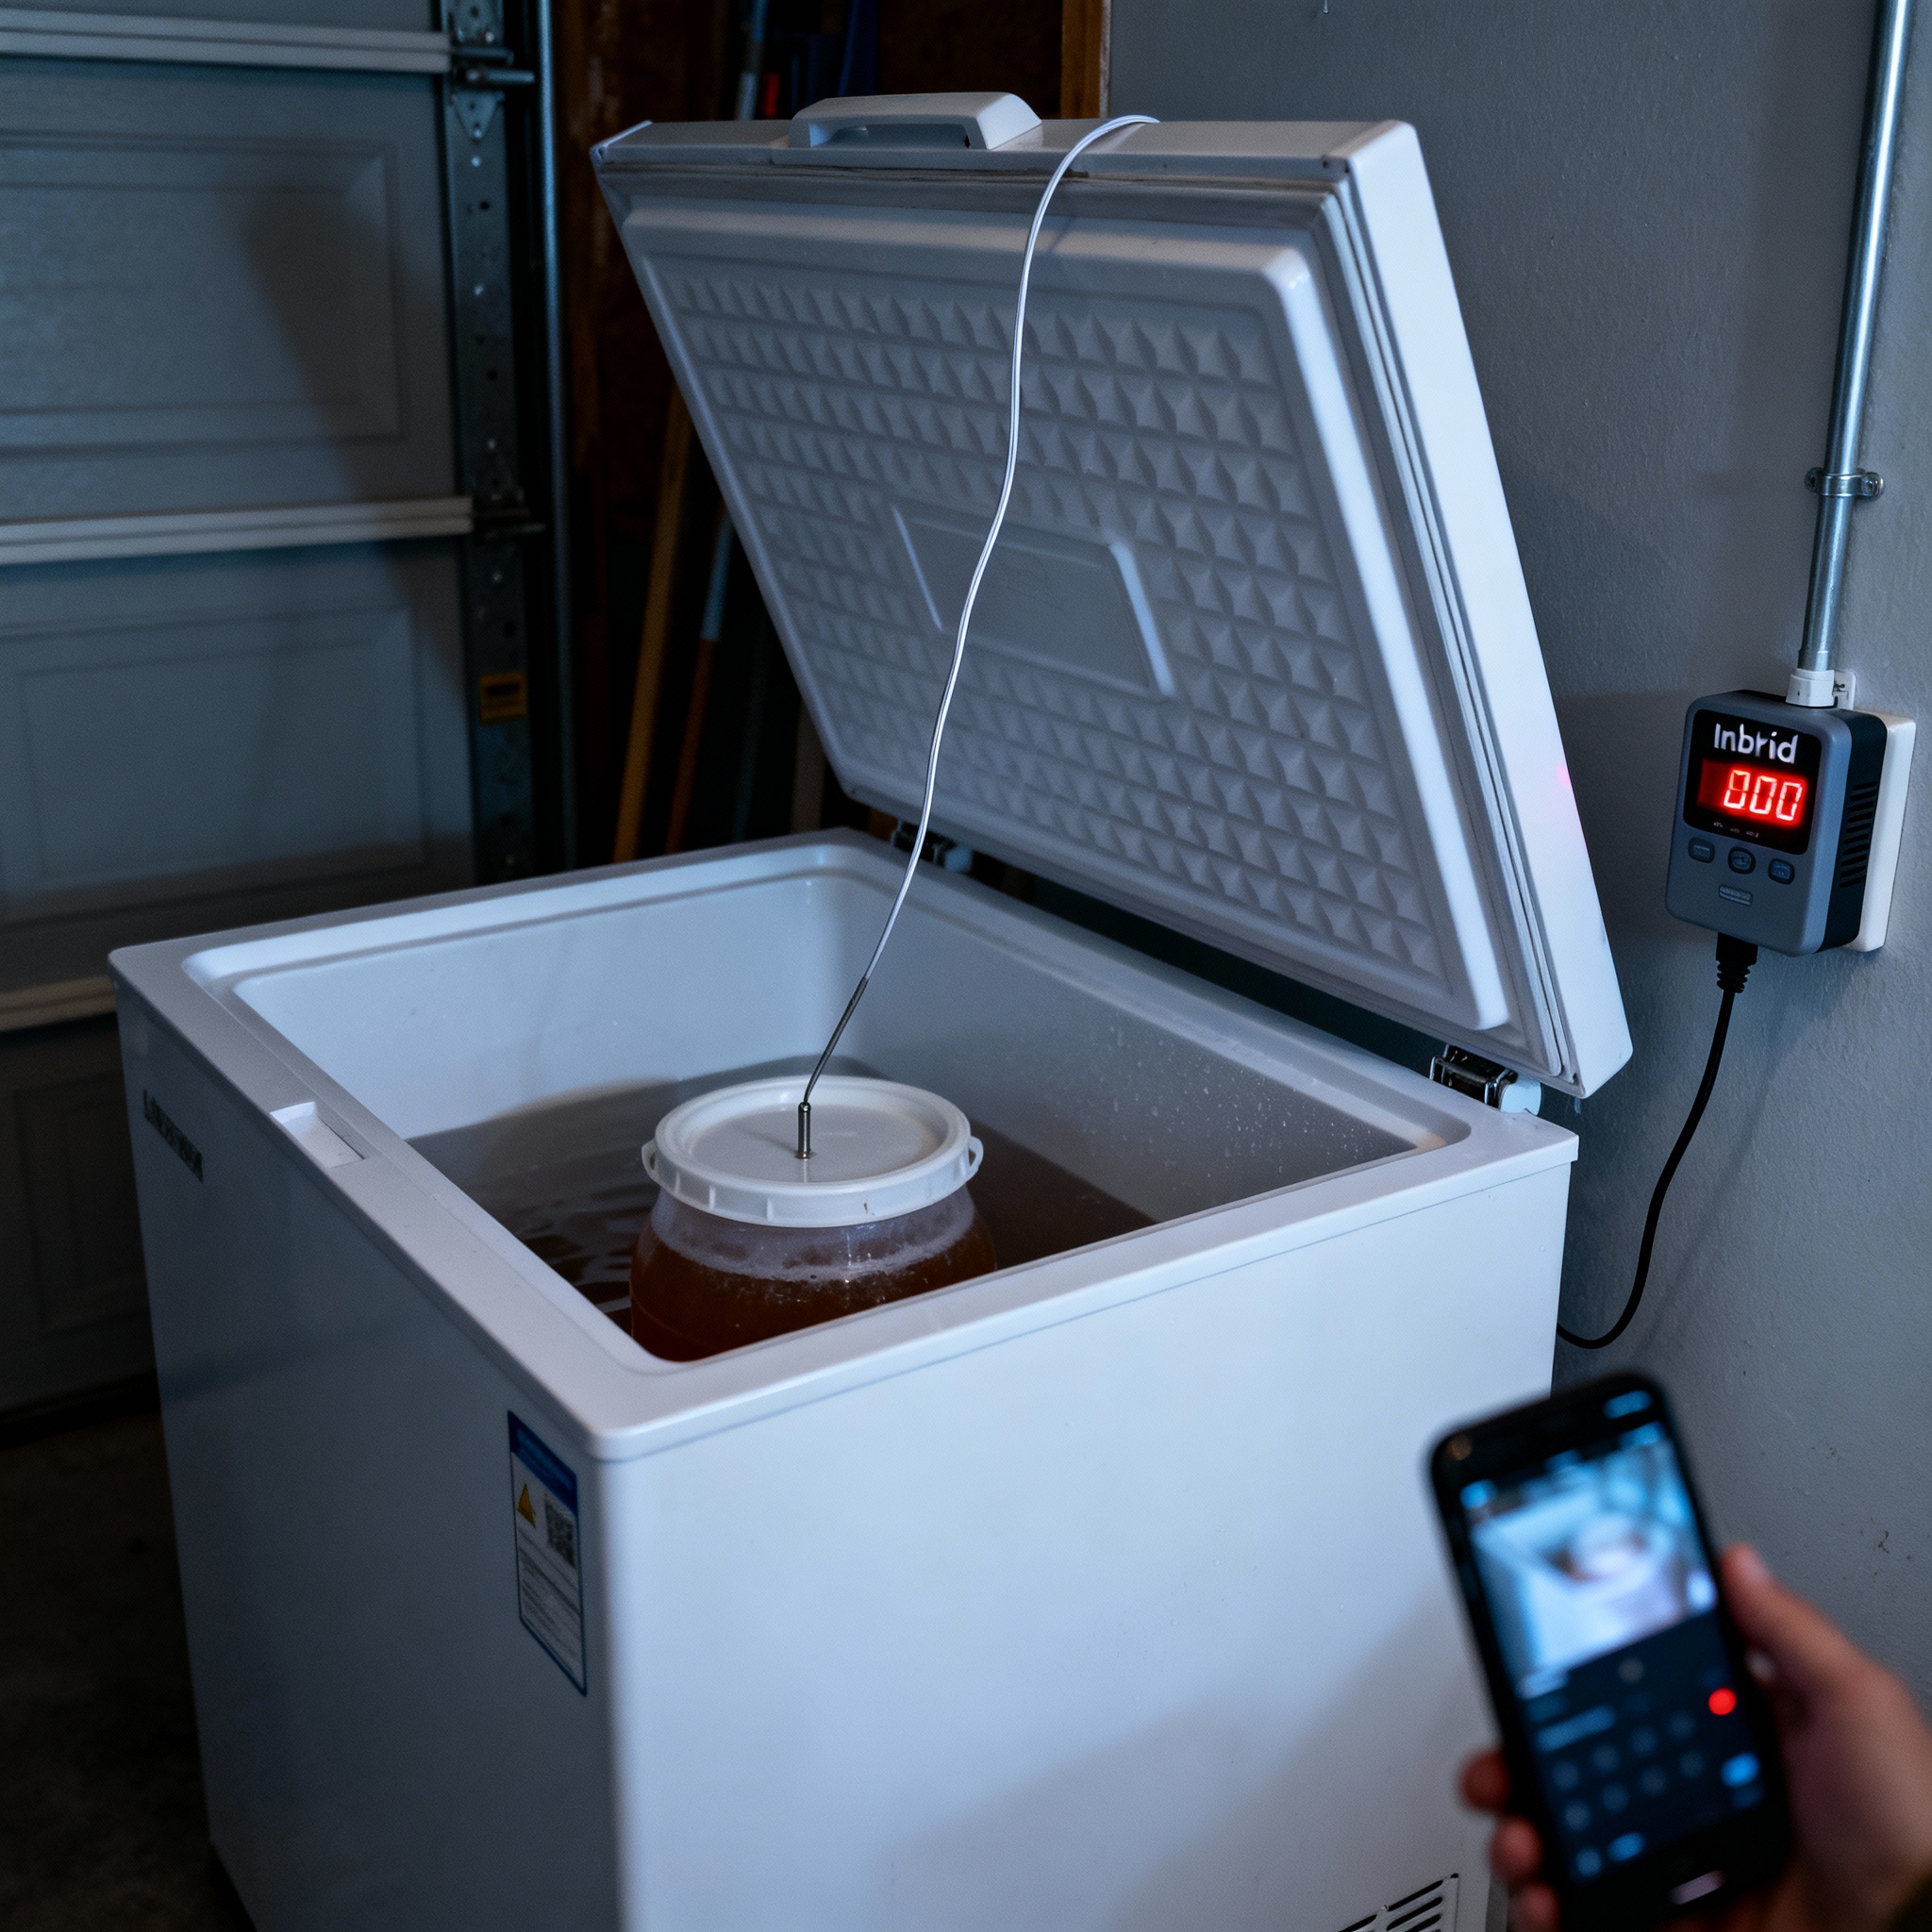
The Chest Freezer Build (The Keezer Method)
The cheapest way to control fermentation temperature is to turn a chest freezer into a fermentation chamber. You do not need to buy a new one; I have seen working units on Facebook Marketplace for as low as forty dollars.
The key is finding one that still cools but does not have a working thermostat (or at least one you are willing to bypass). A chest freezer naturally wants to run at -10°F to 0°F.
That is way too cold for yeast, which need to stay between 55°F and 75°F depending on the strain. So you plug the freezer into an external temperature controller like the Inkbird ITC-308.
The controller cuts power when the chamber hits your target. The freezer cools until the Inkbird says stop, then sits idle until the temperature drifts back up.
I use an Inkbird because it is cheap, waterproof, and has both a cooling and heating output. That second plug is critical if you live somewhere with real winters.
You can plug a small space heater or heat wrap into the heating side, and the Inkbird will toggle between them. I have kept batches at 68°F inside a freezer sitting in a 40°F garage in January.
A 5 cubic foot model will hold one 6.5-gallon carboy or two 3-gallon fermenters. A 7 cubic foot model gives you room for three carboys plus a small fan to circulate air.
The build itself takes about ten minutes. Drill a small hole in the side of the freezer or snake the probe through the drain plug.
Run the Inkbird’s temperature probe inside and plug the freezer into the cooling outlet. Set your target temperature and you are done.
Do not buy a frost-free freezer. They cycle on and off aggressively to prevent ice buildup, which messes with your temperature stability. You want a manual defrost model.
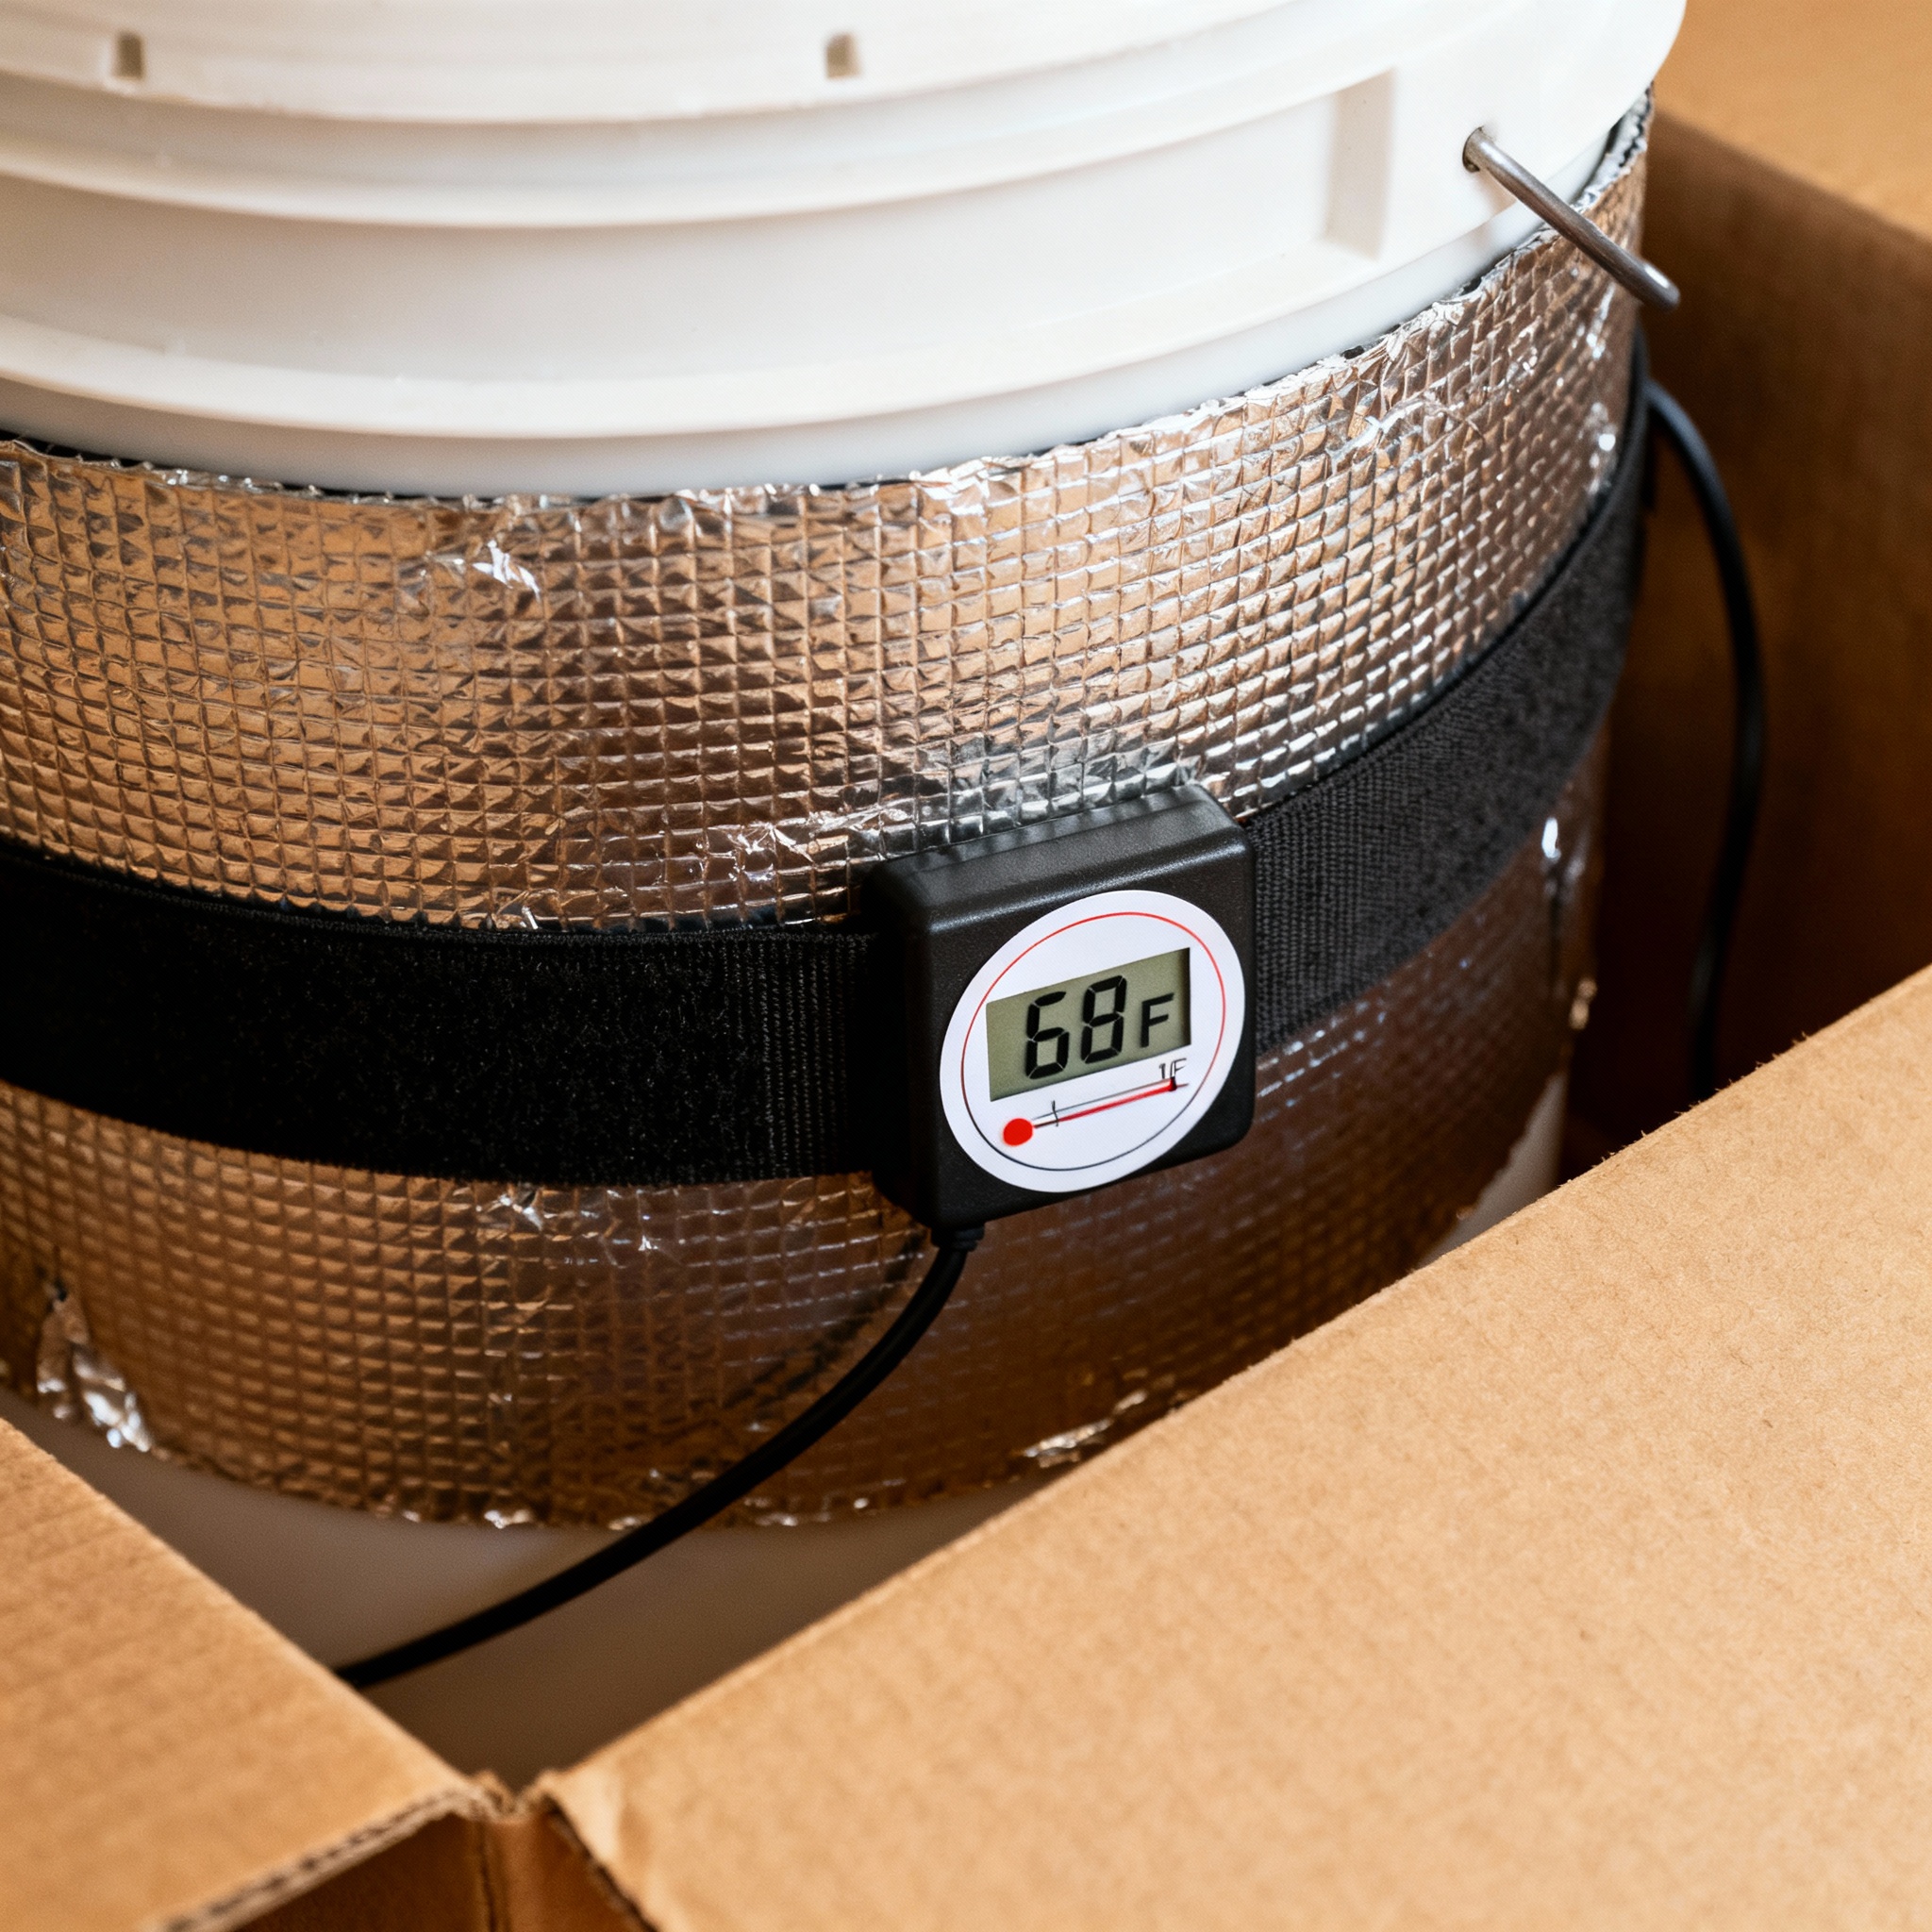
Probe Placement (Tape It to the Fermenter)
This is where most people screw up. They hang the temperature probe in the air inside the chamber and assume that tells them what the beer is doing.
It does not. Air temperature swings fast, while liquid temperature changes slowly.
If your probe is measuring air, the controller will overshoot and undershoot constantly. Your yeast will ride a sine wave all week.
The right way is to tape the probe directly to the side of your fermenter. I use a small square of bubble wrap or a folded dish towel as insulation, then duct tape the probe on top of that.
The insulation prevents the probe from reading the air temperature around the fermenter. What you get instead is a reading that closely matches the liquid inside.
I tested this with a separate thermowell probe stuck directly into a batch of pale ale. The difference between the taped probe (insulated) and the thermowell was less than 1°F.
The difference between the taped probe and a probe hanging in the air was as much as 6°F during active fermentation. Yeast generate heat.
If you are only measuring air, you will think the beer is at 65°F when it is actually at 71°F inside. Some people skip the insulation and just tape the probe directly to the plastic.
That works okay if your chamber is stable, but it can read low when the compressor kicks on and cold air blows across the fermenter wall. If you are fermenting multiple batches, tape the probe to the most active fermenter.
That is usually the one that was pitched most recently. It will be generating the most heat, so it is the one you need to watch.
During the growth and stationary phases of yeast metabolism, the conversion of sugar into ethanol and CO2 is an exothermic reaction. A standard 5-gallon batch can generate enough internal heat to raise the liquid temperature 5°F to 10°F above the surrounding ambient air.
Use aluminum tape instead of duct tape if you have it. Aluminum conducts heat better, so the probe equalizes faster with the fermenter wall.
Heating in Winter (Heat Wraps and Seed Mats)
Cooling is easy, but heating is harder because you need a safe source that fits inside the chamber. I have tried three methods.
Seed mats are the rubber heating pads sold at garden centers for starting seedlings. They run at about 10 to 20 watts and put out gentle, even heat.
I use a mat under a 3-gallon fermenter, and it holds 68°F inside a freezer sitting in a 35°F garage. The mat never gets hot enough to stress the yeast, even if the controller fails.
Heat wraps are silicone belts that strap around a carboy. I like the FermWrap brand, which puts out 40 watts.
This is enough to heat a 6-gallon batch in a cold chamber. The problem is that heat wraps create a hot spot on one side of the fermenter.
I fix this by running a small USB fan inside the chamber to circulate air. It evens out the temperature and prevents the yeast from clustering on the warm side.
Lightbulbs are the old-school method, where you stick a 40-watt incandescent bulb inside the chamber. I tried this once and hated it.
The bulb creates a single hot point and can crack if you splash water on it. Now I plug the Inkbird itself into a surge protector, but I run the freezer and heater on separate breakers if possible.
If you are using a heat wrap, rotate your fermenter 180 degrees halfway through fermentation. It evens out the temperature gradient and prevents the yeast from getting lazy on the cold side.
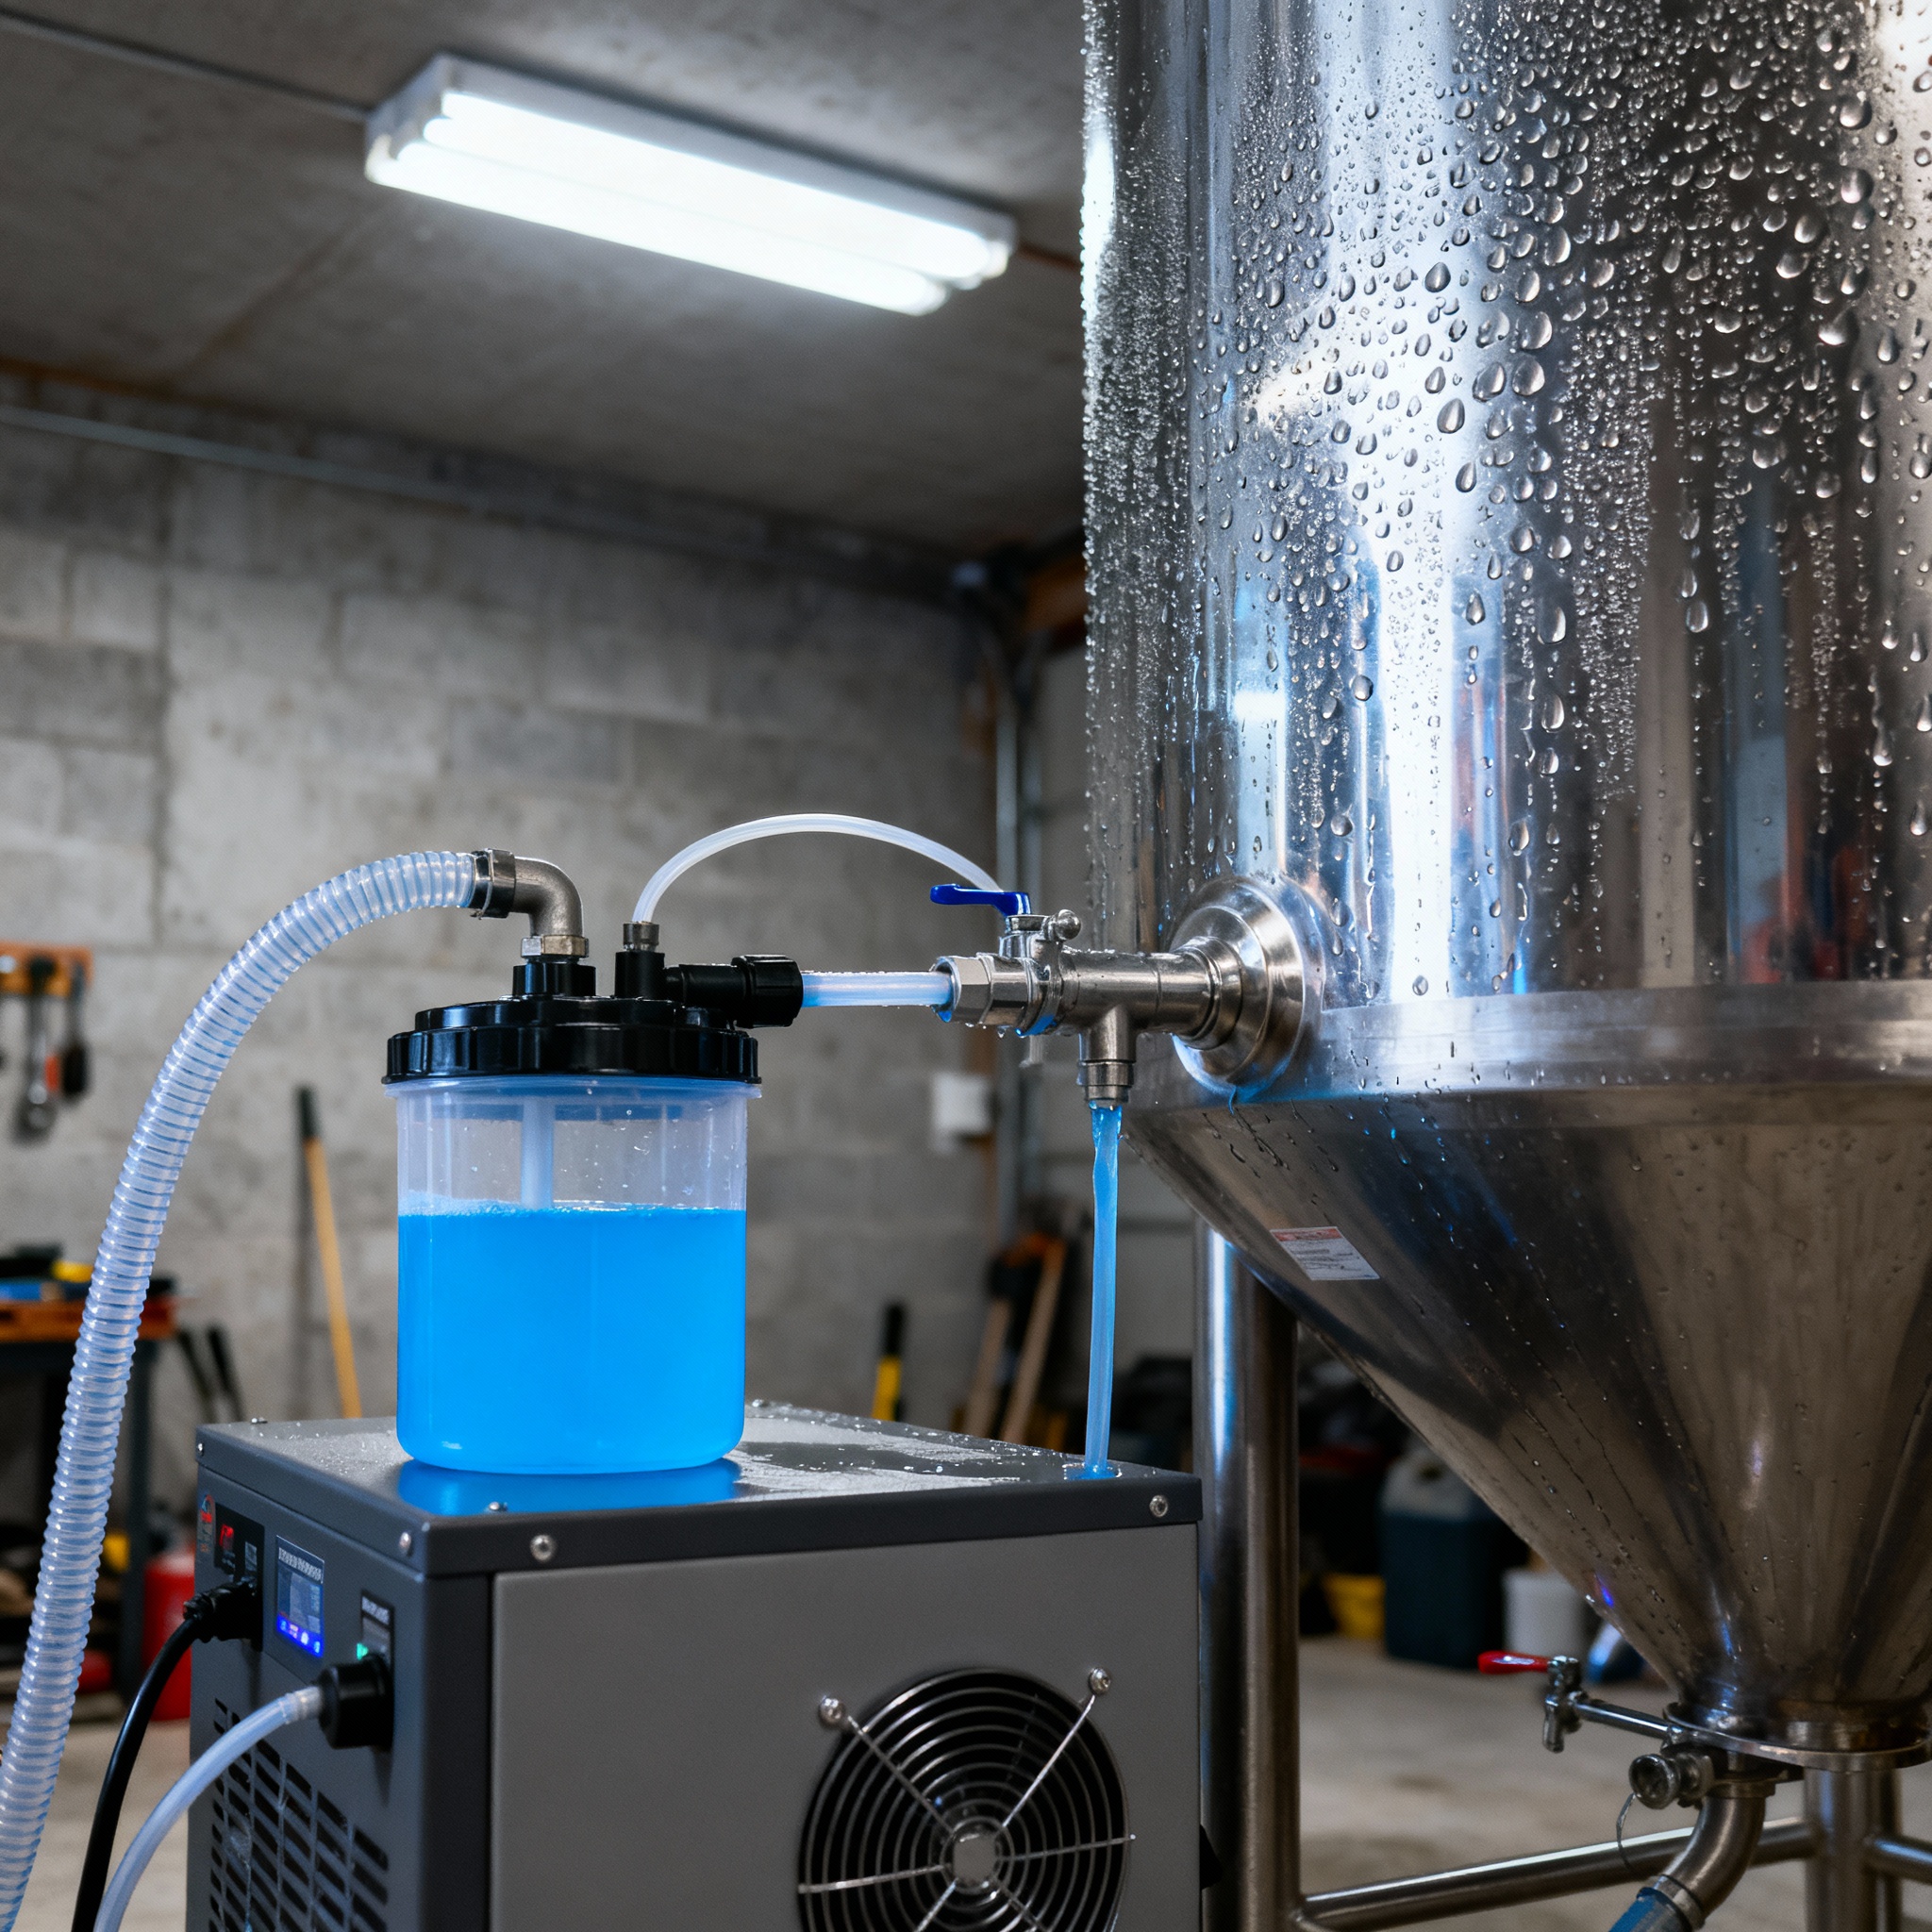
Glycol Chillers (The Pro-Tier Upgrade)
Glycol chillers are the endgame. They are what professional breweries use to cool multiple fermenters at once without needing a walk-in cooler.
The system pumps cold glycol through coils inside each fermenter, pulling heat out of the liquid directly. Companies like SS Brewtech allow you to ferment at 34°F for a lager in one tank and 72°F for a saison in another, all controlled independently.
I do not own a glycol chiller yet. They start around eight hundred dollars for a small single-tap unit.
The big advantage over a chest freezer is space. A freezer can only hold a few fermenters, but a glycol chiller can run coils to many fermenters scattered around.
The downside is complexity; you need to run insulated glycol lines and maintain the reservoir. There is also a middle option: the immersion chiller method.
You build your own loop using a small aquarium chiller and pump the cold glycol through stainless coils. Total cost is around three hundred dollars if you source parts yourself.
The temperature control is almost as good as a commercial unit. If I ever scale up to running six or more fermenters at once, I will probably build the DIY glycol loop.
If you go the glycol route, use propylene glycol instead of ethylene glycol. Propylene is food-safe and less toxic if you spring a leak into your beer.
Hysteresis Settings (Protecting Your Compressor)
Hysteresis is the delay between when your controller stops cooling and when it allows the compressor to start again. If you do not set this correctly, you will burn out your freezer in six months.
Compressors hate short cycling. They need time to equalize pressure before restarting.
The Inkbird ITC-308 has two hysteresis settings. The first is “differential,” which is the temperature swing allowed before the cooling kicks in.
The second is “compressor delay,” which is the minimum time the compressor must stay off. I run a 1°F differential and a 3-minute delay.
This means the freezer will not turn on until the chamber hits 69°F (if set to 68°F). Once it turns off, it cannot turn back on for at least three minutes.
This setup gives me about one cooling cycle per hour during active fermentation. That is gentle enough to avoid stressing the compressor but fast enough to prevent swings.
If you set the differential too tight (like 0.5°F), the controller will short cycle because the freezer cannot respond that fast. I tested this once and counted eighteen compressor starts in one hour; that is a death sentence for any freezer.
I aim for 1°F to 1.5°F as a sweet spot. The compressor delay should never be shorter than two minutes.
My chest freezer holds temperature for about ninety minutes after the compressor shuts off, so a three-minute delay has never caused a problem.
If you hear your freezer compressor clicking on and off rapidly, stop using it immediately and check your settings. Short cycling will kill the compressor quickly.
Wrapping It Up
Temperature control is not optional if you care about consistency. I have brewed batches in the summer heat and in a dialed-in chest freezer; the difference is not subtle.
The uncontrolled batch tastes like a different beer. Hot fermentation pushes out esters and fusel alcohols that were not supposed to be there.
Cold fermentation stalls out and leaves residual sweetness. The recipe does not matter if the yeast are not doing what you expect.
The chest freezer build is where I recommend most people start. It costs less than a hundred dollars, and the Inkbird controller works for years without failing.
If you are fermenting more than three batches at a time, glycol is worth researching. But you do not need it to make great beer.
I still check my Inkbird every morning before work. I look at the readout, make sure it is holding setpoint, and move on.
That thirty-second habit has saved more batches than I can count. Yeast are predictable if you give them what they need, and temperature stability is ninety percent of that.
Temperature Control Comparison Table
| Method | Cost | Temp Range | Capacity | Accuracy | Best For |
|---|---|---|---|---|---|
| Chest Freezer + Inkbird | 100 | 35°F-75°F | 1-3 fermenters | ±1°F | Homebrewers, tight budgets |
| Heat Wrap (winter) | 40 | 55°F-75°F | 1 fermenter | ±2°F | Cold garages, ales only |
| Glycol (commercial) | 3k | 34°F-75°F | 1-20 fermenters | ±0.5°F | Scaling up, lagers, precision |
| DIY Glycol Loop | 400 | 34°F-75°F | 1-6 fermenters | ±1°F | Hobbyists with fab skills |
Inkbird ITC-308 Recommended Settings
| Parameter | Recommended Value | Notes |
|---|---|---|
| Differential | 1.0°F-1.5°F | Prevents short cycling while keeping temps stable |
| Compressor Delay | 3 minutes | Protects freezer compressor from overheating |
| Heating Differential | 1.0°F-2.0°F | Can be slightly wider than cooling differential |
| Alarm High/Low | ±5°F from setpoint | Alerts you if system fails or door is left open |
References
- Palmer, J., & Kaminski, C. (2013). Water: A Comprehensive Guide for Brewers. Brewers Publications.
- White, C., & Zainasheff, J. (2010). Yeast: The Practical Guide to Beer Fermentation. Brewers Publications.