Yeast Banking: Slants, Glycerin, and Long-Term Storage.
I bought the same packet of Safale US-05 eleven times in two years before I got angry enough to do something about it. Each packet cost me seven dollars.
That’s seventy-seven dollars on yeast that is genetically identical, shipped from the same facility, because I kept forgetting to save a sample after each brew. I felt stupid.
I work with data. I know repetition means inefficiency. So I stopped repeating myself.
Yeast banking is not complicated; it is precise. The difference matters.
You are not performing gene therapy. You are putting living cells to sleep in a way that lets you wake them up later without damage.
The method has been standard in microbiology labs since the 1950s, and home brewers have been doing it since the 1980s. The equipment is cheap and the results last years.
This guide will walk you through three storage methods: agar slants, glycerin stocks, and plate streaking. If you brew more than twice a year, this will save you money and give you control over your yeast genetics.
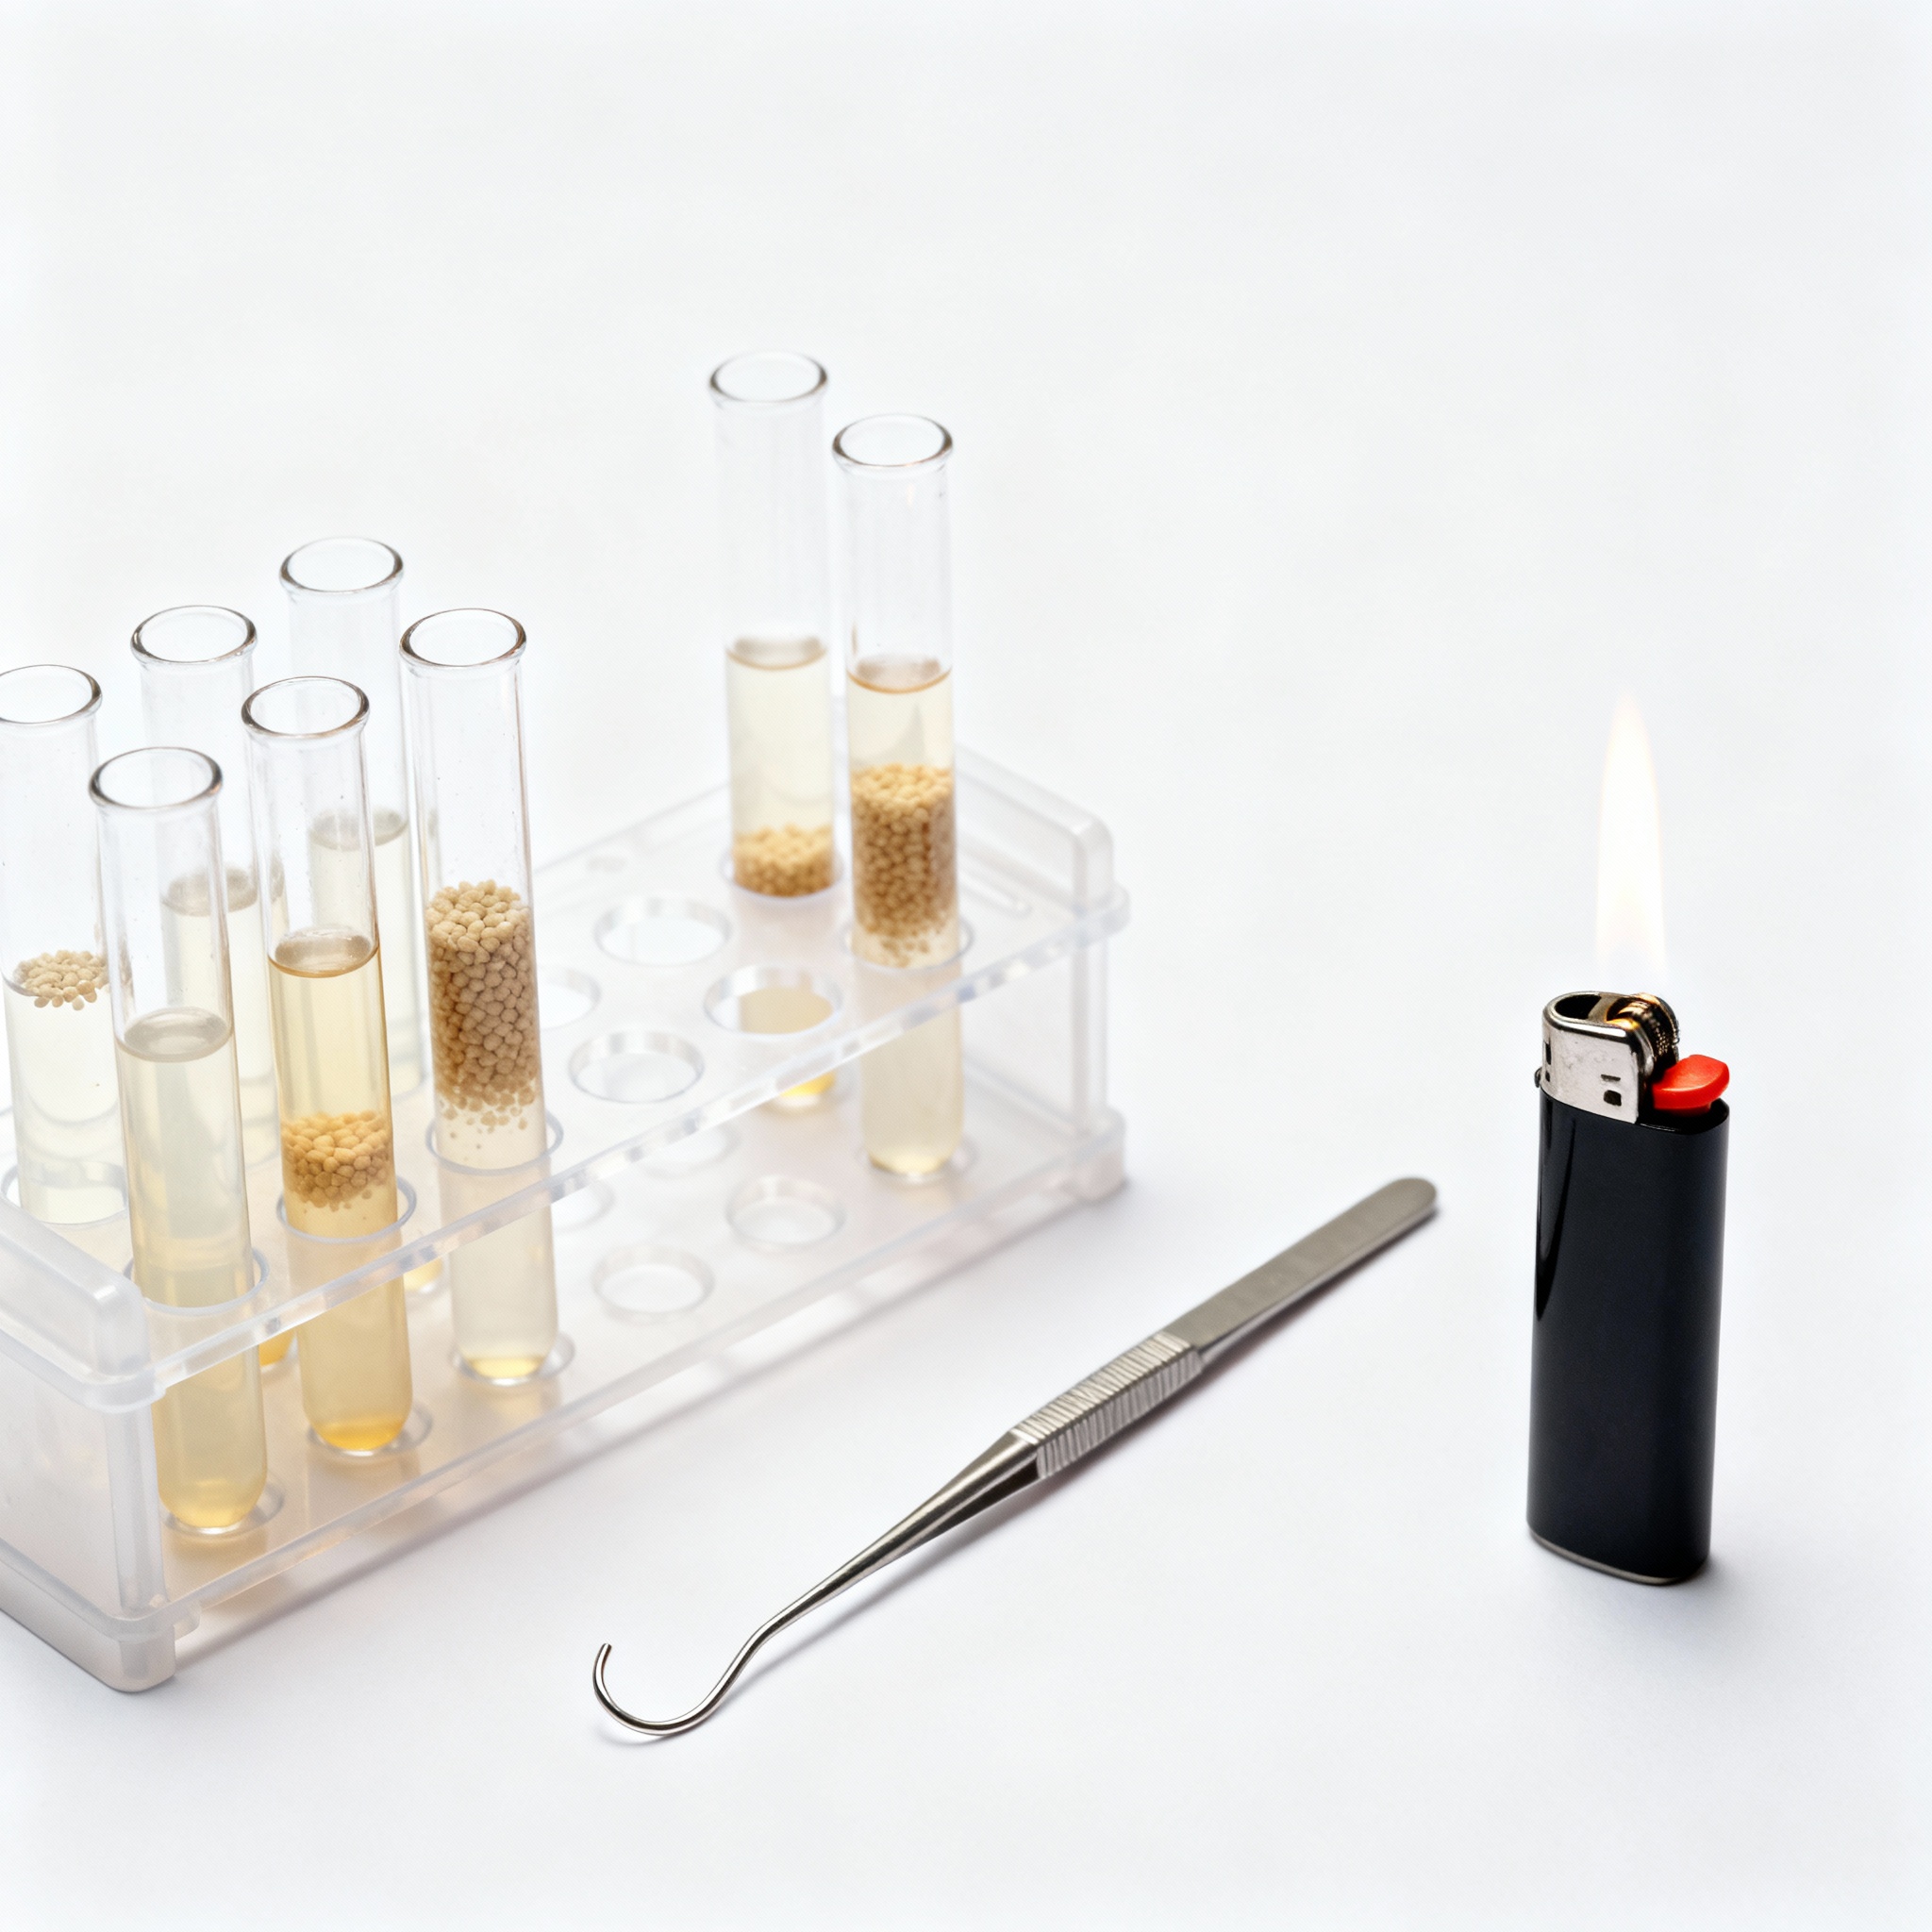
The Equipment
You do not need an autoclave. I used a pressure cooker for three years before I bought a countertop autoclave, and I never had a contamination issue that mattered.
A pressure cooker reaches 15 PSI, which is roughly 121°C. That is enough to sterilize agar, test tubes, and metal loops.
Sterilization at 121°C (15 PSI) for 15-20 minutes is the industry standard for killing heat-resistant bacterial spores. This ensures your yeast cultures remain pure and free from competitive spoilage organisms.
My kit includes borosilicate test tubes, agar powder, malt extract, glycerin, and inoculation loops. I also use Petri dishes and a small gram scale to measure ingredients accurately.
I keep an alcohol lamp for sterilization. The lamp runs on denatured alcohol and gives me a flame to sterilize my loop between streaks.
The total cost was under two hundred dollars, spread over two years. I started with a pressure cooker I already owned and added specialized glassware later.
Buy your glassware used. University labs rotate out old test tubes every few years and sell them in bulk online. Just ensure it is borosilicate and not soda-lime glass.

Making Slants
A slant is a test tube filled with agar that has been tilted while it cools so the agar solidifies at an angle. The angled surface gives you more area to streak yeast without using a full petri dish.
Slants live in the fridge. They are your short-term bank, typically staying viable for six to twelve months.
To make slants, I use a ratio of 10 grams of agar, 10 grams of dried malt extract, and 500 milliliters of water. This creates a firm surface where yeast can grow without bacteria outcompeting them.
Mix the media in a heat-safe bottle with a loose cap and sterilize it in the pressure cooker at 15 PSI for 15 minutes. Let it cool naturally so the agar does not boil over.
Pour the agar into test tubes, fill them one-third full, and sterilize them again. While the agar is still liquid, tilt the tubes on a block of wood so they set at an angle.
If you see condensation pooling at the bottom of the slant after it cools, do not worry. Just ensure you do not let the liquid run over your yeast streak when you inoculate it.
Glycerin Freezing
Glycerin stocks are the long game for your freezer. The glycerin prevents ice crystals from forming inside the yeast cells, which would otherwise rupture the membranes and kill them.
The standard ratio is 50 percent glycerin and 50 percent yeast slurry by volume. I use 2-milliliter screw-cap cryovials to store these samples.
To harvest yeast, I take a sample from an active fermentation during high krausen. Let it settle in a sanitized jar so the trub sinks, then pour off the healthy middle layer for storage.
Glycerin acts as a cryoprotectant by lowering the freezing point of water and preventing the formation of sharp ice crystals. This process keeps the internal structure of the yeast cell intact during sub-zero storage.
Mix the glycerin and yeast in the vial and gently invert it to combine. Do not use a frost-free freezer if possible, as freeze-thaw cycles can damage the cells over time.
I have revived yeast from glycerin stocks that were frozen for three years. The lag time was longer, but the yeast was perfectly healthy once it woke up.
Make duplicates. I always freeze at least two vials of every strain because freezers can fail. If you keep backups in a second location, you won’t lose your entire library to a power outage.
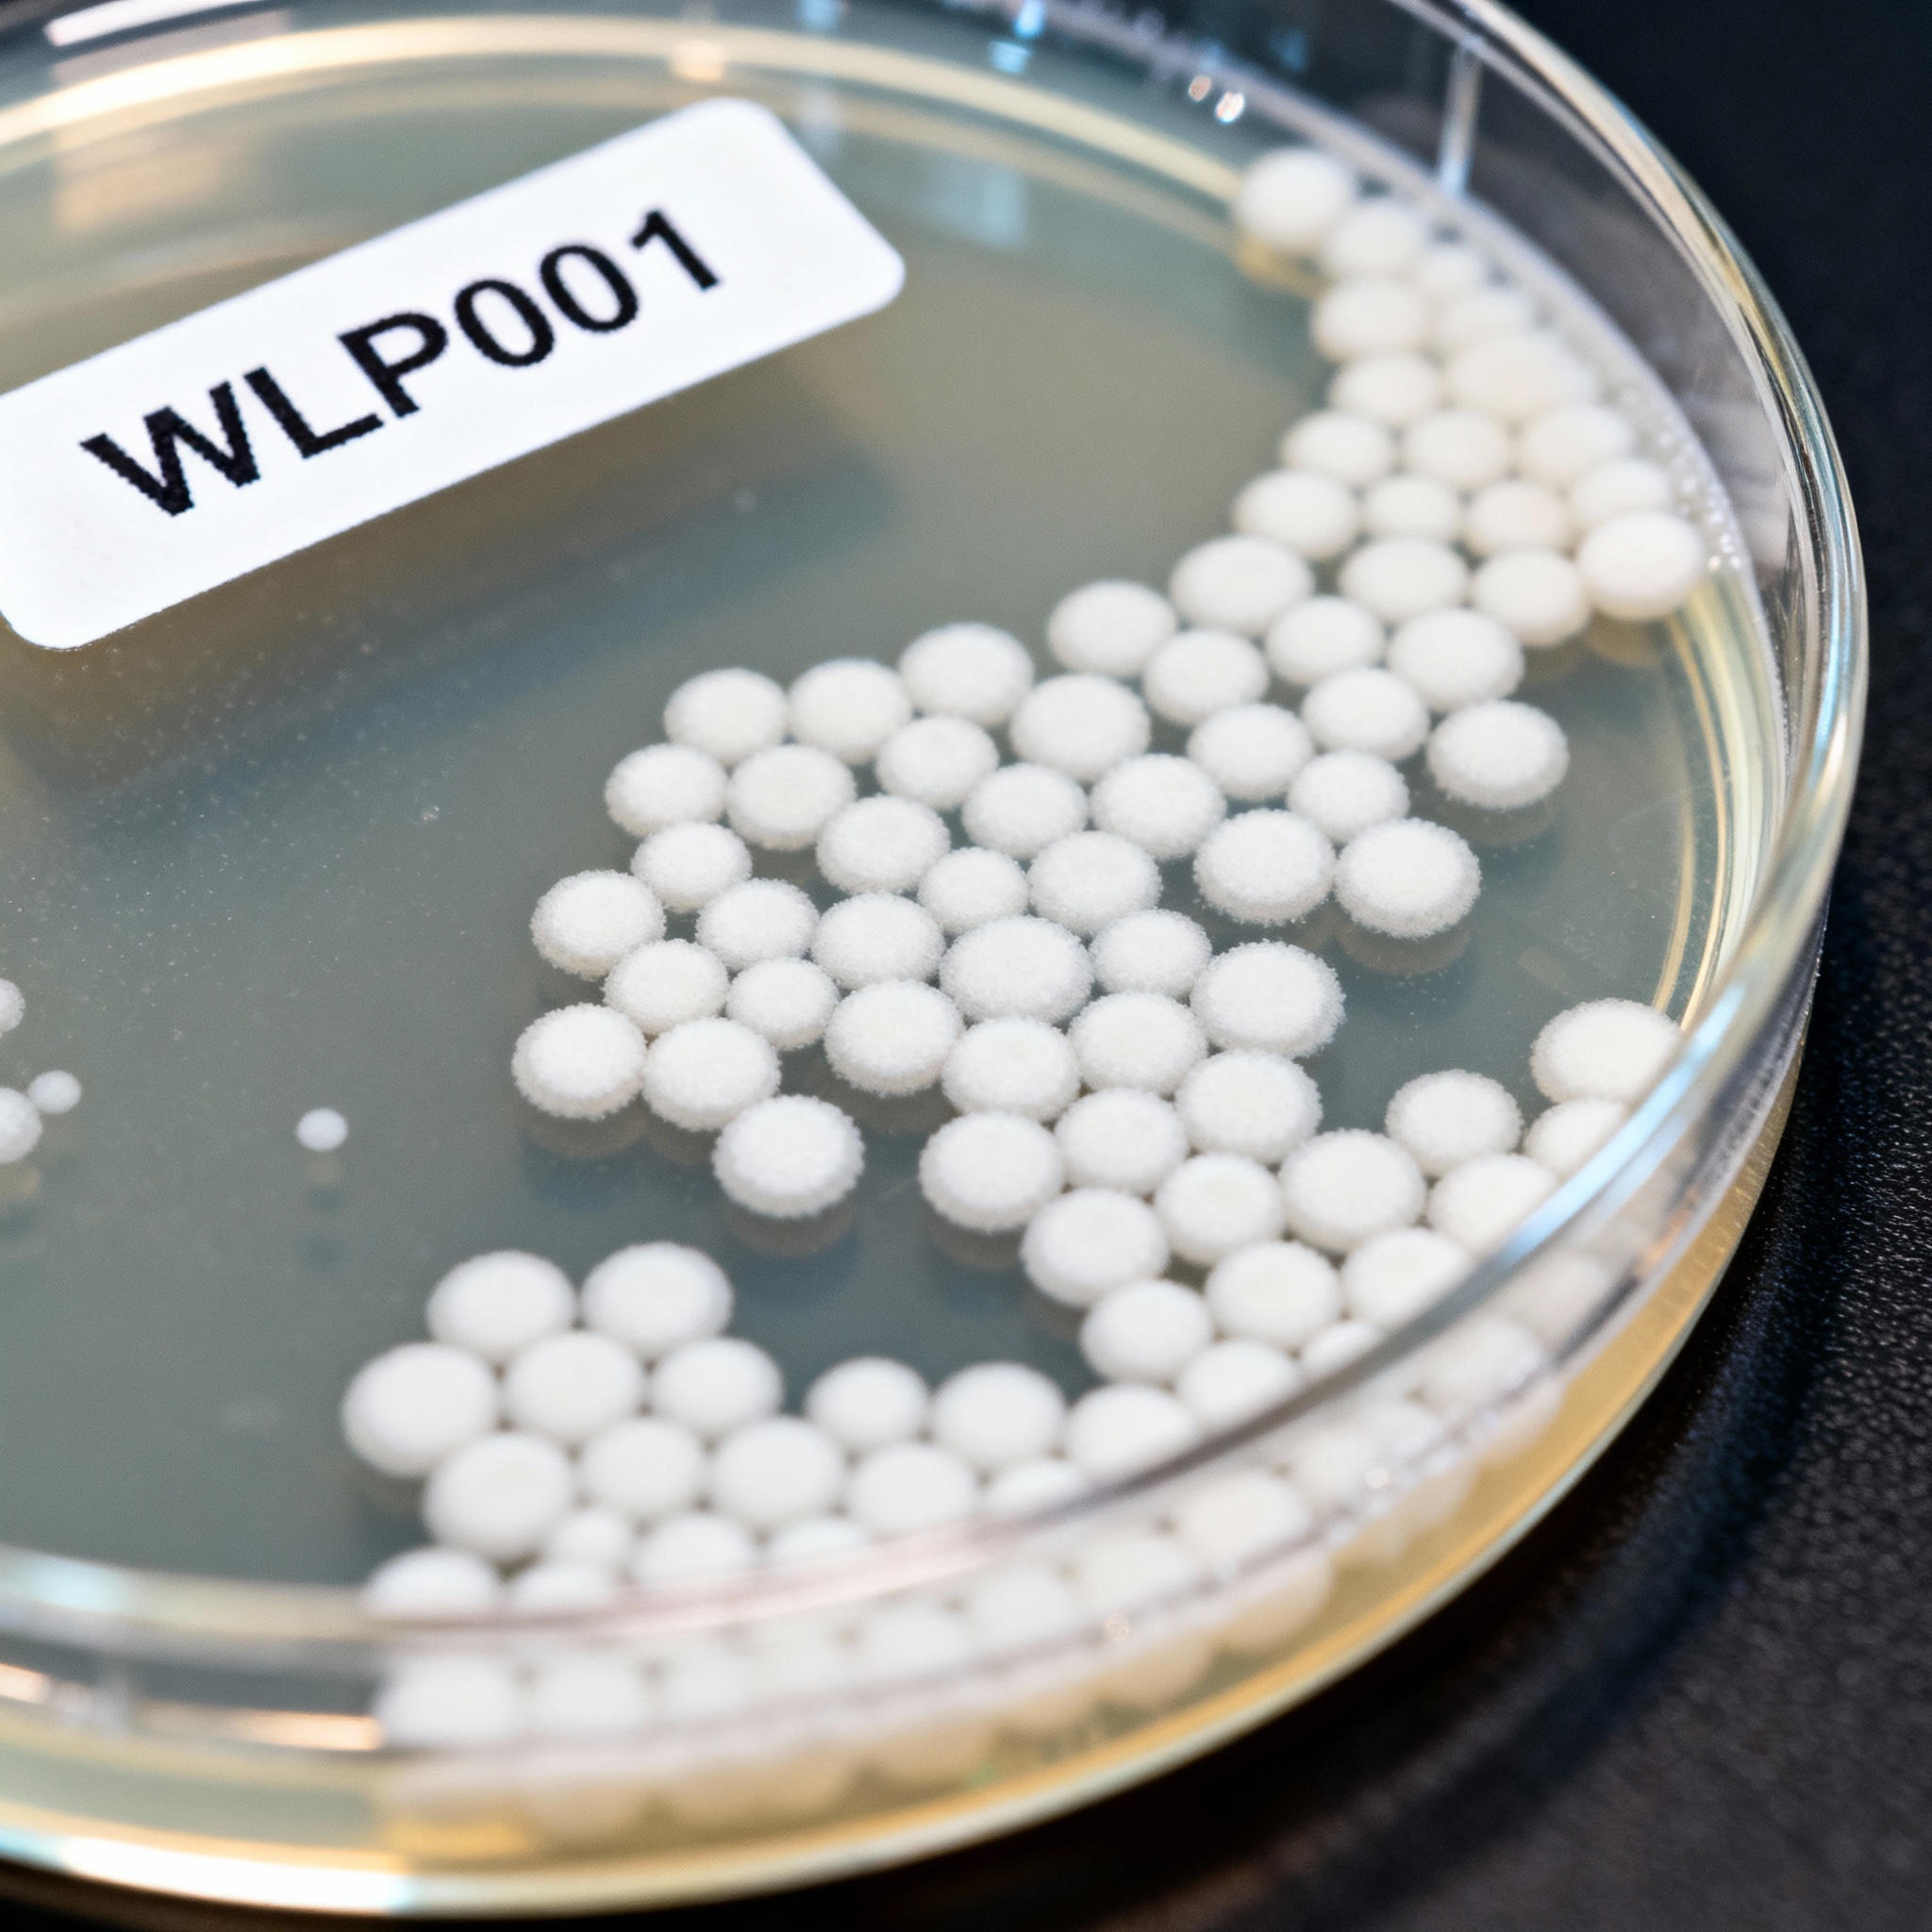
Streaking Plates
Streaking is how you isolate a single colony from a mixed population. When you harvest from a fermenter, you are almost never getting a pure culture.
Prepare Petri dishes with the same agar media used for slants. Once the agar is solid, you can use them to isolate clean yeast colonies from bacteria or wild strains.
To streak a plate, touch a sterile loop to your sample and drag it in a zigzag pattern across the agar. Sterilize the loop again and drag it from the end of the first section into a new area.
Repeat this three times to dilute the yeast. By the third section, the cells should be spread thin enough to form separate, individual colonies.
Work near the flame. The rising heat from an alcohol lamp creates an updraft that pushes airborne contaminants away from your work area.
Reviving Frozen Yeast
Frozen yeast does not wake up instantly. You cannot pull a vial from the freezer and dump it into five gallons of wort.
Thaw the vial at room temperature and transfer the contents into 10 milliliters of sterile starter wort. I make this by pressure cooking 10 grams of DME in 100 milliliters of water.
Step the yeast up gradually over several days. Move from 10 milliliters to 100 milliliters, then to 1 liter as activity increases.
Healthy yeast should smell like bread dough or beer. If it smells like sulfur, vinegar, or rotting fruit, something went wrong and you should toss the starter.
Write the weight and date on the yeast packet with a marker after you open it. Labeling takes five seconds and saves you from guessing generations or cell counts later.
Storage Method Comparison
| Method | Storage Time | Equipment Needed | Temperature |
|---|---|---|---|
| Agar Slants | 6-12 Months | Test tubes, Agar, Pressure Cooker | 2°C to 4°C |
| Glycerin Stocks | 2-5+ Years | Cryovials, Glycerin, Freezer | -20°C or colder |
| Plate Streaking | 2-4 Weeks | Petri Dishes, Inoculation Loop | Room Temp (Incubation) |
Conclusion
I have not bought a packet of commercial yeast in eighteen months. I have twelve slants in my fridge and thirty glycerin vials in my freezer.
Some are strains I harvested from bottle-conditioned Belgian ales, while others are isolates from my own yard. I would not have these if I had not started banking.
The cost per batch has dropped and my control has increased. I know exactly what is going into my fermenters because I grew it myself.
Start small by making five slants. See if you can revive them in three months. If it works, scale up your lab and stop paying for the same packet of yeast every month.
References
- Oregon State University Extension Service. (2019). Yeast Culture Maintenance and Propagation.
- White, C., & Zainasheff, J. (2010). Yeast: The Practical Guide to Beer Fermentation. Brewers Publications.
- University of California, Davis. (2018). Cryopreservation of Microorganisms.
- Rajoka, M. I., et al. (1997). Kinetics of batch single cell protein production. Bioresource Technology.